Installation & Servicing Instructions ATAG Q-Series
34
13.3 Maintenance activities
To carry out the maintenance activities please follow the next procedure:
- switch off the power supply;
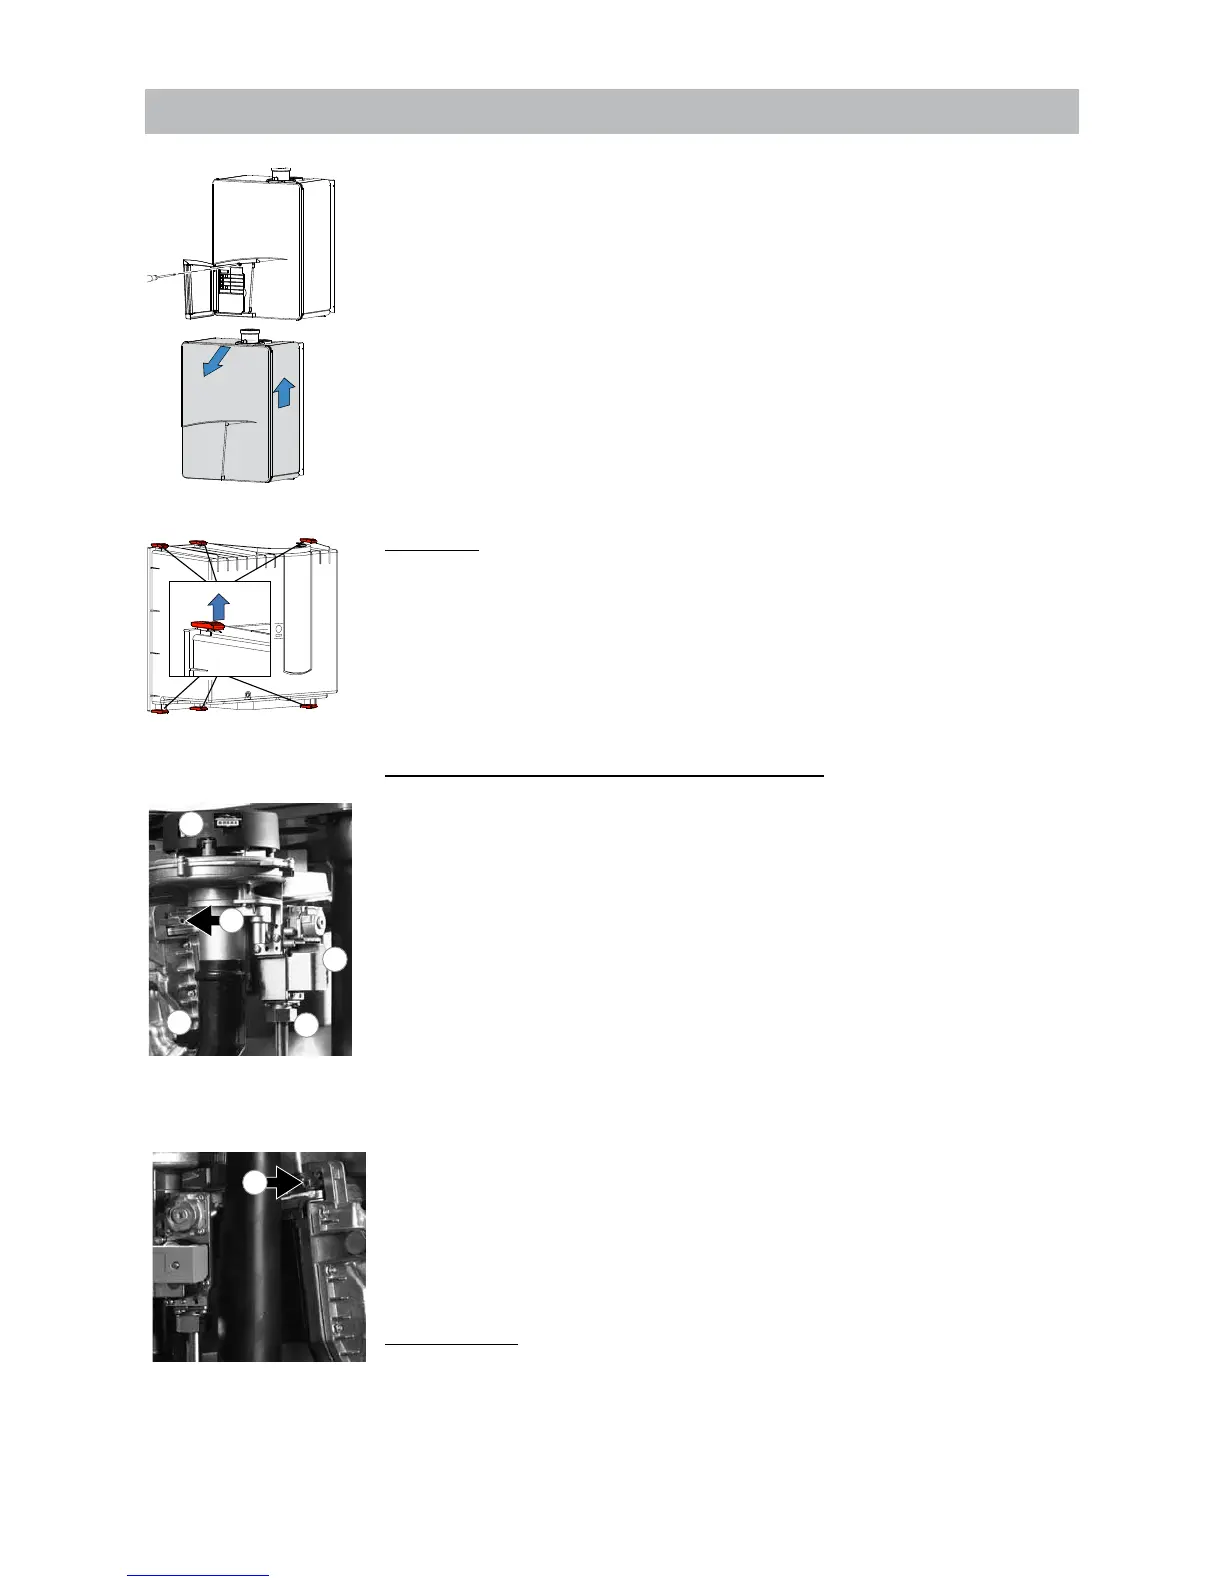
- remove the screw behind the door on the front of the casing (see g. 17);
- Lift the casing and remove it towards the front.
The air box
- remove the transparant air box (see g. 18);
- clean the box with a cloth with a simple (non-abrasive) cleaning agent;
The fan unit and burner cassette (see g. 19 and 20)
- remove the electrical connection plug from the gas valve (1) and fan motor (2);
- loosen the nut (3) of the gas pipe under the gas valve;
- replace the gasket with a new one;
- loosen the front cross head screw (4) of the black plastic silencer;
- after this turn the two clamping rods (9 and 10) ¼ turn and remove them by pulling
them forward. Note the correct turning direction (red indicator, g. 23);
- slightly lift the fan unit and remove it towards the front of the heat exchanger;
- remove the burner cassette out of the fan unit;
- check the burner cassette for wear, pollution and possible cracks. Clean the burner
cassette with a soft brush and vacuum cleaner.
If burners are cracked replace the complete burner cassette;
- replace the gaskets between burner and fan unit and the gasket between fan
unit and heat exchanger;
- check the venturi and the gas-air distribution plate for pollution and clean this part,
if necessary with a soft brush and vacuum cleaner. If the air box contains a lot
of dirt it is plausible that the fan itself is dirty as well. To clean this, the fan has to
be removed from the hood and the venturi. Clean the fan with a soft brush and a
vacuum cleaner. Replace the gasket and ensure that all gaskets of the fan parts
are mounted correctly.
Heat exchanger
- check the heat exchanger for contamination. Clean this if necessary with a soft
brush and a vacuum cleaner. Prevent dirt falling down into the heat exchanger.
Flushing the heat exchanger from the top down is not permitted
Retting of the components is done in reverse order.
OPEN
Opening air box gure 18
Removing casing gure 17
 Loading...