011 Idle
Position
X 0 0
Y 0 0
Z 337 3
Bed Calibration Extrusion
Macro
Fan 0%
HOMEConsoleMove
STOPControlPrint Setup
Nozzle 1 Hot Bed
200
70
23.3 24.2
1
Messages
STOPControlPrint Setup
12
Swapping Hotends
Atom 3’s hotend is easily swappable so you can print with
dierent materials at dierent temperatures. While we always
recommend using the default, PTFE-lined hotend for use with
PLA and many other low-temperature materials, the included
all- metal hotend allows you to print with materials which
require temperatures hotter than what PTFE can handle. As
always, please remember to use your printer in a well ventilated
area.
1. Preheat the hotend and unload the lament.
2. Cool down the hotend, then turn o the machine.
3. Remove the Bowden tube from the eector by removing the
plastic pneumatic connector clips and depressing the top of
the connector while pulling the tube.
4. Disconnect the heater and thermistor connectors from the
cable harness.
5. While holding the hotend, use a 1.5 mm hex wrench (included)
to loosen the two headless hex screws on the side of the
heat sink below the eector, and the hotend should be easily
removable.
6. Replace the hotend in the same orientation and tighten the
screws.
7. Reconnect the heater, thermistor, and Bowden tube, ensuring
that the tube is pushed all the way in.
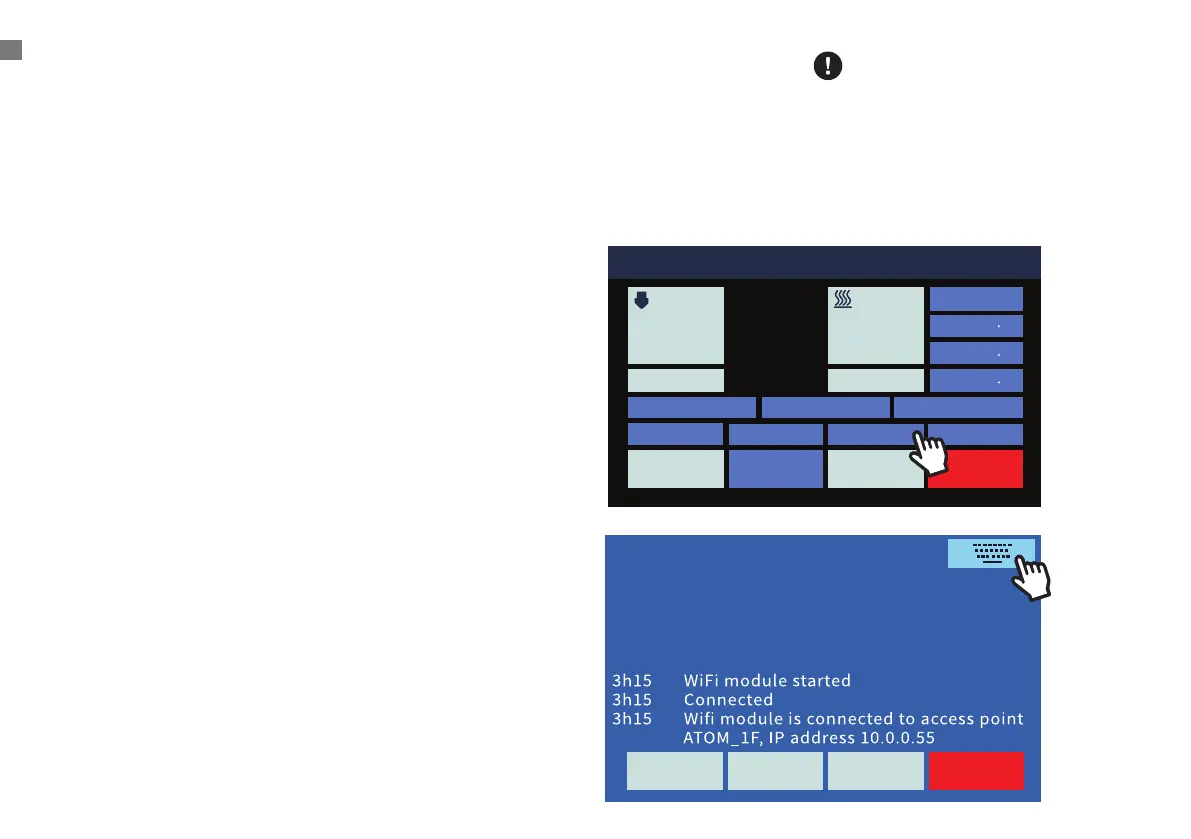
Wi-Fi Setting
A. Click
[ Console ] > Upper Right Keyboard > Input 3 steps
SWAPPING HOTENDS/WI-FI SETTING
When printing over 250 degrees,
please use the all-metal hose to
avoid melting and deformation
of the original Teflon hose.
Removing and Replacing a Hotend