13 / 22
The centering and adjusting of laser beam
The centering of laser beam
The cutting quality mainly depends on whether the optical lens is in the center or not. If the optical
lens is not in the center, the laser beam will reach to the inside parts of the cutting head thus the inside
parts can be easily out of shape because of high temperature. Thus, whenever the cutting quality is
getting worse, please try to adjust the position of optical lens or the nozzle tips and try again.
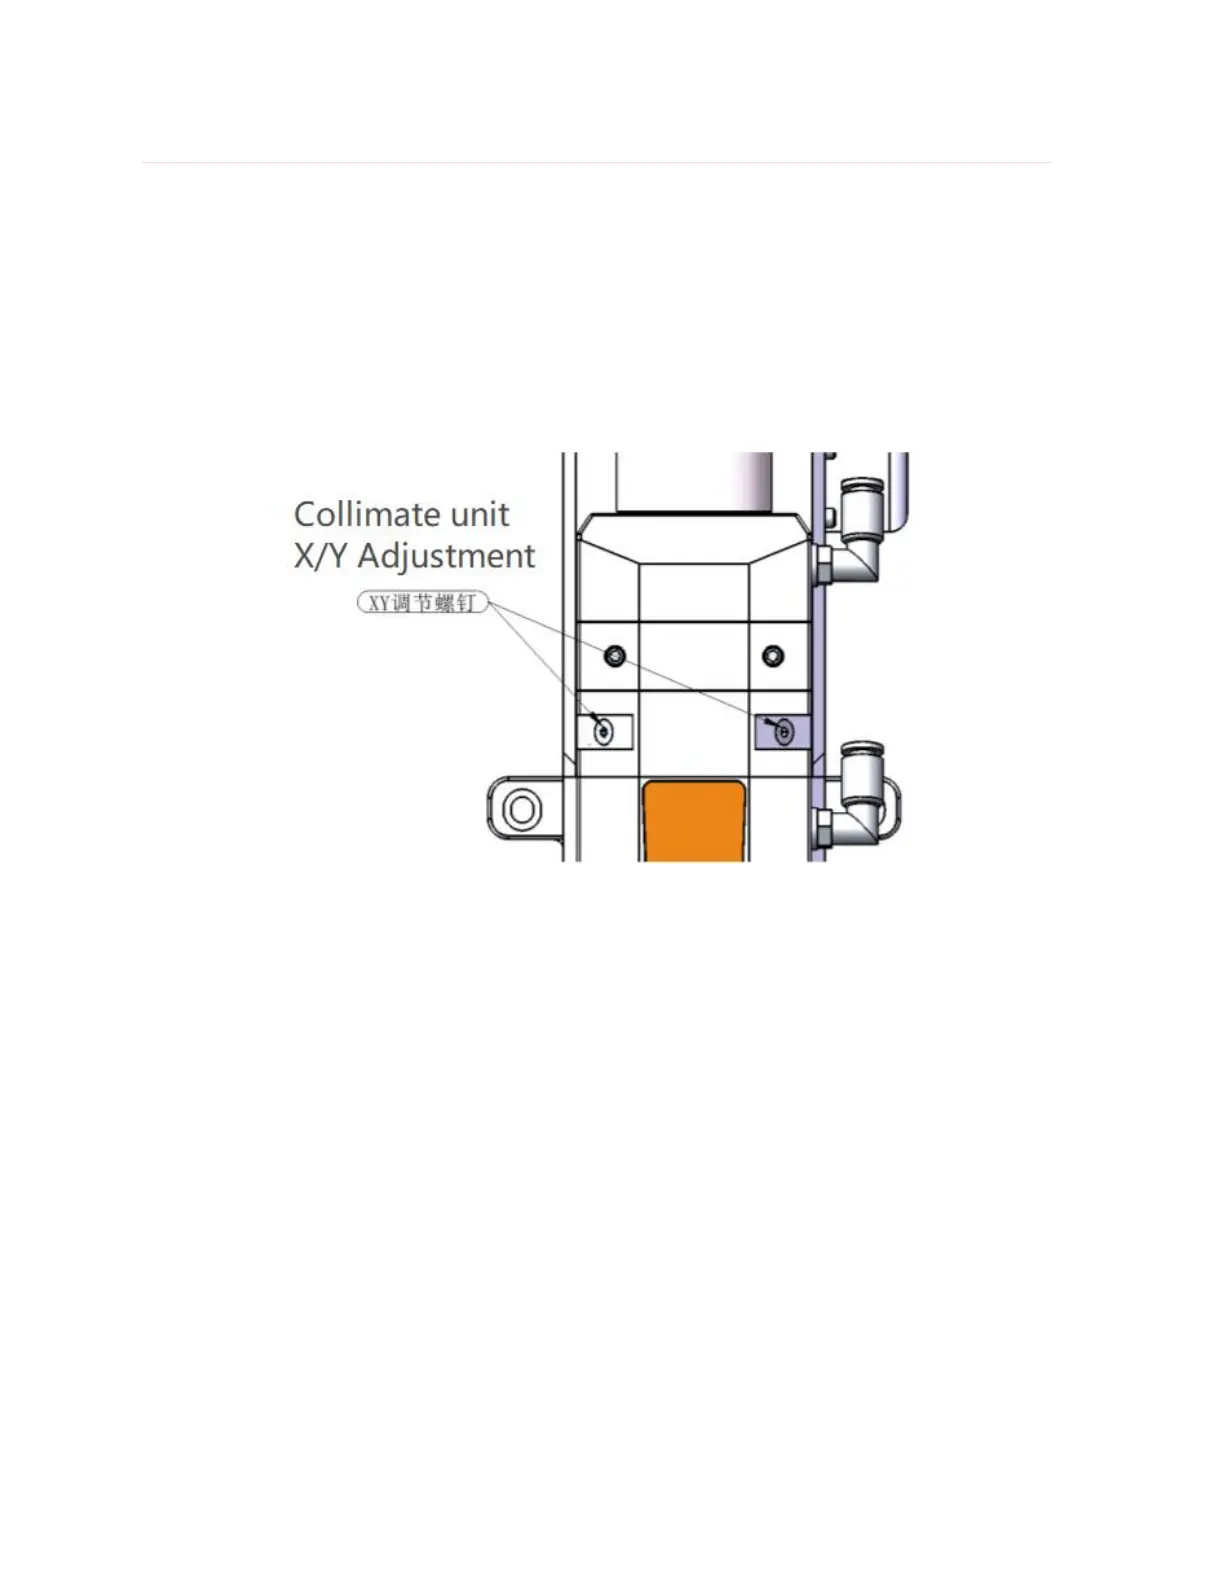
Figure 9. The centering of laser beam of A230E electric fiber laser cutting head.
The centering of A230E electric fiber laser cutting head can be done by adjusting the X-Y direction
of collimate lens. Collimator Unit X/Y Adjustment showed as Figure 9. The adjustment can be done by
using hexagonal screw driver until the laser beam is in the center of nozzle tips. Please make sure the
laser beam is in the center of the nozzle tips before start cutting. Normally you could try to use this
way to check if the laser beam is in the center of nozzle tips or not:
(1) Take one piece of scotch tape and then horizontally stick on the bottom of nozzle tips;
(2) Open the red light inside the laser source and then take out the scotch tape you stick on the
nozzle tips to check if the red right is in the middle of the nozzle tip’s center hole. If not, please adjust
the X-Y direction of collimate lens and repeat the first two steps until it does;
(3) Open the laser source and adjust the power in the range of 80w to 100w, then manually enable
the laser power in order to receive a spot on the tap;