- Position the vehicle jack only at the
des ignated lifting points and align the
jack. Otherwise, the vehicle jack could
slip and cause an injury if it does not
have sufficient ho ld on the vehicle.
- A soft or unstab le surface under the
jack may cause the vehicle to slip off
the jack. Always provide a firm base for
the jack on the gro und. If necessary,
use a sturdy board un der the jack.
- On ha rd, slippery surface (such as tile s)
use a rubbe r mat or similar to preve nt
the ja ck from slipping.
- To help prevent injury to yourself and
your passenge rs:
- Do not raise the vehicle until yo u are
sure the jack is securely engaged.
- Passengers must not remai n in the ve-
hicle when it is j acked up .
- Make sure t hat passengers wait in a
safe place away from the vehicle and
well away from the roadway and traffic.
- Make sure j ack position is correct, ad-
just as necessary and then contin ue to
ra ise the jack .
(D Note
A floo r jack or the pads on the hoist arms
m ust
not be positioned at the points
shown
-arrows-.
Taking the wheel off
Follow these instructions step -by-step for
changing the wheel.
Fig. 16 0 Wheel change: us ing t he screwd river handle
(wit h the blade removed) to turn t he bolts
What do I d o now ? 21 7
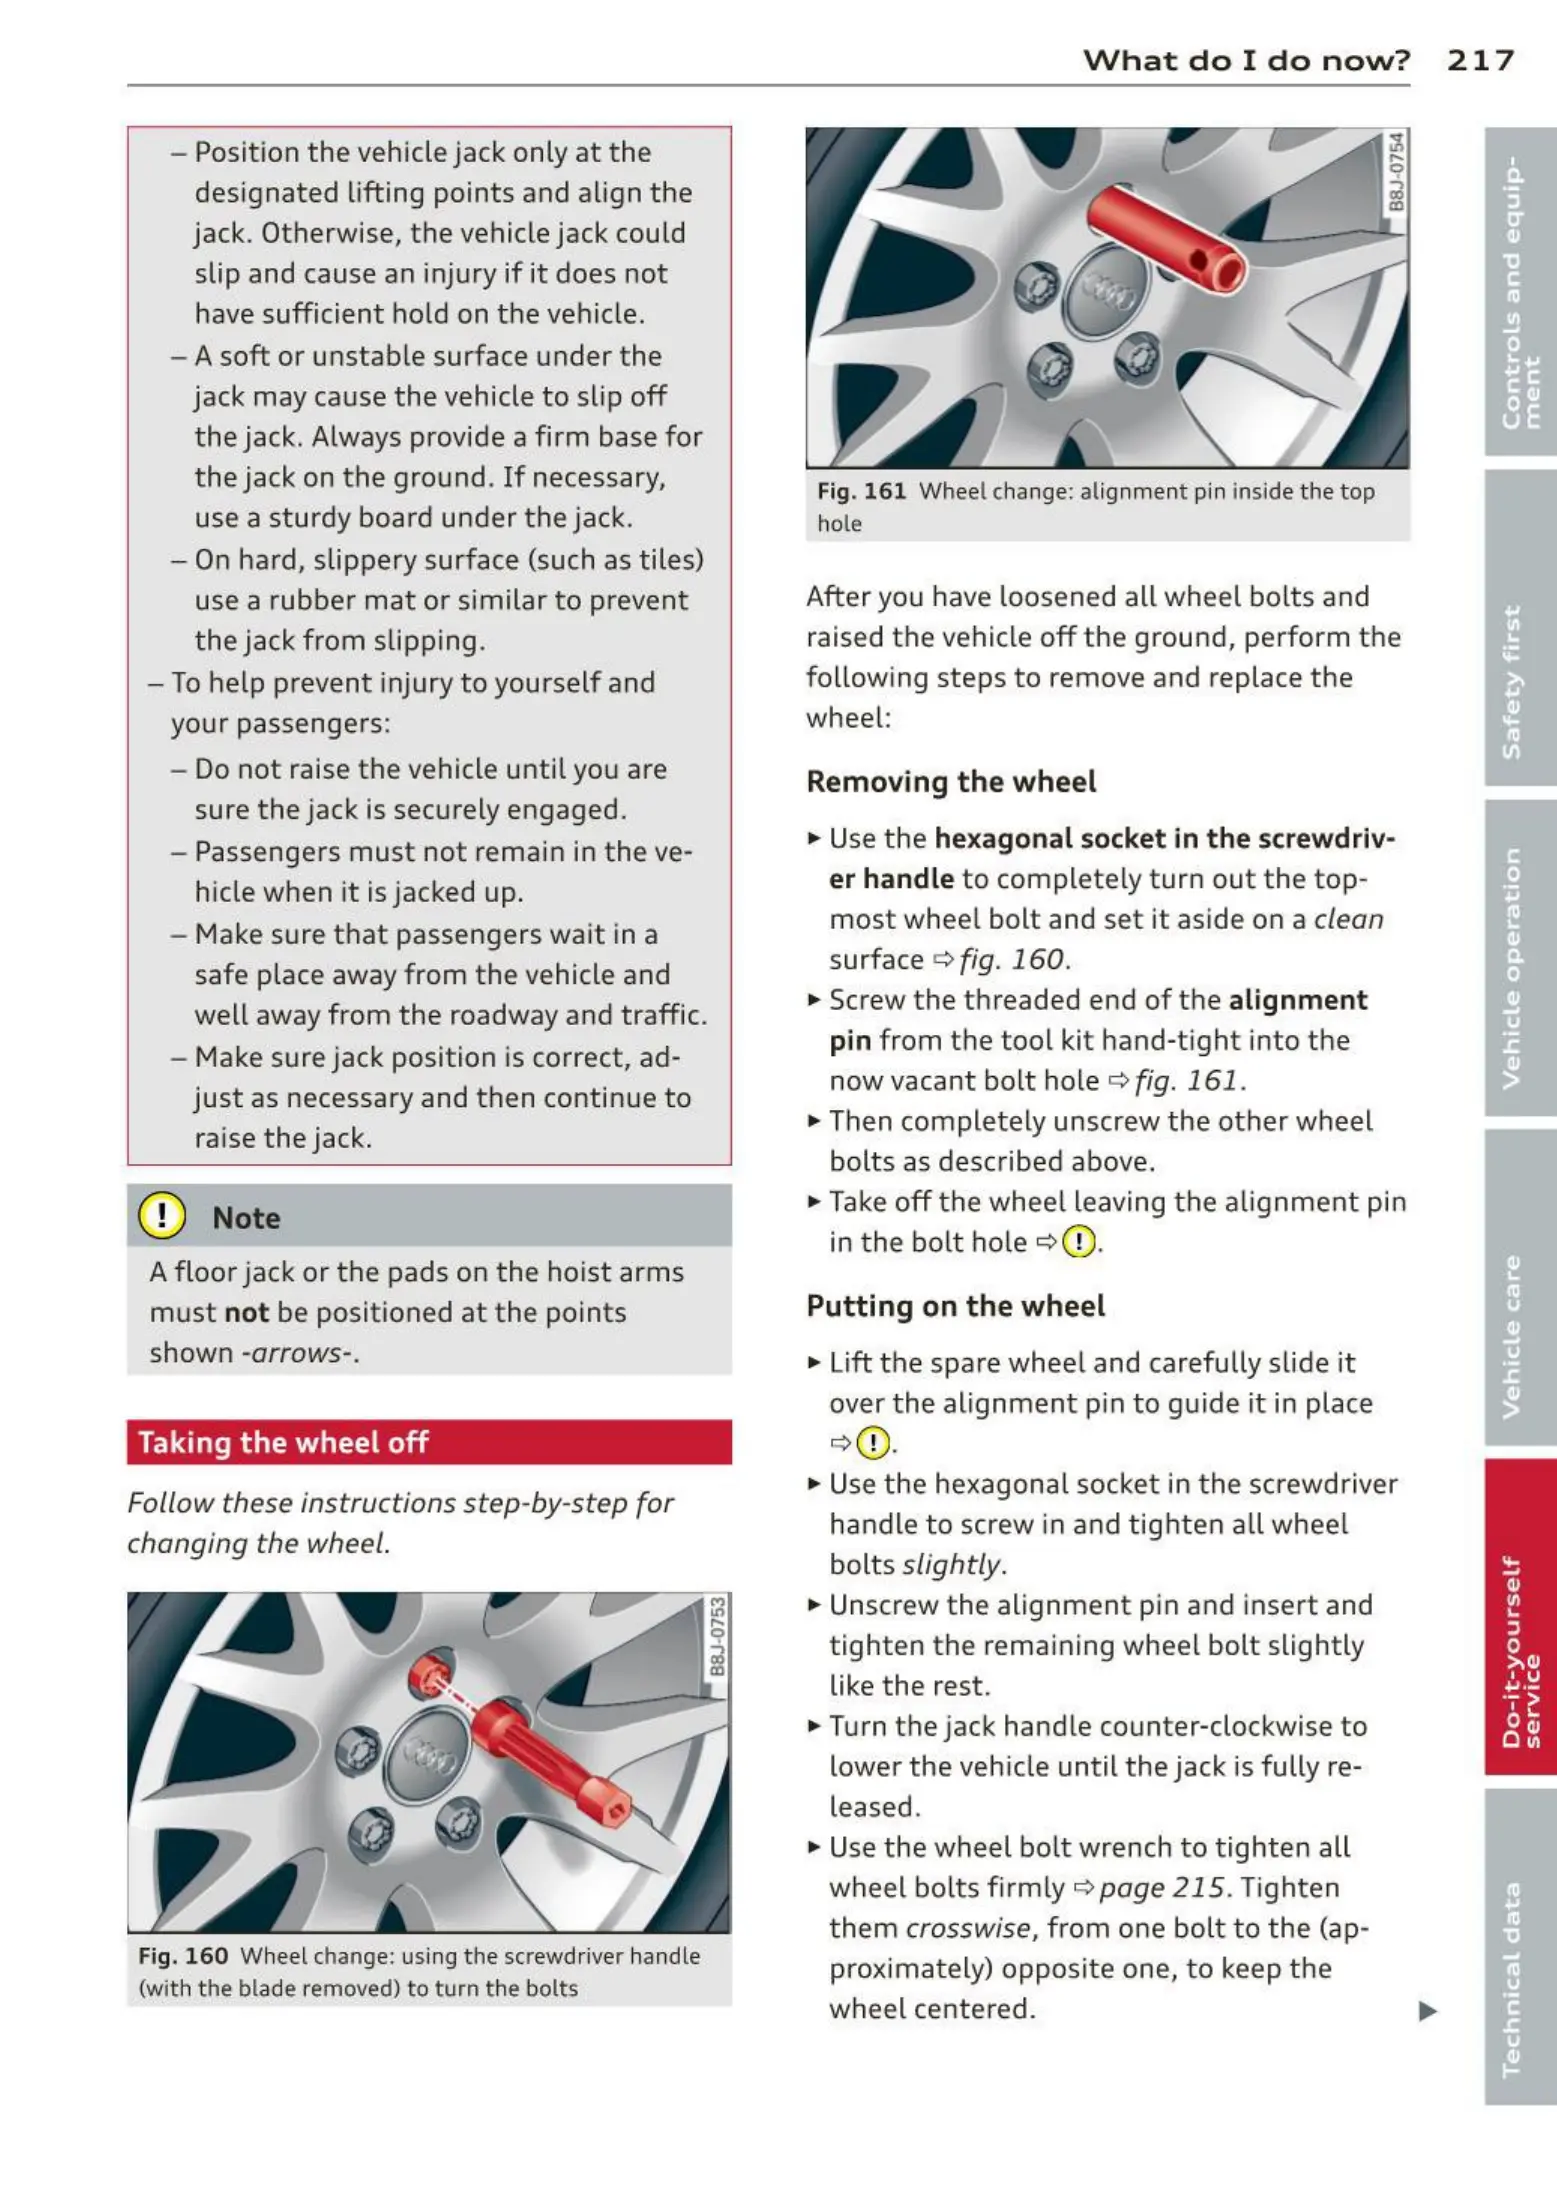
Fig. 161 Whee l cha nge: alignment pin inside the top
hole
After you have loosened all wheel bo lts and
raised the vehicle off the ground, perform the
following steps to remove and replace the
whee l:
Removing the wheel
.,. Use the hexagonal socket in the screwdriv-
er handle
to complete ly tur n out the top -
most whee l bolt and set it aside on a
clean
surface ¢ fig. 160.
.,. Screw the threaded end of the alignment
pin from the tool kit hand-tight into the
now vacant bolt hole¢
fig. 161 .
.,. Then completely unscrew the other wheel
bolts as desc ribed above.
.,. Take off th e whee l leaving the a lignment pin
in t he bo lt ho le ¢ (D.
Putting on the wheel
.,. Lift the spare whee l and carefully slide it
over the alignment pin to guide it in place
¢ (D .
.,. Use the hexagona l socket in t he screwd river
handle to screw in an d tig hten all whee l
bolts
slightly .
.,. Unscrew the alignment pin and insert and
tighten the rema ining whee l bolt slightly
like the rest .
.,. Turn the jack handle counter-clockwise to
lower the veh icle until the jack is fully re-
leased .
.,. Use the whe el bo lt wrench to tighten all
wheel bo lts firm ly ¢
page 21 5 . Tighten
t hem
crosswise, from one bolt t o the (ap-
proxima t ely) opposi t e one, t o keep t he
wheel cente red.
 Loading...