12
EN
Replacing a cartridge
Replacing a new cartridge
Refer to the user manual for the cartridge that you will be using if you are
replacing the cartridge (AT91R) included with this product with another,
commercially sold cartridge. After you replace the old cartridge with a new one,
you must readjust the overhang and the tonearm’s balance and tracking force.
1. Release the headshell from the tonearm.
•
Hold the tonearm tightly and then remove the headshell gently.
2. Remove the stylus from the cartridge.
•
Refer to “Removing the stylus” on p. 11.
3. Remove the lead wires.
•
Be careful not to damage the lead wires.
4. Using a commercially sold, non-metallic slotted
screwdriver, remove the installation screws, and then
remove the cartridge from the headshell.
5. Refer to the user manual for the new cartridge for
mounting instructions.
6. Using a commercially sold, non-metallic slotted
screwdriver, tighten the screws in both places, and then
adjust the overhang.
•
Refer to "Adjusting the overhang" on p. 13.
•
After the adjustments are complete, tighten the screws securely.
7. Attach the headshell to the tone arm.
8. Adjust the tonearm balance and tracking force.
•
Refer to “Tonearm balance and tracking force” on p. 7 to perform the
readjustments.
Replacing the belt
•
The belt is a consumable part. Replace the belt if the speed of playback
slows down or irregular rotation occurs. As a rule of thumb, we suggest
replacing the belt once a year.
•
Before replacing the belt, be sure to disconnect the product’s power cable
plug from the outlet.
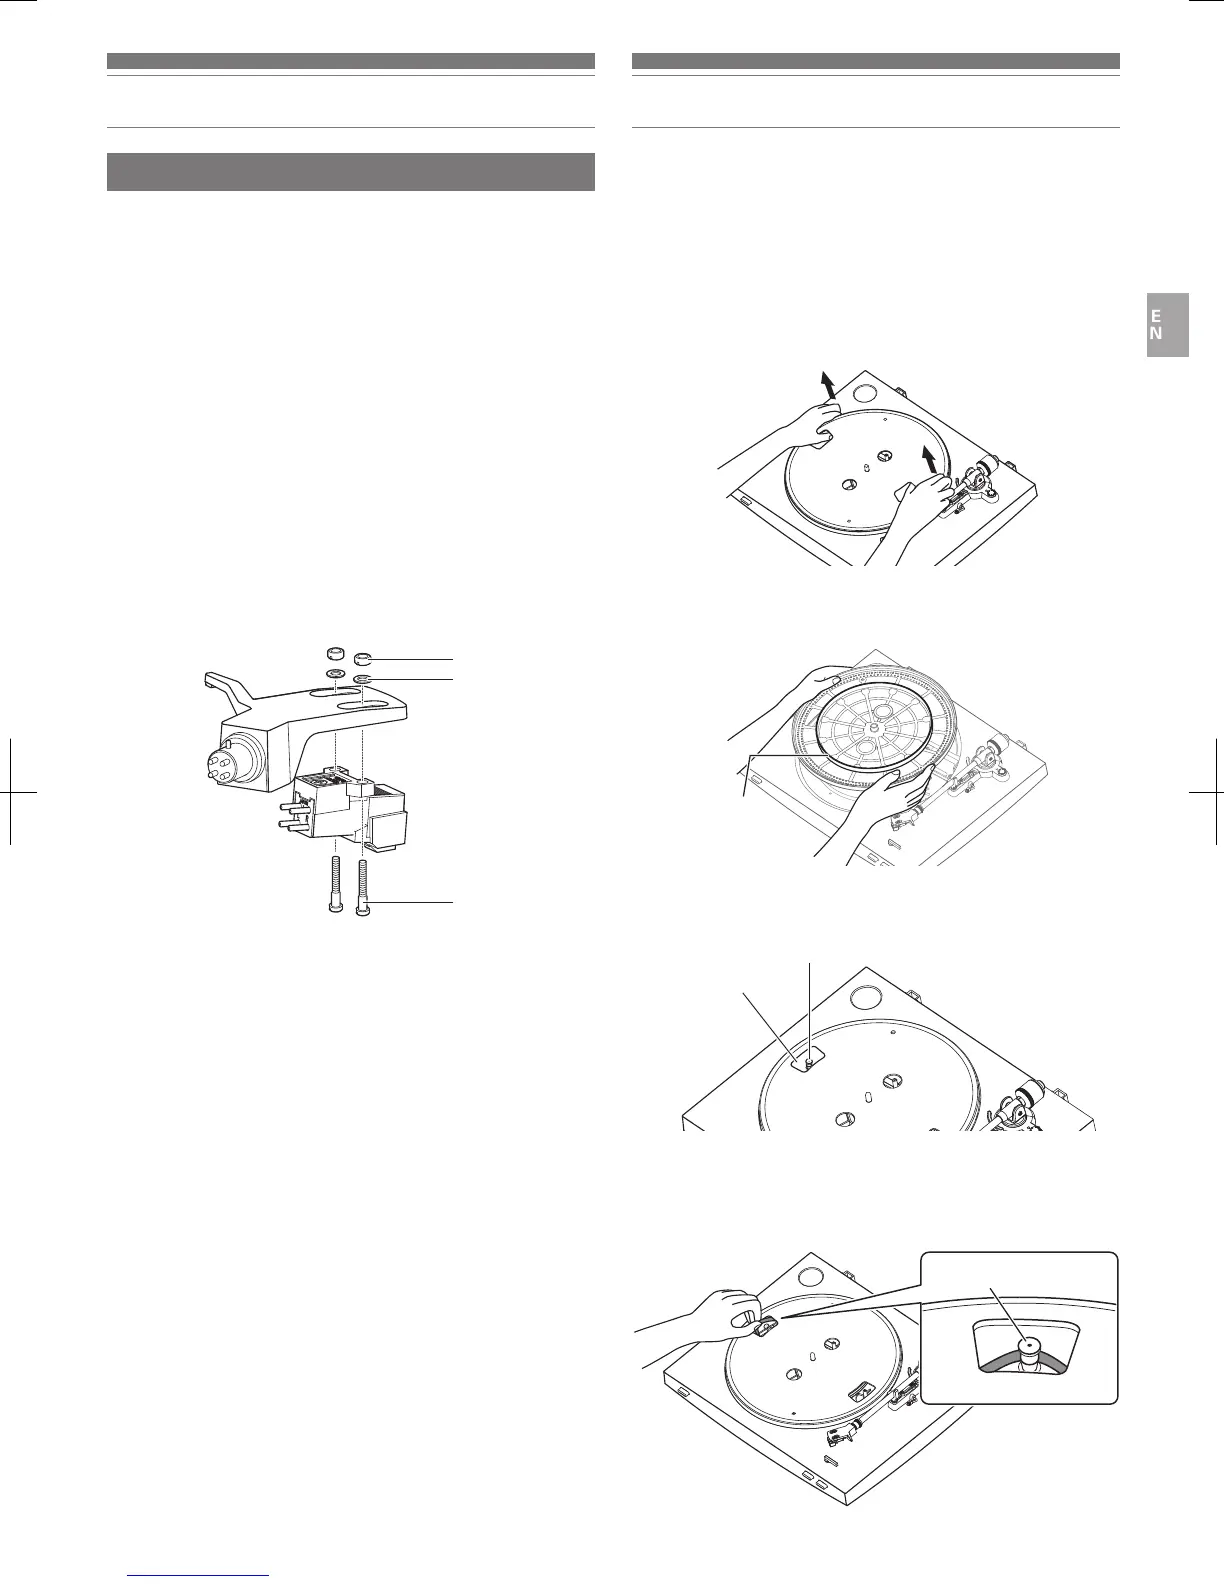
1. Remove the rubber mat.
2. Remove the platter, turn the platter over, and then
remove the old belt.
•
Place your thumbs in the openings and pull up strongly.
3. Place the new belt around the inner circle.
•
Be careful not to twist the belt while doing this.
4. Attach the platter.
•
Align one of the openings with the position of the motor pulley (brass-colored).
5. Place the belt on the motor pulley (brass-colored).
•
Grasp the belt that was attached in step 3 and, while pulling it, place it on the
brass motor pulley.
Installation screws
Plastic washers
Nuts
Motor pulley (brass-colored)
Opening
Place the belt
Motor pulley (brass-colored)
Belt
AT-LP3_UM_V2_ATUS_book.indb 12 2016/11/29 11:17
 Loading...