6
Preparation for use
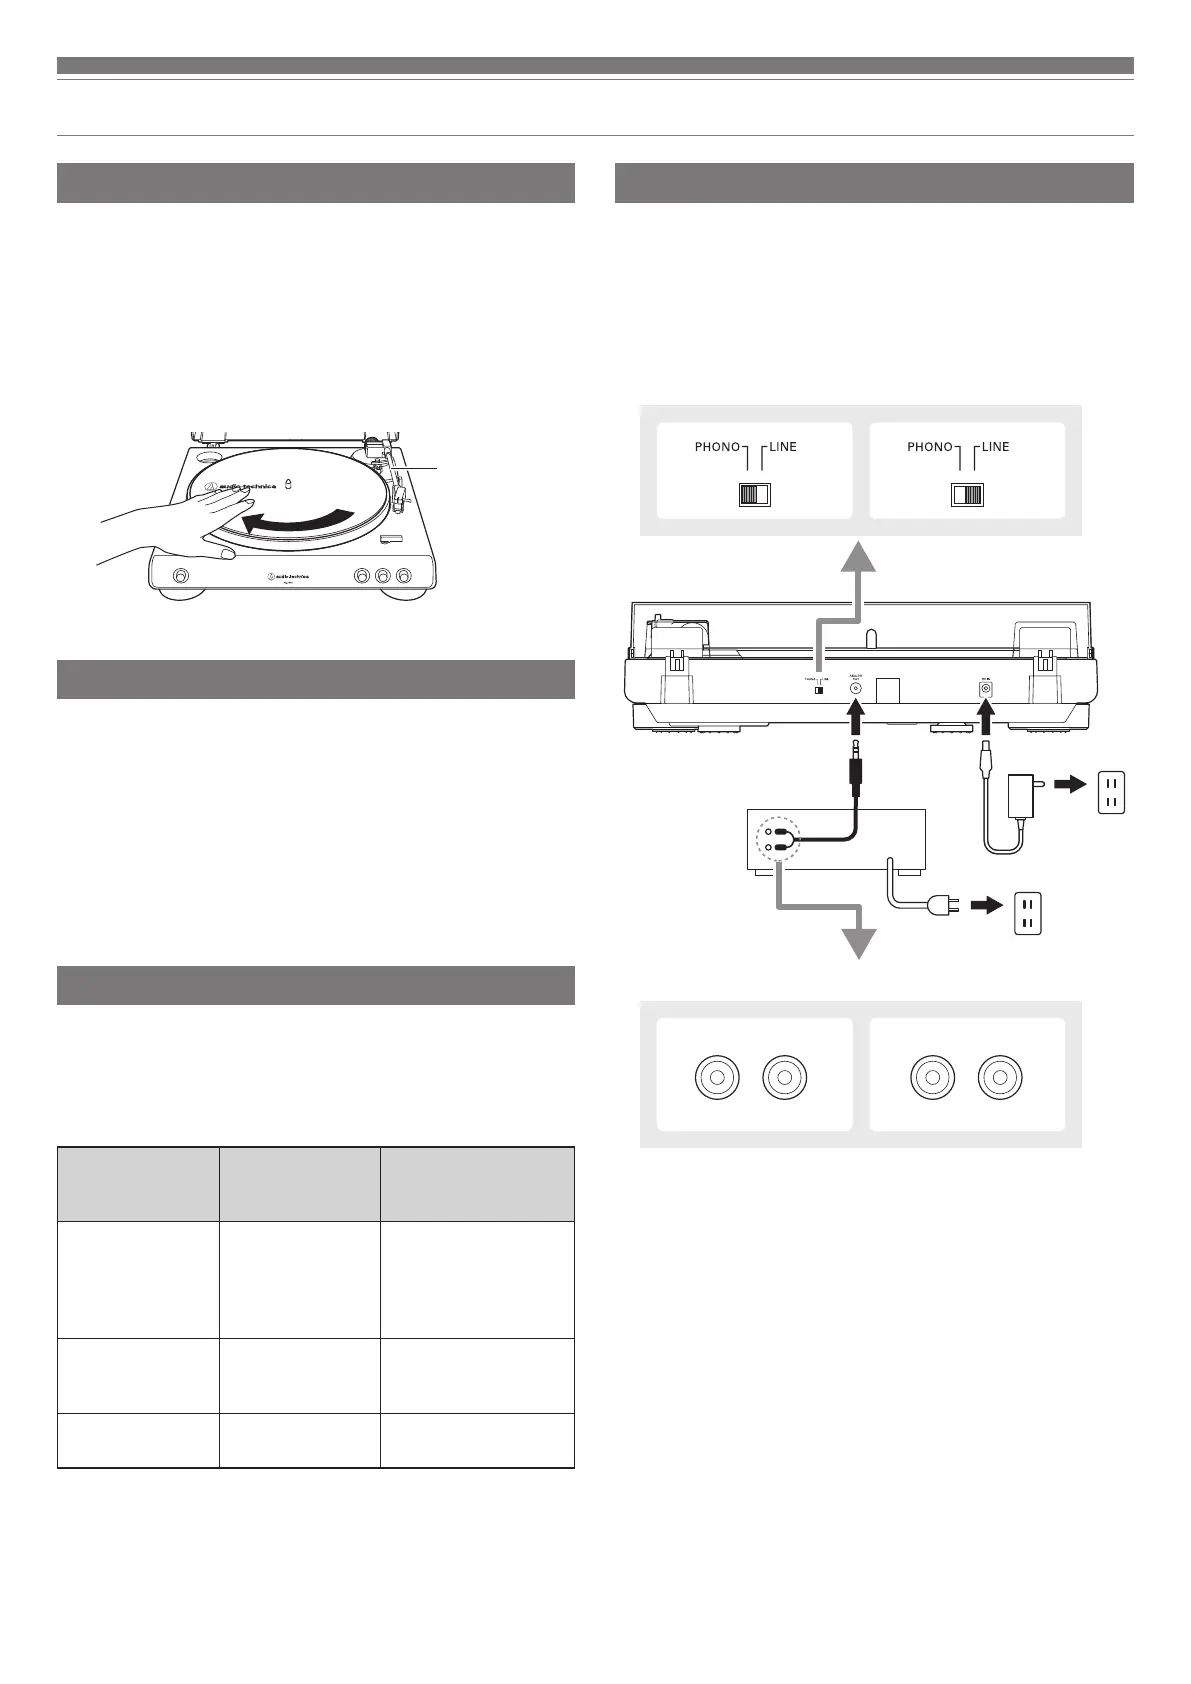
Rotating the platter
1. Using your hands, rotate the platter ten times.
•
Remove the tie that locks the tonearm and press the
tonearm lift button to lift the tonearm. Slowly rotate the
turntable ten times by hand in the direction of the arrow.
•
You may want to hold the tonearm to prevent it from
moving. This step is for resetting the auto mechanism,
getting rid of any twists in the belt and making sure the
belt rides smoothly along the drive rim on the underside of
the platter.
Connecting the AC adapter
This product does not have a power switch. A standby current
is always running through the product, even when it is not
being used; disconnect the AC adapter from the outlet when
not using the product for a long period of time.
1. Connect the AC adapter to the outlet.
•
Connect the AC adapter to the outlet without removing
the cartridge’s protector. If the platter has rotated, press
the STOP button without touching the tonearm, and then
wait until the tonearm returns to its original position.
Setting pre-amplifier selector switch
This product has a built-in phono equalizer function. You can
use the product even if you do not have a phono amplifier or
connectable equipment with a built-in phono amplifier.
Use the pre-amplifier selector switch to set the output, as
shown below.
Connectable
equipment
being used
Position of
pre-amplifier
selector switch
Where to connect
RCA audio cable
Device with
phono input
PHONO Phono input
jack and ground
(earth) terminal
of connectable
equipment
Device without
phono input
LINE AUX or line input
jack of connectable
equipment
PC sound card LINE PC sound card’s line
input jack
*
*
An audio adapter (sold separately) may be required to connect the
RCA audio cable to the line input jack of the PC sound card.
Connecting the device
Align the settings for the pre-amplifier selector switch and
connect the RCA audio cable to an input jack that is compatible
with the connectable equipment you are using (amplifier,
receiver, active speakers, sound card, etc.).
• The RCA audio cable's red jack is for the right (R) channel,
and the white jack is for the left (L) channel.
AUX
L R
PHONO
L R
With PHONO
With PHONO
Without PHONO
Without PHONO
To outlet
To outlet
Connectable equipment
(Amplifier, etc.)
Tonearm
 Loading...