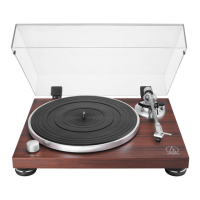
EasyManuals Logo

Audio Technica AT-LPW40WN User Manual

Audio Technica AT-LPW40WN
25 pages
To Next Page IconTo Next Page
To Previous Page IconTo Previous Page
Page #6 background imageLoading...
Page #6 background image
5 Turntable mat
6 Control knob Use to start and stop, as well as select the platter’s speed.
7 Tonearm For details, refer to “Tonearm” on p. 4.
8 Feet Adjust the level of the product.
9
Ground (earth) terminal Connect the amplifier’s ground (earth) terminal to this terminal using the RCA a
udio cable’s ground conductor.
10
Stereo output terminals Connect the RCA audio cable. Connect it to either the amplifier’s PHONO input
jack or its line input jack. The red terminal
11
Output selector switch If connecting to an amplifier’s PHONO input jack, set this switch to the PHONO p
osition. If connecting to the AUX jack of an amplifier, set this switch to the LINE position.
12 Power input jack Connect the AC adapter
13 Power switch Switch ON/OFF.
14 Dust cover hinge holder
Part names and functions
Tonearm

Other manuals for Audio Technica AT-LPW40WN

Questions and Answers:

Question and Answer IconNeed help?

Do you have a question about the Audio Technica AT-LPW40WN and is the answer not in the manual?

Audio Technica AT-LPW40WN Specifications

General IconGeneral
Drive MethodBelt-drive
Speeds33-1/3 RPM, 45 RPM
MotorDC servo motor
CartridgeAT-VM95E
Stylus0.3 x 0.7 mil elliptical
Replacement StylusAT-VMN95E
Phono PreampBuilt-in switchable
PlatterAluminum
Dimensions420.0 mm (16.54") W x 340.0 mm (13.39") D x 116.9 mm (4.6") H
Tonearm TypeStraight
OutputRCA
Power Supply100-240V AC, 50/60 Hz

Related product manuals