AudioArts Lightning / June 2018
CONTROLS AND FUNCTIONS
page 2 – 15
Mic Preamp Card
Mic Selection
Dipswitch SW2 positions 1 - 4 when ON will select the mic source
for the input channels 1- 4 (source A) respectively. To access these
switches, power off the console by disconnecting the AC cord from
the outlet or SPS-202, then remove the four mounting screws from the
Input panel so that the panel can be lifted from the console frame. The
switches are located on the underside of the panel. Replace the panel by
carefully setting the panel in place, being sure that the rear connectors
are properly aligned with the access holes in the rear of the frame, then
replacing the four mounting screws. Reapply power to the console by
reconnecting the AC cord.
Phantom Power
Dipswitch SW1 positions 1-4 enable phantom power for microphone inputs 1 - 4
respectively. This dipswitch can be accessed from the rear of the console and is located
next to the microphone audio input connectors. Having a switch in the up position turns
phantom ON.
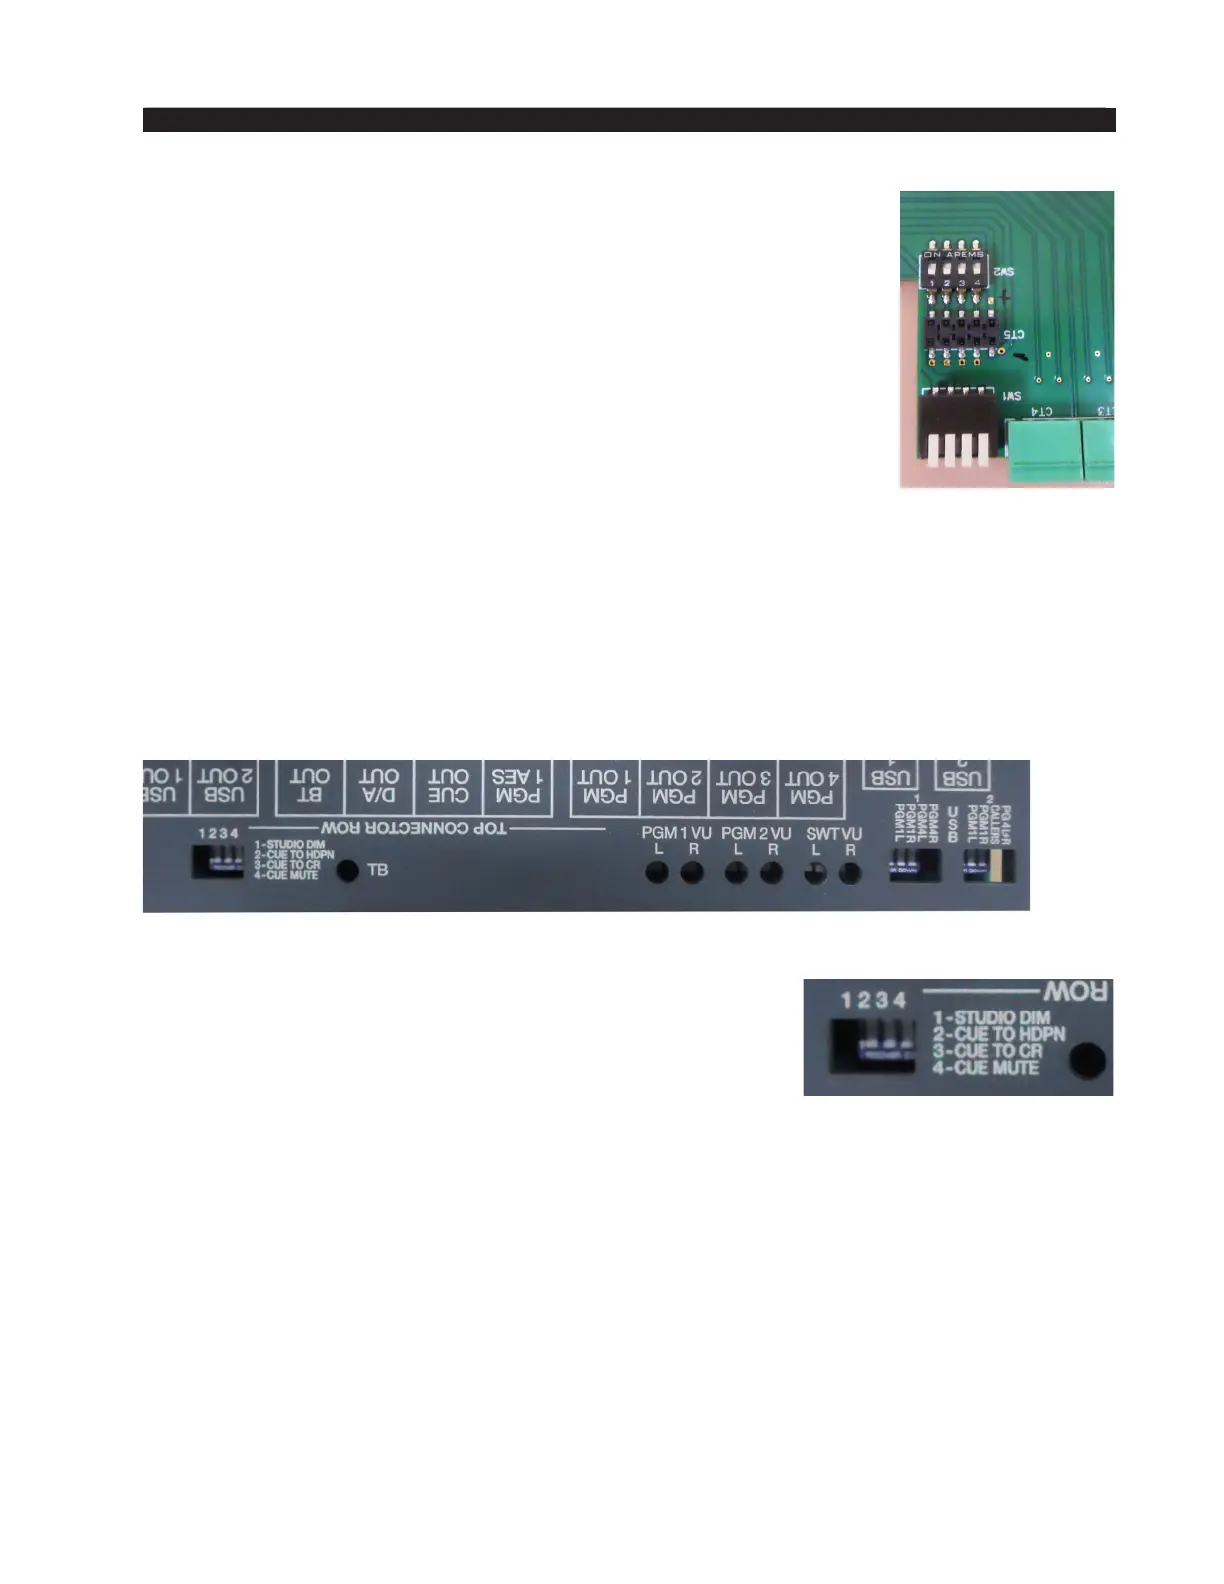
Master Panel
Studio Dim
Normally, when the TB button is pressed, the operator’s
microphone signal interrupts the normal feed to the studio
speakers, allowing the operator to talk to the performers in
the studio. Turning on the STUDIO DIM switch causes the
normal feed to the studio to drop 20 dB when the TB button
is pressed, allowing the operator to talk over the normal audio
feed instead of completely interrupting it.
Cue To Headphone
Normally you would want the CUE speaker muted when you have a mic channel
turned on so the mic doesn’t pick up anything in CUE at the time. The CUE TO HDPN
dipswitch, when activated, allows the operator to hear CUE in his headphones when his
mic is turned on.
Cue To CR
The dipswitch CUE TO CR, when activated, sends cue to the control room.
Cue Mute
The audio from both the control room speakers and the console’s built-in meterbridge
speaker can easily be picked up by the console operator’s microphone. This is a potential