- 14 -
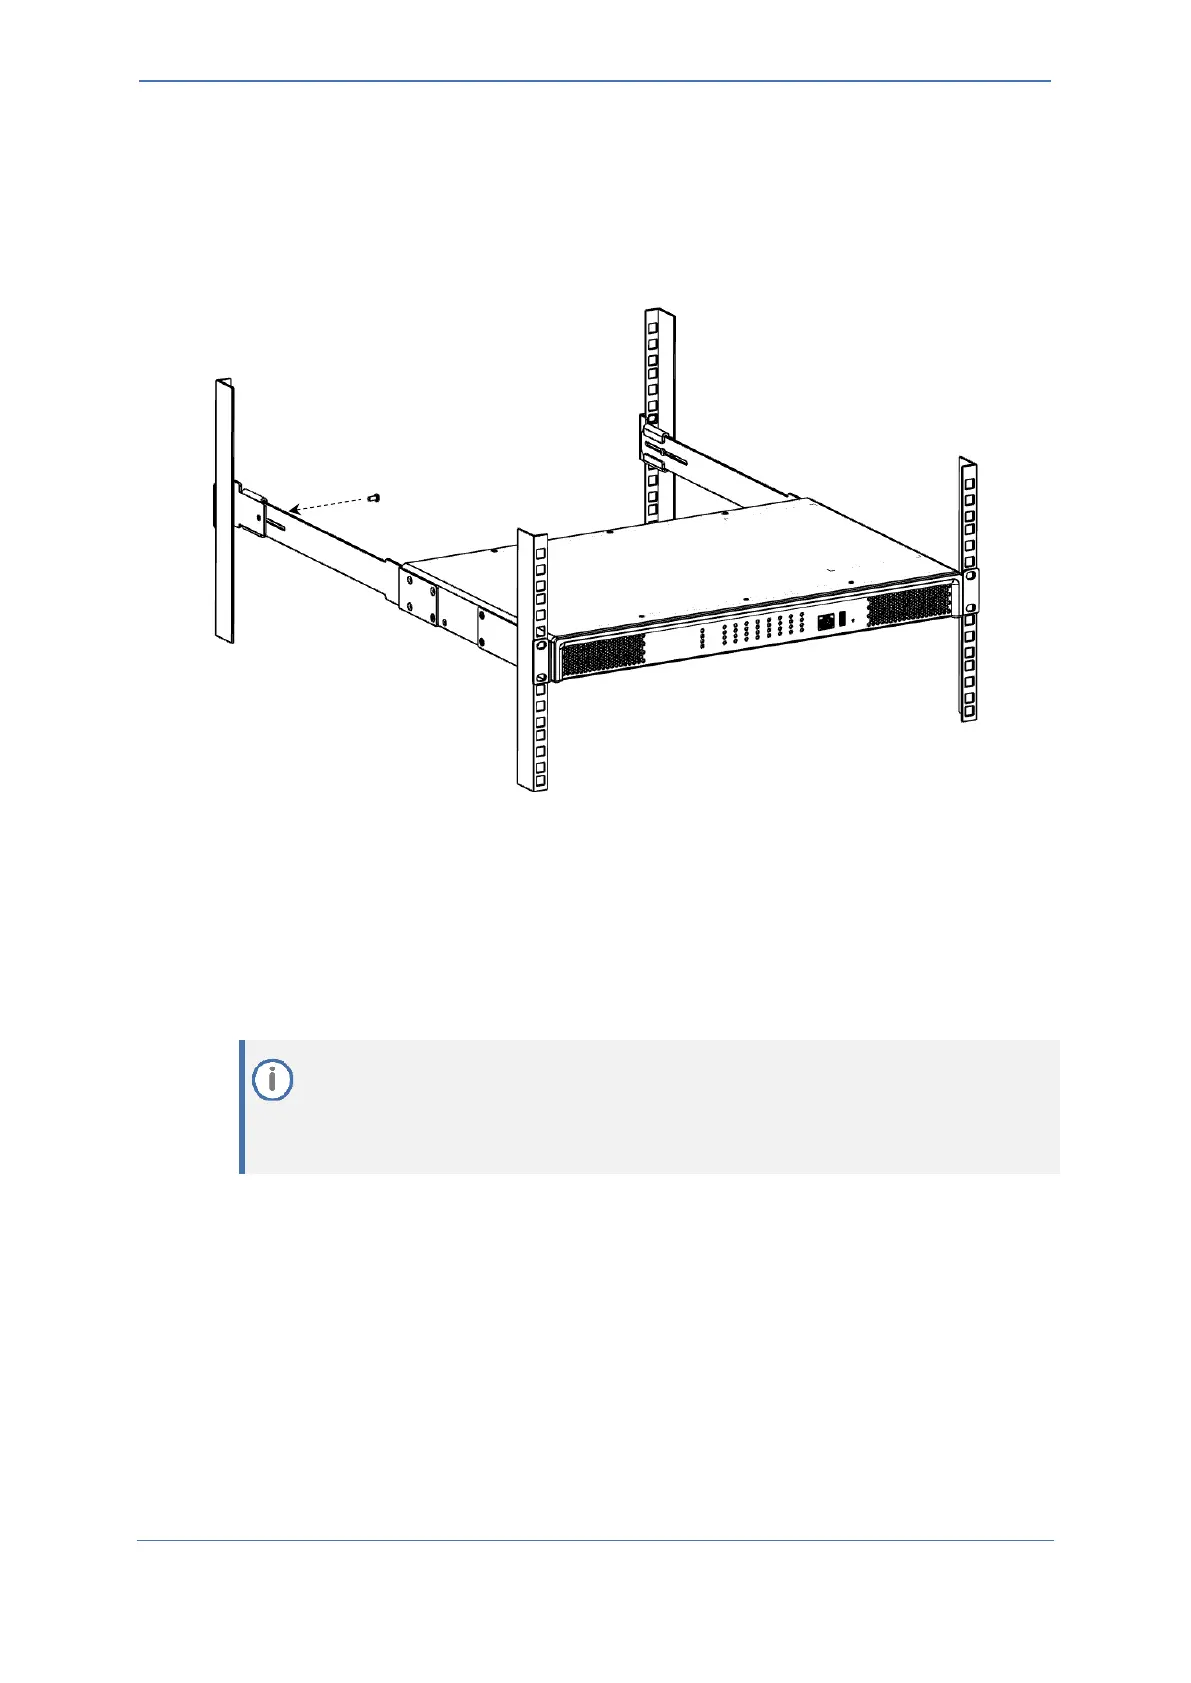
6. Hold the chassis in position while the second person secures the rear-mounting flanges to the
rear-mounting brackets. Insert the supplied screws from the inside of the rack, through the
flange's grid and into the screw hole on the rear-mounting bracket. Finger-tighten the screws
but make sure that the screws are NOT fully tightened and that the flange can freely move on
the slide rails of the rear-mounting bracket.
Figure 4-7: Fastening Rear-Mounting Flange to Rear-Mounting Bracket
7. Hold the chassis for support while the second person positions the chassis so that the front-
mounting brackets are flush against the front-rack posts and that the holes of the front-
mounting brackets align with the holes on the front-rack posts. Secure the two front-
mounting brackets to the front posts, by finger-tightening 19-inch rack bolts (not supplied) to
the rack posts.
8. Tighten the bolts on the front-mounting brackets.
9. With a Philips screwdriver, tighten the screws securing the rear-mounting flanges to the rear-
mounting brackets.
◼ Make sure that all the mounting brackets are attached at the same level to the
mounting posts so that the chassis is supported in a horizontal position.
◼ If the depth of the rack exceeds the maximum length of the adjustable rear-mounting
brackets, install an additional side rack post to accommodate the length of the Rear-
Mounting Bracket