(d) After setting the required Modbus address, quit the programming mode
by pressing key T3 CHANGE MODE. The newly set address now
becomes valid.
Pressing the key T3 results in changing to BAUD RATE MODE;
renewed pressing of key 3 results in reverting to DEFAULT MODE.
(e) Alternatively to clause d), pressing the push button T3 may be ommitted.
After 30 s the status address mode is automatically quit and the
DEFAULT MODE is indicated. The set address is thus accepted.
7.15 Setting the baud rate
The baud rate is selected with the push buttons T2 and T3. This is done
according to the following sequence:
(a) Press push button T3 CHANGE MODE (hold down for 1 to 2 seconds):
The green LED 7 is illuminated (not blinking): the ADDRESS MODE is
active.
(b) Press push button T3 CHANGE MODE again (hold down for 1 to 2
seconds): The green LED 7 is blinking: now, the BAUD RATE MODE is
active.
(c) Select the desired Modbus baud rate pressing push button T2 MODIFY.
(d) The baud rate setting changes each time, push button T2 is pressed.
After the setting 56,400 bit/s (1001), the setting 110 Bit/s (0000) follows
again. If push button T2 MODIFY is held down (approx. 1/3 s), the
incrementation is done automatically. Only the first 4 LEDs count as only
10 baud rate settings are possible.
(e) After setting the required Modbus baud rate, close the programming
mode by pressing push button T3. The newly set baud rate becomes
valid and the interface is in DEFAULT MODE.
(f) Alternatively to clause e), pressing the push button T3 CHANGE MODE
may be omitted. After 30 s, the BAUD RATE MODE status is
automatically quit and the DEFAULT MODE is indicated. The set baud
rate is thus accepted.
22
Actuator controls AUMA MATIC AM/ AMExB/ AMExC
Modbus Operation instructions
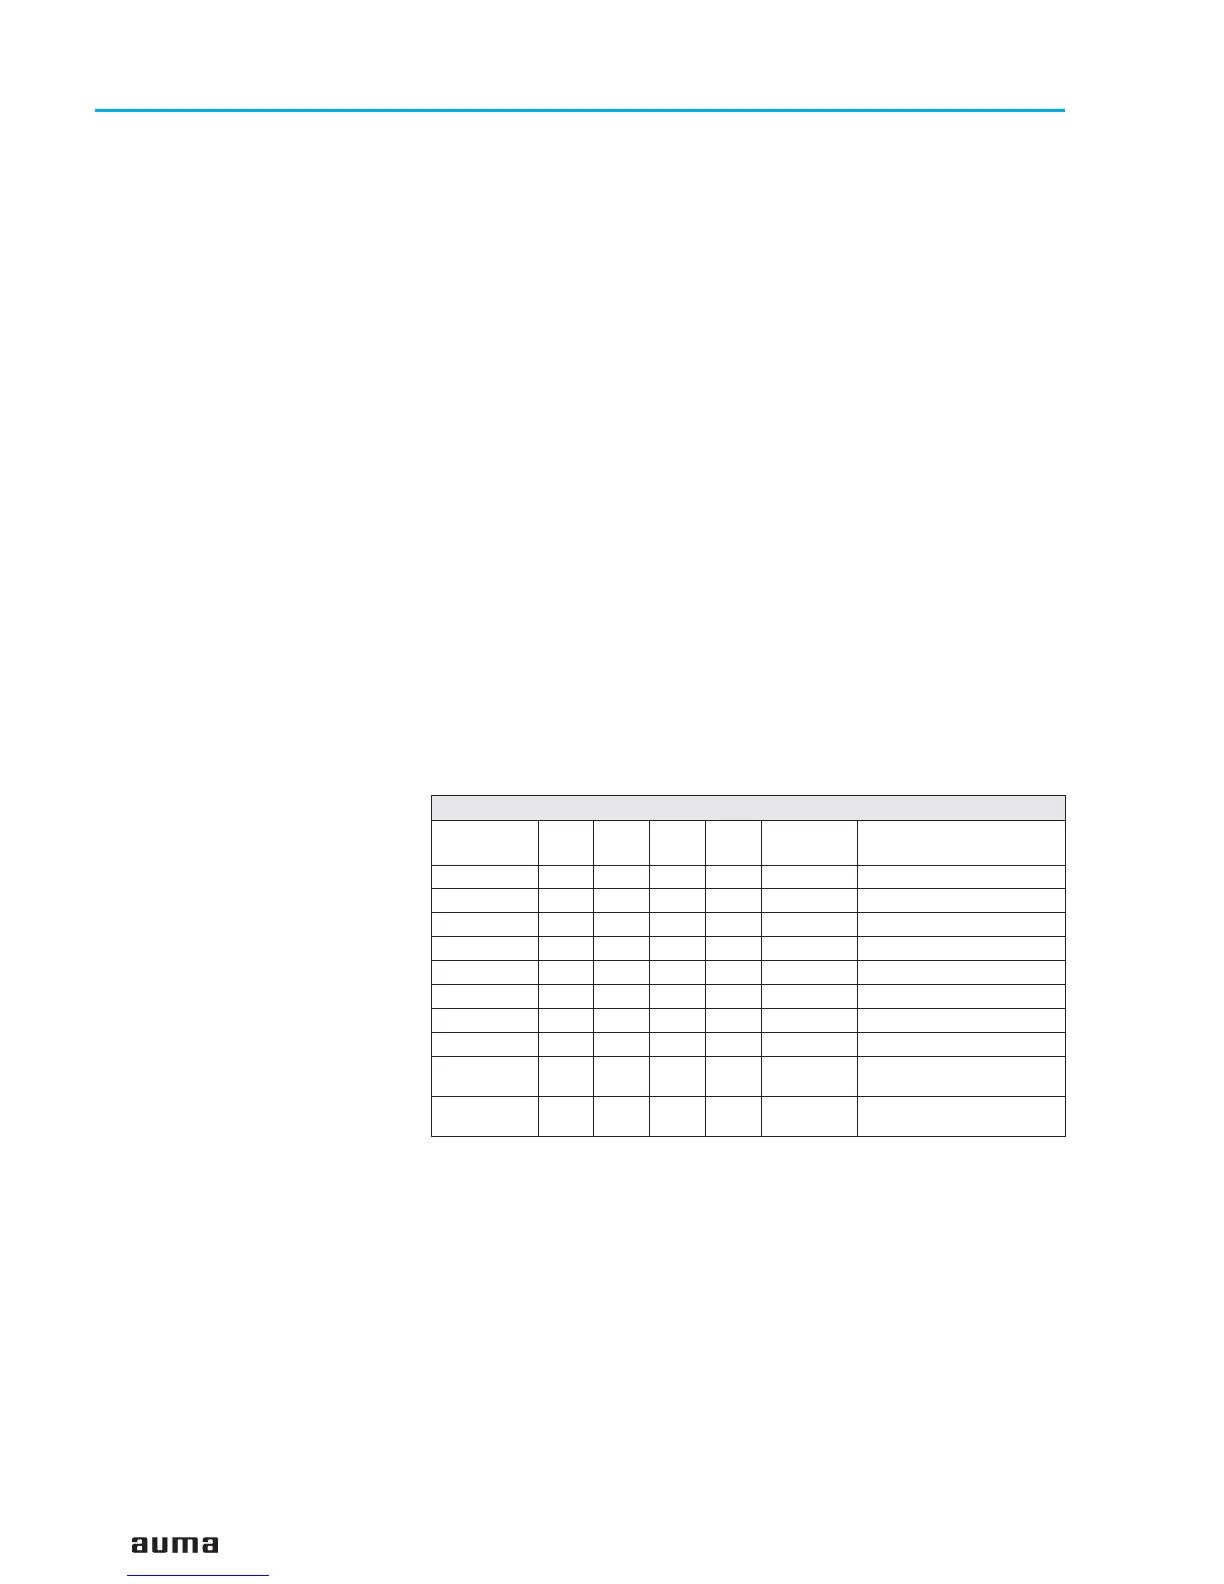
Setting
LED 3 LED 2 LED 1 LED 0
Baud rate
bit/s
Notes
0 0000
110
1 0001
300
2 0010
600
3 0011
1200
4 0100
2400
5 0101
4800
6 0110
9600 Default setting
7 0111
19200
8 1000
38400
Baud rate deviation
– 2.5 % !
9 1001
56400
Baud rate deviation – 5 %
(not recommended)
 Loading...