4. Assembly
4.1. Mounting position
Vertical mounting position with the flange pointing upwards (hood pointing downward)
is not allowed. In any other mounting position, the product may be operated without
restriction.
4.2. Actuator: mount to valve
The actuator is mounted to the valve using a coupling.
4.2.1. Overview on coupling variants
Design Figure 5: Coupling variants
[1] Bore with keyway
[2] Square bore
[3] Bore with two-flats
Application
●
For valve attachments according to EN ISO 5211
●
For rotating, non-rising valve stem
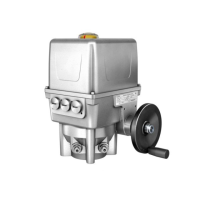
4.2.2. Actuator (with coupling): mount
Unbored couplings or couplings with pilot bore must be machined to match the valve
shaft prior to mounting the actuator to the valve (e.g. with bore and keyway, two-flat
or square bore).
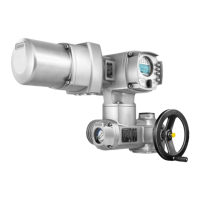
Assemble valve and actuator in the same end position. As standard, the actu-
ator is supplied in end position CLOSED.
→
Recommended mounting position for butterfly valves: End position CLOSED.
→
Recommended mounting position for ball valves: End position OPEN.
Assembly steps
1. If required, move actuator in same end position as valve using the handwheel.
2. Clean mounting faces, thoroughly degrease uncoated mounting surfaces.
3. Apply a small quantity of grease to the valve shaft [2].
9
EQ 40 – EQ 150
EQ 300 – EQ 600 Assembly