Do you have a question about the AUMA SA 07.2 and is the answer not in the manual?
Details requirements for safe handling and personnel qualifications.
Specifies permitted and prohibited applications for the actuators.
Explains warning symbols and signal words used in the manual.
Lists references and common symbols used throughout the document.
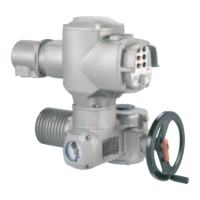
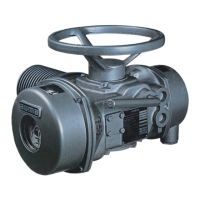
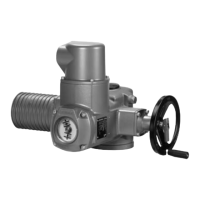
Defines multi-turn actuators and describes AUMA's models.
Details the AC 01.2 actuator controls and their functions.
Introduces AUMA CDT, Cloud, and Assistant App for device management.
Explains the information found on the actuator's name plate.
Details the information on the actuator controls name plate.
Explains the data presented on the motor's name plate.
Provides guidelines for safe transport, including handling suspended loads.
Outlines requirements for proper storage to prevent corrosion.
Specifies permissible mounting positions for the actuator.
Details the procedure for attaching the handwheel to the actuator.
Guides the process of mounting the actuator onto a valve.
Lists and describes different types of output drives and their applications.
Explains the characteristics and mounting of output drive type A.
Provides step-by-step instructions for mounting the actuator with output drive type A.
Details the process for finishing the stem nut for output drive type A.
Describes the mounting principles for output drive types B, C, D, and E.
Guides the mounting procedure for multi-turn actuators with output drive type B.
Covers accessories used during the assembly process.
Explains the assembly of the stem protection tube for rising valve stems.
Details options for positioning the local control unit.
Details how to change the mounting position of the local controls if needed.
Presents an overview of the different electrical connection types available.
Covers fundamental electrical connection safety and requirements.
Explains the SJ electrical connection using AUMA plug/socket connectors.
Guides on how to open the terminal compartment for mains connection.
Details the process of connecting cables and protective earthing.
Provides steps to properly close the terminal compartment after connection.
Explains how to open the fieldbus terminal compartment.
Details the connection procedure for DeviceNet cables.
Guides on closing the fieldbus terminal compartment securely.
Covers accessories related to electrical connections.
Describes the installation and application of actuator controls mounted on a wall bracket.
Explains the use of a parking frame for protecting plugs or covers.
Describes the DS intermediate frame for ensuring double sealing.
Details the procedure for making an external earth connection for equipotential compensation.
Explains how to operate the actuator manually for setting or during power failure.
Details the steps for manually operating the valve using the handwheel.
Covers the basic settings required before operating the actuator via motor.
Explains how to operate the actuator using the local control push buttons.
Describes how to operate the actuator remotely via fieldbus interface.
Guides on navigating the actuator's menu system using push buttons.
Explains the structure of the display menus and how to navigate them.
Covers user levels, password entry, and change procedures.
Details the steps for entering the password to access parameters.
Explains how to change passwords for different user levels.
Describes the security timeout feature for incorrect password attempts.
Explains how to select and change the display language.
Details the procedure for changing the display language.
Covers LED tests, language selection, and startup menu indications.
Explains various indications shown on the actuator's display.
Details how valve position and torque are displayed as feedback signals.
Explains status indications like warnings, faults, and maintenance needs.
Covers NAMUR-recommended status indications like out of specification and function check.
Describes the arrangement and signification of local control indication lights.
Covers optional indications available on the actuator.
Describes the mechanical position indicator that is not self-adjusting.
Explains the self-adjusting mechanical position indicator and its characteristics.
Covers feedback signals that can be configured via the DeviceNet fieldbus.
Explains the use of output contacts for sending binary status signals.
Details how to assign various signals to the output contacts.
Explains how to set output signals to high active or low active.
Describes the availability and use of analogue signals for position and torque feedback.
Guides on setting the valve seating type (limit or torque) to match the valve.
Details how to set the torque switching limits for overload protection.
Explains how to set the limit switching for end positions to prevent damage.
Covers configuration settings for the DeviceNet gateway, including baud rate and node ID.
Details how to set the fieldbus address and baud rate using DIP switches.
Explains the requirement and procedure for bus termination.
Describes how to select input/output data representation using rotary coding switches.
Explains the significance of the LEDs on the DeviceNet gateway.
Outlines the final test run procedures after all settings are complete.
Guides on checking the direction of rotation at the mechanical position indicator.
Details how to check the direction of rotation at the hollow shaft or stem.
Explains how to check if the limit switching has been set correctly.
Provides instructions for opening and closing the actuator's switch compartment.
Explains the self-adjusting mechanical position indicator and its operation.
Details the procedure for setting the mechanical position indicator.
Describes the mechanical position indication using an indicator mark.
Guides on setting the mechanical position indicator with an indicator mark.
Explains how to test and set the gear stage of the reduction gearing.
Lists common faults encountered during commissioning and their remedies.
Explains fault and warning indications displayed on the actuator.
Provides information on the types and ratings of fuses used in the actuator controls.
Provides instructions for testing and replacing fuses.
Details the procedure for replacing primary fuses F1/F2.
Guides on testing and replacing secondary fuses F3/F4.
Explains motor protection features, tripping signals, and proof testing.
Lists required actions for safe device operation and regular checks.
Covers manual operation checks and lubrication recommendations.
Provides guidelines for the proper disposal and recycling of the devices.
Presents detailed technical specifications for multi-turn actuators.
Provides detailed technical specifications for the actuator controls.
Lists the tightening torques for various screw sizes and strength classes.
Shows a diagram and parts list for spare parts of multi-turn actuators.
Provides a diagram for spare parts of AC 01.2 actuator controls with SJ connection.
| Brand | AUMA |
|---|---|
| Model | SA 07.2 |
| Category | Controller |
| Language | English |