Do you have a question about the AUMA SA 07.1 - SA 30.1 and is the answer not in the manual?
Defines the intended use of AUMA actuators for industrial valves and clarifies manufacturer liability for other applications.
Specifies that electrical work must be done by skilled electricians following safety rules.
Emphasizes the importance of following maintenance instructions for safe operation.
Highlights potential hazards from ignoring warnings, including burn risks and electrostatic discharge precautions.
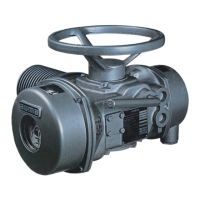
Provides instructions for safe transport, including packaging and lifting, and how to fit the handwheel.
Outlines best practices for storing actuators to prevent damage from environmental factors.
Details the environmentally friendly packaging materials used and recommends recycling.
Explains how to safely change the orientation of the local controls on the actuator.
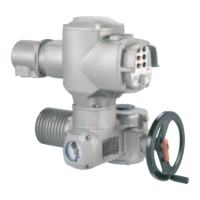
Details the process for connecting the actuator using AUMA plug/socket connectors (Versions S, SH, SE).
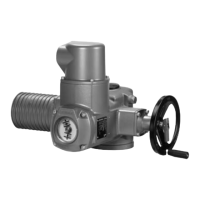
Describes the steps to engage manual operation mode using the handwheel's change-over mechanism.
Explains that manual operation disengages automatically when the motor is restarted.
Details the functions of the selector switch positions: OFF, Local Control, Remote Control, Test, and Reset.
Explains how to use the OPEN, STOP, and CLOSE push buttons for local actuator control.
Describes the meaning of the green, yellow, and red indication lights for actuator status and faults.
Provides instructions on how to remove the cover of the switch compartment safely.
Details how to remove the optional indicator disc using a wrench.
Instructions for setting the CLOSED end position using the control unit's setting spindle.
Instructions for setting the OPEN end position using the control unit's setting spindle.
Explains how to test the limit switches using the red test buttons T and P.
Guides on setting the intermediate position for the CLOSE direction using setting spindle G.
Guides on setting the intermediate position for the OPEN direction using setting spindle K.
Explains how to test DUO limit switches using test buttons T and P.
Instructions for setting the torque values for OPEN and CLOSE directions.
Explains how to test the torque switches using test buttons T and P.
Details how to verify the actuator's direction of rotation after installation.
Guidance on verifying the correct tripping of limit switches at end positions.
Notes that seating type (limit or torque) is determined by the valve manufacturer.
Explains how to test the PTC tripping device and its fault signal indication.
Procedure for setting position transmitter for 2-wire and 3-/4-wire systems.
Procedure for setting position transmitter for 3-/4-wire systems with 4-20mA range.
Explains the status indicated by LEDs V14 and V15 on the interface board.
Details DIP switch settings for configuring actuator behavior like self-retaining or push-to-run modes.
Describes the function and connection of the EMERGENCY OPEN/CLOSE signal input.
Provides technical specifications for the electronic positioner, including signal types and sensitivity.
Instructions for checking and adjusting the electronic positioner settings.
Explains how to change signal types (current/voltage) for E1 and E2 using DIP switch S1-7.
Configures actuator response (fail as is, fail close, fail open) upon signal loss using switch S2-7.
Procedure to set the CLOSED end position for the standard electronic positioner.
Procedure to set the OPEN end position for the standard electronic positioner.
Instructions for adjusting the sensitivity (dead band) using potentiometers P9 and P7.
Procedure to set the OPEN end position with inverse signal definition.
Procedure to set the CLOSED end position with inverse signal definition.
Explains Split Range operation where setpoints are shared among multiple positioners.
Details DIP switch settings for configuring Split Range operation.
Guides on setting positioners for Split Range operation, including example scenarios.
Explains the status indicated by LEDs V14, V15, V21, and V22 on the timer board.
Describes how to set stepping mode start/end points using DUO limit switches or external contacts.
Instructions for setting independent ON/OFF times for both directions using potentiometers R10-R13.
Details the types and locations of fuses within the actuator controls and replacement guidelines.
Explains motor protection via thermoswitch, thermal overload relay, or PTC thermistor.
Provides guidance on routine checks, paint finish touch-ups, and elastomer seal inspection.
Specifies lubricant change intervals for gear housing and valve stem lubrication.
Information on environmentally responsible disassembly, sorting, and disposal of actuator components.
Highlights AUMA's services for maintenance, inspection, and training courses.
| Brand | AUMA |
|---|---|
| Model | SA 07.1 - SA 30.1 |
| Category | Controller |
| Language | English |