Do you have a question about the AUMA SA 16.1 and is the answer not in the manual?
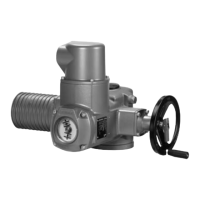
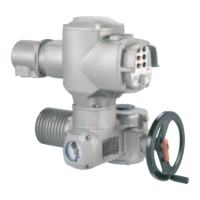
Details on actuator types SA 07.1 - SA 16.1 and SAR 07.1 - SAR 16.1.
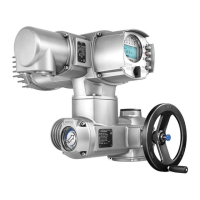
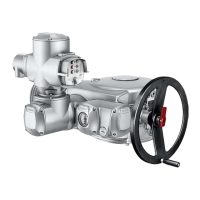
Information on the electromechanic control unit with AUMATIC AC 01.1.
Lists communication protocols like Modbus, Profibus DP, DeviceNet.
Covers standards, directives, and general safety requirements.
Defines the intended use of AUMA multi-turn actuators and prohibited applications.
Specifies requirements for personnel performing installation, commissioning, and maintenance.
Highlights importance of correct settings for safe commissioning.
Prerequisites for safe operation, fault reporting, and national regulations.
Responsibility for implementing site-specific protective measures.
Ensures safe operation through adherence to maintenance instructions.
Requirements for actuators in dust hazardous locations, ZONE 22, per ATEX.
Explains hazard symbols (DANGER, WARNING, CAUTION, NOTICE) and their meanings.
Details the meaning of WARNING, CAUTION, and NOTICE signal words.
Explains the structure of hazard warnings: type, consequence, measures.
Explains common references, symbols, and menu navigation indicators.
Details on actuator, controls, and motor name plates and their content.
Provides examples of actuator and controls name plates.
Lists the actuator series covered by these instructions.
Explains commission number use and feedback signal indication in wiring diagrams.
Specifies Modbus RTU for control via fieldbus interface.
Defines multi-turn actuators and their operational capabilities.
Describes AUMATIC control functions, mounting, and operation modes.
Distinguishes between electromechanical (intrusive) and electronic (non-intrusive) control units.
Safety instructions for handling hovering loads during transport.
Recommendations for storage to prevent corrosion and temperature damage.
Details on packaging materials used and recycling recommendations.
Confirms that actuators can be operated in any mounting position.
Step-by-step guide for attaching the handwheel to the actuator.
Instructions for mounting actuators with output drive types B, B1-B4, and E.
Detailed steps for machining the stem nut for output drive type A.
Instructions for mounting actuators with output drive type A to the valve.
Procedure for installing the stem protection tube for rising valve stems.
Describes options for mounting local controls and how to change positions.
Steps for changing the mounting position of local controls, including safety precautions.
Warning about dangers of incorrect electrical connection and qualified personnel.
Information on obtaining and using wiring diagrams and terminal plans.
Requirements for customer-provided fuses and disconnect switches.
Details current consumption and maximum permissible protection devices.
Information on 24 V DC and DC motor power supply requirements.
Compliance with safety standards and EMC for external connections.
Guidelines for cable routing to minimize interference and ensure signal integrity.
Ensuring mains voltage and frequency match motor name plate data.
Specifications for insulation, temperature rating, and UV resistance of cables.
Recommendations for Modbus wiring, including impedance, capacity, and screening.
Prior installation notes for bus systems, including device limits and bonding.
Details on cross-sections for AUMA plug/socket connector power and control terminals.
Procedure for opening the terminal compartment for mains connection.
Steps for connecting cables, including wire stripping and PE connection.
Warning regarding hazardous voltage if protective earth is not connected.
Instructions for securely tightening PE conductors to the PE connection.
Steps for closing the terminal compartment, including O-ring and cable gland fitting.
Caution regarding cable pinching and short circuits when closing the compartment.
Procedure for opening the bus terminal compartment.
Measures to prevent electrostatic discharge (ESD) damage to electronic components.
Steps for connecting bus cables, including cable glands and wire insertion.
Illustrates standard and redundant connection boards for bus communication.
Explains components like bus termination, channels, and shielding clamps.
Details connection boards for loop topology and redundancy.
Explains the function of switches S1-S3 for bus termination and redundancy.
Table mapping AUMA labelling to SUB-D 9 plug pins and cable colours.
Instructions for setting termination resistors for bus segments.
Procedure for closing the bus terminal compartment.
Details on accessories like wall brackets for controls.
Describes applications and benefits of mounting controls separately using a wall bracket.
Illustrates the design principle and connection points for wall bracket mounting.
Checks and recommendations before connecting cables to wall bracket systems.
Purpose of the parking frame for safe storage of disconnected plugs.
Describes the function of the protection cover for the plug compartment.
Explains the role of the intermediate frame in maintaining enclosure protection.
Describes the external earth connection for equipotential bonding.
Step-by-step guide to engage manual operation using the change-over lever.
Warning about potential damage to the change-over mechanism during manual operation.
Explains how manual operation is automatically disengaged when motor operation resumes.
How to operate the actuator using the local control push buttons (OPEN, STOP, CLOSE).
Caution regarding hot surfaces when operating locally.
Instructions for setting the selector switch to enable remote control via fieldbus.
Using push buttons for viewing, editing settings, and indications on the local controls.
Details the functions of the push buttons (▲, ▼, C) for navigation and input.
Explains the display groups (S, M, D) and navigation between them.
Procedure for entering the password to access and change settings.
Step-by-step guide to change the display language.
Navigating menus to select and confirm language settings.
Explains display lines indicating operation mode, commands, and actuator status.
Details the meaning of indications for running status and end positions.
Procedure to edit the torque indication display format (percent, Nm, Lbs/ft).
Table explaining the meaning of each LED on the local controls.
Description of the mechanical indicator disc and its functions.
How to read feedback signals via Modbus RTU using function codes.
Explains the use of output contacts for binary signals and their assignment.
Describes analogue feedback signals, typically valve position (0/4-20 mA).
Procedure for setting the selector switch and switching on power supply.
Specifies heat-up times required for low-temperature versions before commissioning.
Instructions for checking and editing limit and torque seating for end positions.
Defines limit seating and torque seating and their functions.
Navigating menus to select and edit seating modes (VIEW/EDIT).
Steps to view the current seating mode settings (OPEN POSITION, CLOSED POSITION).
Procedure to change the seating mode, including password entry.
Steps to set new values for seating modes after password entry.
Procedure for setting Modbus interface parameters: Baud rate, parity, slave address.
Navigating menus to view Modbus parameters like Baudrate, Parity, Slaveaddress.
Steps to edit Modbus parameters including password entry and value setting.
Accepting or cancelling Modbus parameter changes and returning to status display.
Details connection monitoring time and cable redundancy parameters.
Procedure for opening the switch compartment for settings.
Instructions for setting the torque switching heads for overload protection.
Warning about valve damage from incorrect tripping torque limit settings.
Describes how limit switching records travel and operates switches at preset positions.
Step-by-step guide to set the CLOSED end position using the setting spindle.
Step-by-step guide to set the OPEN end position using the setting spindle.
Instructions for setting intermediate positions for DUO limit switching.
Procedure to set an intermediate position for the CLOSE direction.
Procedure to set an intermediate position for the OPEN direction.
Procedure to check the actuator's direction of rotation.
Warning about incorrect direction of rotation and immediate actions.
Procedure to check if limit switching is set correctly using indications.
Performing reference operation after limit switching changes for correct position feedback.
Instructions for setting the potentiometer as a travel sensor.
Procedure for setting up the electronic position transmitter (RWG).
Steps for connecting ammeter and adjusting potentiometers for calibration.
Procedure for setting the mechanical position indicator disc.
Steps to align indicator discs for CLOSED and OPEN positions.
Procedure for closing the switch compartment, including O-ring and screw fastening.
Lists common faults during commissioning, possible causes, and remedies.
Procedure for manually checking torque and limit switches.
Explains fault indications (FAULT IND.) and warning indications (WARNING IND.) in status S0.
Details fault signals like INTERNAL FAULT, TORQUE FAULT, and their remedies.
Details warnings like WARNING OPER. TIME, INTERNAL FEEDBACK, and their remedies.
Lists causes for the 'NOT READY' indication when operating remotely.
Identifies fuse locations (F1-F5) and safety precautions for access.
Lists fuse types, sizes, and AUMA part numbers for replacement.
Explains motor protection tripping, signals, and recovery procedure.
Methods for acknowledging motor faults via Reset button or fieldbus command.
Safety rules for performing servicing and maintenance tasks.
Measures required for safe operation, performed 6 months after commissioning and annually.
Instructions for lubricating output drive type A using grease nipple.
Guidelines for grease change intervals and recommended seal exchange.
Procedures for disassembling, sorting, and disposing of devices.
Details on duty types (S2, S4, S5) and torque range.
Information on motor type, insulation class, and protection.
Explanation of self-locking mechanism and types of limit switching.
Details on torque switching and position feedback options (Potentiometer, RWG).
Information on manual operation modes and valve attachment standards.
Electrical specifications for limit and torque switches, including mechanical lifetime.
Electrical specifications for the blinker transmitter.
Details on power supply, mains frequency, and current consumption for controls.
Information on switchgear types (contactors, thyristors) and control interface.
Details on Modbus RTU interface and available additional inputs/outputs.
Specifications for auxiliary voltage output and redundant Modbus RTU interface.
Describes selector switch, push buttons, indication lights, and display features.
Lists standard functions like mode adjustment, torque monitoring, phase failure monitoring.
Details monitoring of starts, reaction times, and operating time.
Information recorded on the electronic name plate (commission number, product data, project data).
Describes counters for motor running time, starts, and switch trips.
Information on motor temperature monitoring and thermal overload protection.
Details on plug/socket connectors, threads, and protection covers.
Transmission speed, cable length, device types, and supported functions.
How to set Baud rate, parity, and Modbus address via the AUMATIC display.
Lists commands (output) and feedback signals (input) for the fieldbus interface.
Describes programmable actuator behavior when communication is lost.
Details mounting position, enclosure protection, corrosion protection, altitude, humidity, pollution, finish, colour, and ambient temperature.
Specifications for vibration resistance and estimated lifetime of actuators.
Lists available accessories such as wall brackets and emergency stop buttons.
Lists relevant EU Directives for Electromagnetic Compatibility and Machinery.
Exploded view diagram showing spare parts for multi-turn actuators.
Table listing part numbers, designations, and types for actuator spare parts.
Exploded view diagram showing spare parts for AUMATIC AC 01.1 controls.
Table listing part numbers, designations, and types for control unit spare parts.
Declaration of conformity with EC Machinery Directive 2006/42/EC and harmonised standards.
Compliance with EMC (2004/108/EC) and Low Voltage (2006/95/EC) Directives.
Contact details for AUMA offices across Europe.
Contact details for AUMA offices in Africa.
Contact details for AUMA offices in the Americas.
Contact details for AUMA offices in Asia.
Contact details for AUMA offices in Australia.
AUMA Riester GmbH & Co. KG address and general contact information.
Information on ISO 14001 and ISO 9001 certifications.
| Brand | AUMA |
|---|---|
| Model | SA 16.1 |
| Category | Controller |
| Language | English |