Do you have a question about the AUMA SAR 07.6 and is the answer not in the manual?
Ensures all legal requirements and guidelines for assembly, connection, commissioning, and operation are met.
Defines the intended use of AUMA multi-turn actuators for industrial valves and specifies prohibited applications.
Details compliance requirements for actuators in hazardous dust locations (ZONE 22) according to ATEX directive.
Explains safety-relevant procedures and signal words (DANGER, WARNING, CAUTION, NOTICE) used in the manual.
Lists references and symbols used throughout the operation instructions for clarity and understanding.
Details the information found on the actuator, actuator controls, and motor name plates for device identification.
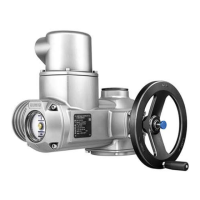
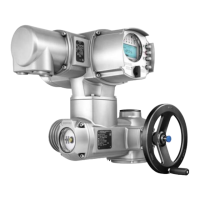
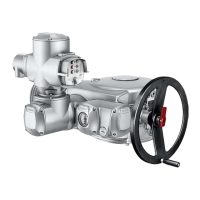
Provides a concise overview of AUMA multi-turn actuators, actuator controls, and their functionalities.
Covers safe transport procedures for actuators and controls, including handling hovering loads and lifting instructions.
Provides guidelines for proper storage to prevent corrosion and damage from environmental factors.
Specifies permissible mounting positions for actuators, noting considerations for lubricant type.
Overviews different output drive types (A, B, B1-B4, E) and their applications for connecting to valve stems.
Explains the components and torque transmission mechanism for output drive type A.
Describes the connection method for output drive types B and E via a hollow shaft and output drive sleeve.
Details the procedure for fitting the handwheel, including handling of larger diameters supplied separately.
Provides instructions for mounting the actuator to the valve or gearbox, including corrosion prevention.
Details the working steps for machining the stem nut for output drive type A if supplied unbored.
Step-by-step guide for mounting the actuator with output drive type A to the valve stem, including tightening torques.
Step-by-step guide for mounting the actuator with output drive type B to the valve/gearbox, including tightening torques.
Lists and describes accessories for actuator assembly, such as stem protection tubes.
Details the assembly procedure for the stem protection tube to protect rising valve stems.
Explains how to adjust the mounting position of local controls for optimal accessibility, allowing 90° shifts.
Provides steps for modifying the mounting position of local controls, including safety precautions for electrical shock and ESD.
Covers essential safety information and general guidelines for electrical connections, emphasizing qualified personnel.
Presents an overview of different electrical connection types, such as SJ and compact SF versions.
Details the SJ version's plug-in electrical connection with screw-type terminals for power and control contacts.
Provides instructions on how to open the mains terminal compartment, including safety warnings.
Guides through the process of connecting cables, specifying terminal cross sections, tightening torques, and safety measures.
Details the procedure for closing the mains terminal compartment after cable connection, ensuring enclosure protection.
Instructs on opening the fieldbus terminal compartment to access the connection board for fieldbus cables.
Describes the connection of industrial Ethernet cables, typically equipped with RJ-45 connectors.
Provides steps for closing the fieldbus terminal compartment, ensuring proper sealing and enclosure protection.
Explains the SF version's electrical connection, utilizing screw-type terminals for motors and controls.
Details how to open the mains terminal compartment for the SF compact version, including safety precautions.
Guides cable connection for the SF version, specifying terminal cross sections, torques, and protective earth connection.
Instructs on closing the mains terminal compartment for the SF version, ensuring proper sealing and cable protection.
Details the connection of industrial Ethernet cables using M12 connectors to the actuator.
Lists and describes accessories for electrical connections, such as wall brackets.
Explains the principle and benefits of mounting actuator controls separately on a wall bracket.
Provides information on installation with wall brackets, including cable length and connection details.
Describes the parking frame for safe storage of disconnected plugs or covers, protecting contacts.
Details the external earth connection procedure for equipotential compensation, including terminal cross sections and torques.
Explains manual valve operation using the handwheel, noting it's for occasional use and disengages during motor operation.
Provides steps for manual valve operation, emphasizing safety to prevent damage to motor coupling.
Covers operation of the actuator via the motor, stressing the need for prior commissioning and basic settings.
Details how to operate the actuator locally using the push buttons on the actuator controls.
Explains how to operate the actuator remotely via fieldbus, including setting the selector switch to 'Remote control'.
Describes how to navigate menus for settings and indications using the push buttons on the local controls.
Explains the structure of the display, including groups, navigation support, and push button functions for menu interaction.
Details the concept of user levels and the necessity of passwords for parameter modification, defining available user levels.
Provides a step-by-step guide for entering the password to access parameter modification functions.
Explains how to change passwords for the same or lower access levels, outlining the process and menu items.
States that actuator controls display is multilingual and describes how to change the display language.
Provides a detailed procedure for changing the display language through the menu, including user level selection.
Describes indications during commissioning, including LED test, language selection activation, and startup menu display.
Explains the information presented in the display, including the status bar and navigation support.
Details display indications for valve position and torque, including units and end position symbols.
Explains status indications according to AUMA classification, such as warnings, not ready REMOTE, and faults.
Describes status indications according to NAMUR recommendation NE 107, covering out of specification, function check, maintenance, and failures.
Details the arrangement and meaning of indication lights (LEDs) on the local controls, including customizable assignments.
Covers optional indications, specifically mechanical position indicators that are self-adjusting or use an indicator mark.
Explains the self-adjusting mechanical position indicator, its characteristics, and how it shows valve position.
Describes the mechanical position indicator that uses an indicator mark, its characteristics, and how it shows valve position.
Explains how output contacts provide status signals as binary signals to the control room, detailing assignment and coding.
Covers analogue signals, specifically for valve position and torque feedback, requiring additional input signals.
Guides on setting the type of seating (limit or torque) for end positions, emphasizing valve compatibility and safety.
Details how to set torque switching limits for overload protection, including safety warnings about excessive tripping torque.
Provides instructions for setting limit switching for end positions, including safety precautions for motor operation and overrun.
Guides on checking the connection between the EtherNet/IP module and a computer, including IP address settings.
Details the process of configuring the EtherNet/IP module using the GW-7472 Utility software.
Outlines the procedure for performing a test run after all settings are completed, focusing on checking the direction of rotation.
Explains how to check the direction of rotation using the mechanical position indicator, including safety measures.
Details how to check the direction of rotation directly at the hollow shaft/stem if no mechanical position indicator is present.
Guides on checking the correct setting of limit switching by operating the actuator and observing indicator lights.
Describes how to open and close the switch compartment for accessing internal settings and indicators.
Explains the self-adjusting mechanical position indicator, its function, and how to set it.
Provides step-by-step instructions for setting the self-adjusting mechanical position indicator by moving the valve to end positions.
Details how to test and set the reduction gearing stage if the mechanical position indicator cannot be correctly set.
Describes the mechanical position indication using an indicator mark and the procedure for setting it.
Provides instructions for setting the mechanical position indicator with an indicator mark by aligning discs with the cover mark.
Explains how to test and set the reduction gearing stage, particularly if actuator turns/stroke were changed.
Lists common faults encountered during commissioning, such as issues with mechanical position indicators and overrun.
Explains how faults and warnings are indicated on the display (red backlight for faults, white for warnings) and via status texts.
Details the types and locations of fuses within the actuator controls, including primary and secondary fuses.
Lists primary fuses F1/F2 for the power supply unit and the internal fuse F3 for the 24 V DC supply.
Provides instructions and safety precautions for replacing fuses F1/F2, emphasizing disconnection from mains.
Details the procedure for replacing fuses F1/F2 in the actuator controls, including safety warnings.
Guides on testing and replacing fuses F3/F4 located in the power supply unit, including checking resistance.
Explains how motor protection trips due to overheating, indicated by LEDs and fault messages, and how to resume operation.
Outlines preventive actions for safe operation, including visual inspections, screw checks, and lubrication of output drive type A.
Covers maintenance aspects, including checking mechanical parts, lubrication intervals, and seal replacement during grease changes.
Provides guidelines for the disposal and recycling of devices, emphasizing material separation and environmental protection.
Lists features and functions for multi-turn actuators, including type of duty, motors, insulation class, and electrical connections.
Details technical specifications for actuator controls, covering power supply, current consumption, switchgear, and control signals.
Illustrates the spare parts breakdown for multi-turn actuators SA/SAR 07.2 to 16.2, showing components and their reference numbers.
Shows the exploded view and components for AC 01.2 actuator controls with SJ electrical connection for spare parts identification.
Presents the spare parts breakdown for AC 01.2 actuator controls SF compact, illustrating the assembly of components.
Contains information regarding the Declaration of Incorporation and EU Declaration of Conformity for the products.
| Control Signal | 4-20 mA |
|---|---|
| Communication Protocol | Modbus RTU, PROFIBUS DP |
| Control | Local, Remote |
| Inputs | Analog, Digital |
| Outputs | Relay |
| Communication | Fieldbus |