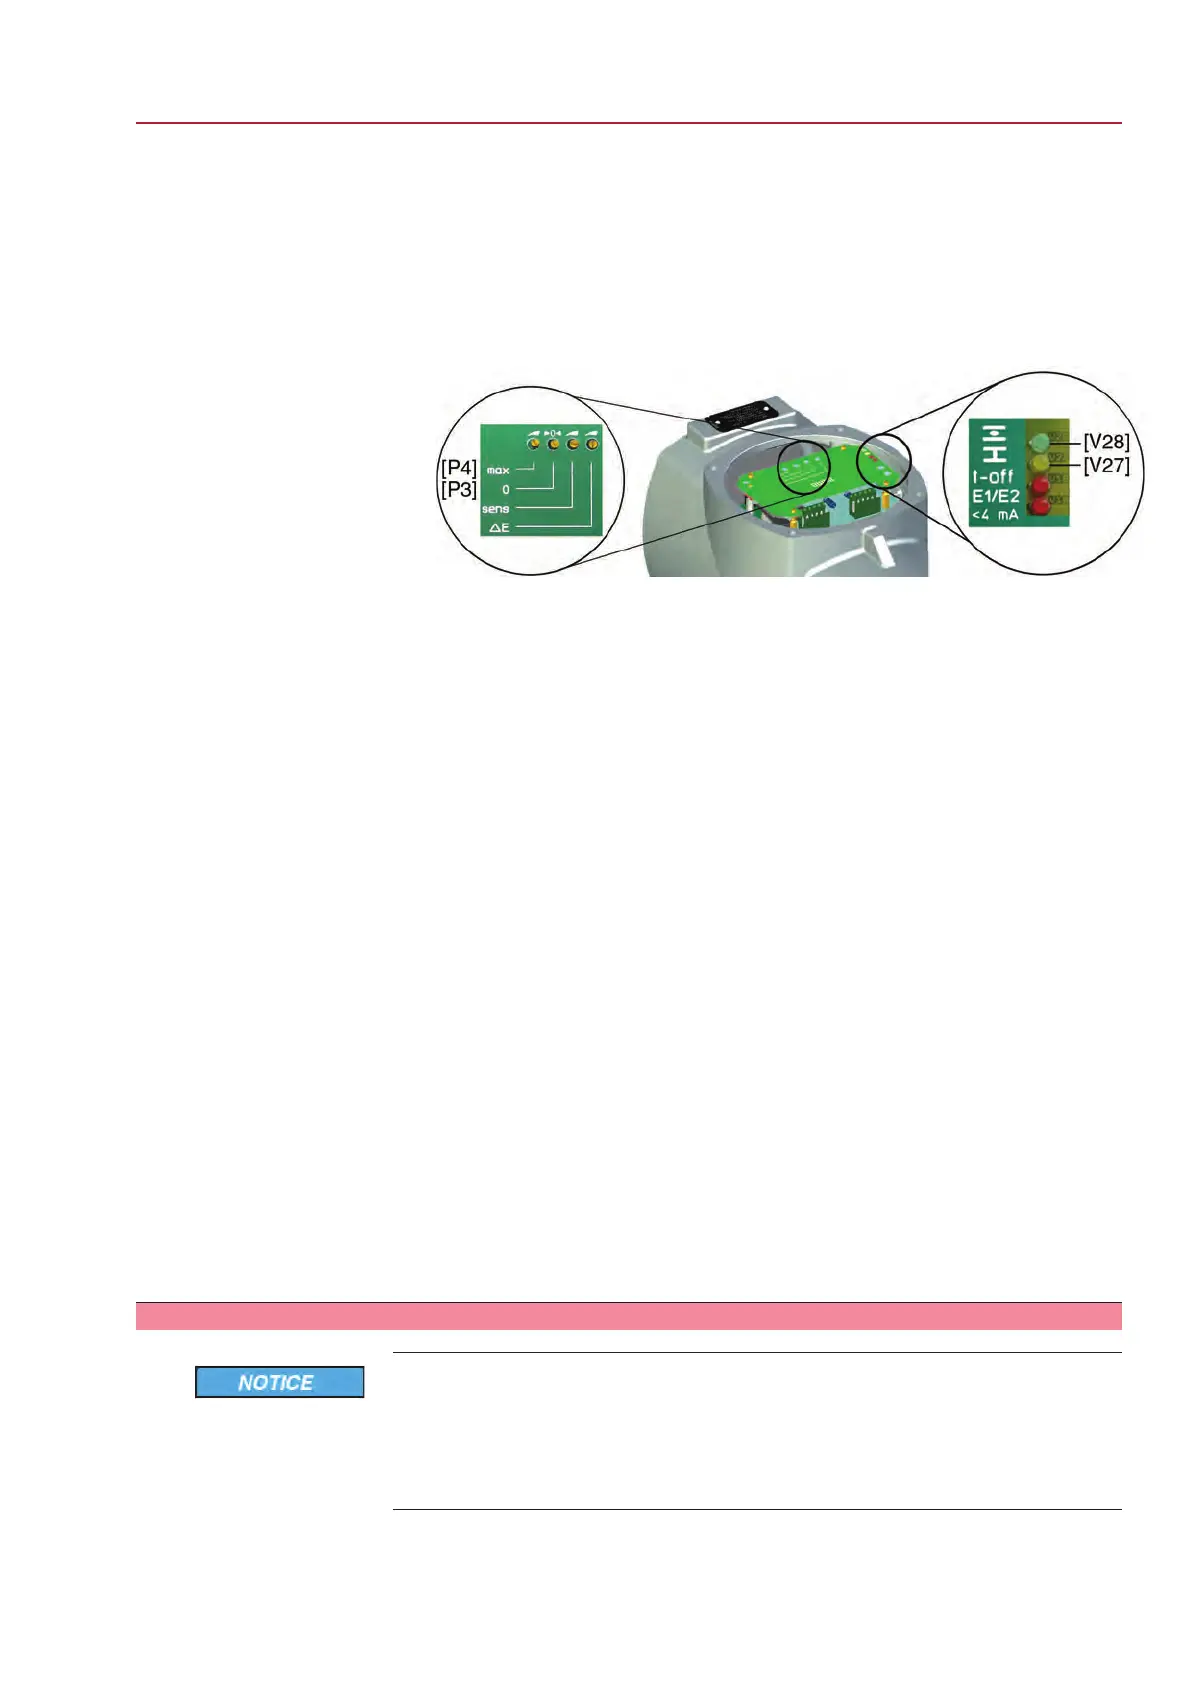
9. Adjust positioner using potentiometer 0 [P3].
9.1 If both LEDs are OFF or the green LED [V28] is illuminated:Turn poten-
tiometer 0 [P3] slightly clockwise until the yellow LED [V27] is illuminated.
9.2 If the yellow LED [V27] is illuminated:Turn potentiometer 0 [P3] counter-
clockwise until the yellow LED [V27] goes out.Then turn potentiometer 0
[P3] slightly clockwise until the yellow LED [V27] is illuminated again.
Figure 37: Electronic positioner board
[P3] Potentiometer 0
[P4] Potentiometer max
[V27] Yellow LED: End position CLOSED reached
[V28] Green LED: End position OPEN reached
➥
The setting is correct if the yellow LED [V27] is switched on when reaching end
position CLOSED.
End position OPEN
10. Move valve to end position OPEN.
11. Measure actual value E2 (measuring points [MP1/MP2]):
➥
For an actual value E2 of 20 mA, the voltmeter shows 5 V.
12. If measured value is not correct: Re-set potentiometer or electronic position
transmitter and perform adjustment once again, starting from step 1.
13. Set maximum setpoint E1 (5 V or 20 mA, refer to label [5]).
14. Measure setpoint E1 (measuring points [MP3/MP4]):
➥
For a setpoint E1 of 5 V or 20 mA, the voltmeter shows 5 V.
15. If measured value is not correct:Verify setpoint E1.
16. Adjust positioner using potentiometer max [P4].
16.1 If both LEDs are OFF or the yellow LED [V27] is illuminated:Turn poten-
tiometer max [P4] slightly counterclockwise until the green LED [V28] is
illuminated.
16.2 If the green LED [V28] is illuminated:Turn potentiometer max [P4] clock-
wise until the green LED [V28] goes out.Then turn potentiometer 0 [P3]
slightly counterclockwise until the green LED [V28] is illuminated again.
➥
The setting is correct if the green LED [V28] is switched on when reaching
end position OPEN.
10.6.4. Sensitivity setting
Unnecessary wear at valve and actuator caused by an excessive number of
starts (sensitivity)!
→
Set maximum dead band acceptable for the process.
→
Observe maximum number of actuator starts (refer to technical data sheet for
modulating actuators).
Dead band
The dead band determines the sensitivity between switch-on point and switch-off
point.The smaller the dead band, the higher the sensitivity of the positioner.
49
SQ 05.2 – SQ 14.2/SQR 05.2 – SQR 14.2
AM 01.1 Commissioning – controls settings


 To Next Page