Installation Instructions MegaCode
®
Receiver 9
5.3 Removing the Battery From the Transmitter
(Battery Type: 3V Lithium Battery CR2032).
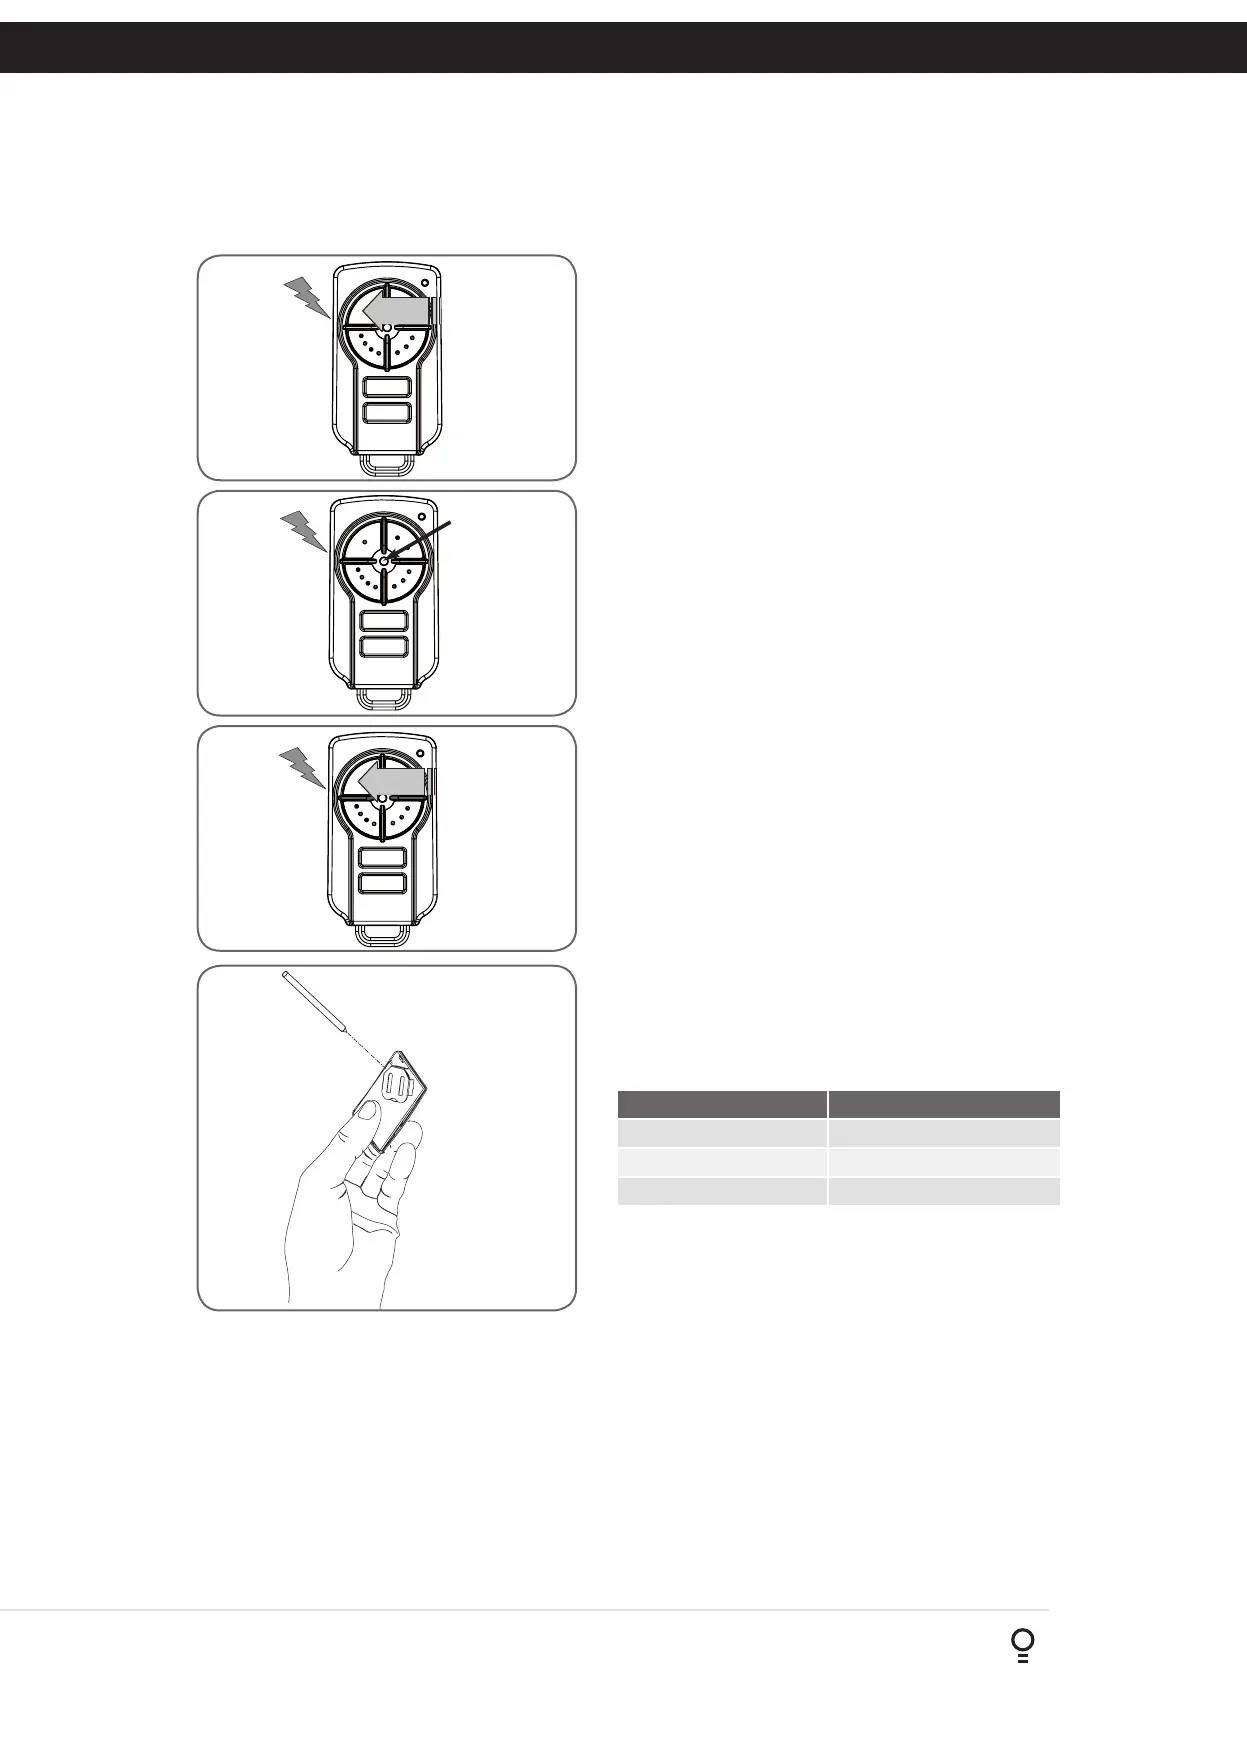
Use a non-metallic object (e.g. pen) to remove the battery. (Fig. 5.4). To
test the battery is working, press and hold a transmitter button;
(Fig. 5.5).
Light Status Battery Status
Solid OK
Flashing Requires replacement
No light Requires replacement
4. Coding Transmitter
Fig 4.1
Fig 4.2
Fig 4.3
Fig 4.4
Fig 4.5
Fig 4.6
5. Remotely Coding Transmitters
PRESS
If a TrioCode™128 transmitter is already coded into the MegaCode
®
receiver, additional TrioCode™128 transmitters can be coded without
being in direct contact with the MegaCode
®
receiver.
NOTE: Only the function of the existing transmitter button can be
assigned to new transmitter. Please read instructions prior to proceeding
- there is a time-out facility for security reasons.
5.1 Selecting The Function To Be Coded
Using the existing transmitter, operate the MegaCode
®
receiver’s output
with the transmitter button which has the function to be coded (Fig. 5.1)
(e.g. Button 1 has been coded with the M_1 function assigned).
5.2 Activate Remote Code Set Mode
Using this method transmitters can be coded without access to the
opener’s control panel as long as a pre-coded transmitter is available.
a. Take any pre-coded transmitter. Press the button for the function to be
duplicated and release.
b. Using a small needle / pen, press and hold firmly for two seconds the
middle button, through the Coding Hole (Fig. 5.2).
c. Within ten (10) seconds take the additional transmitter you wish to
code. Hold the new transmitter’s button for two seconds, pause for
two seconds, hold again for two seconds and then release (Fig. 5.3).
d. Wait for ten (10) seconds and then press the new transmitter’s button
to test.
Existing
transmitter
New
transmitter
Existing
transmitter
Fig 5.1
Fig 5.2
Fig 5.3
NOTE: When a transmitter is remotely coded, its ID label is set to that
of the existing transmitter. If the existing transmitter does not have an ID
label assigned, then the ID label of the new transmitter is set to: R/C Tx
###, where ### is the existing transmitters store number. This ensures that
the originator of any remotely coded transmitter can be identified.
REPLACE BATTERY WITH CR2032 ONLY
Fig 5.4
Fig 5.5
Use a pen
to push the
battery down
through the
side opening
to release
battery