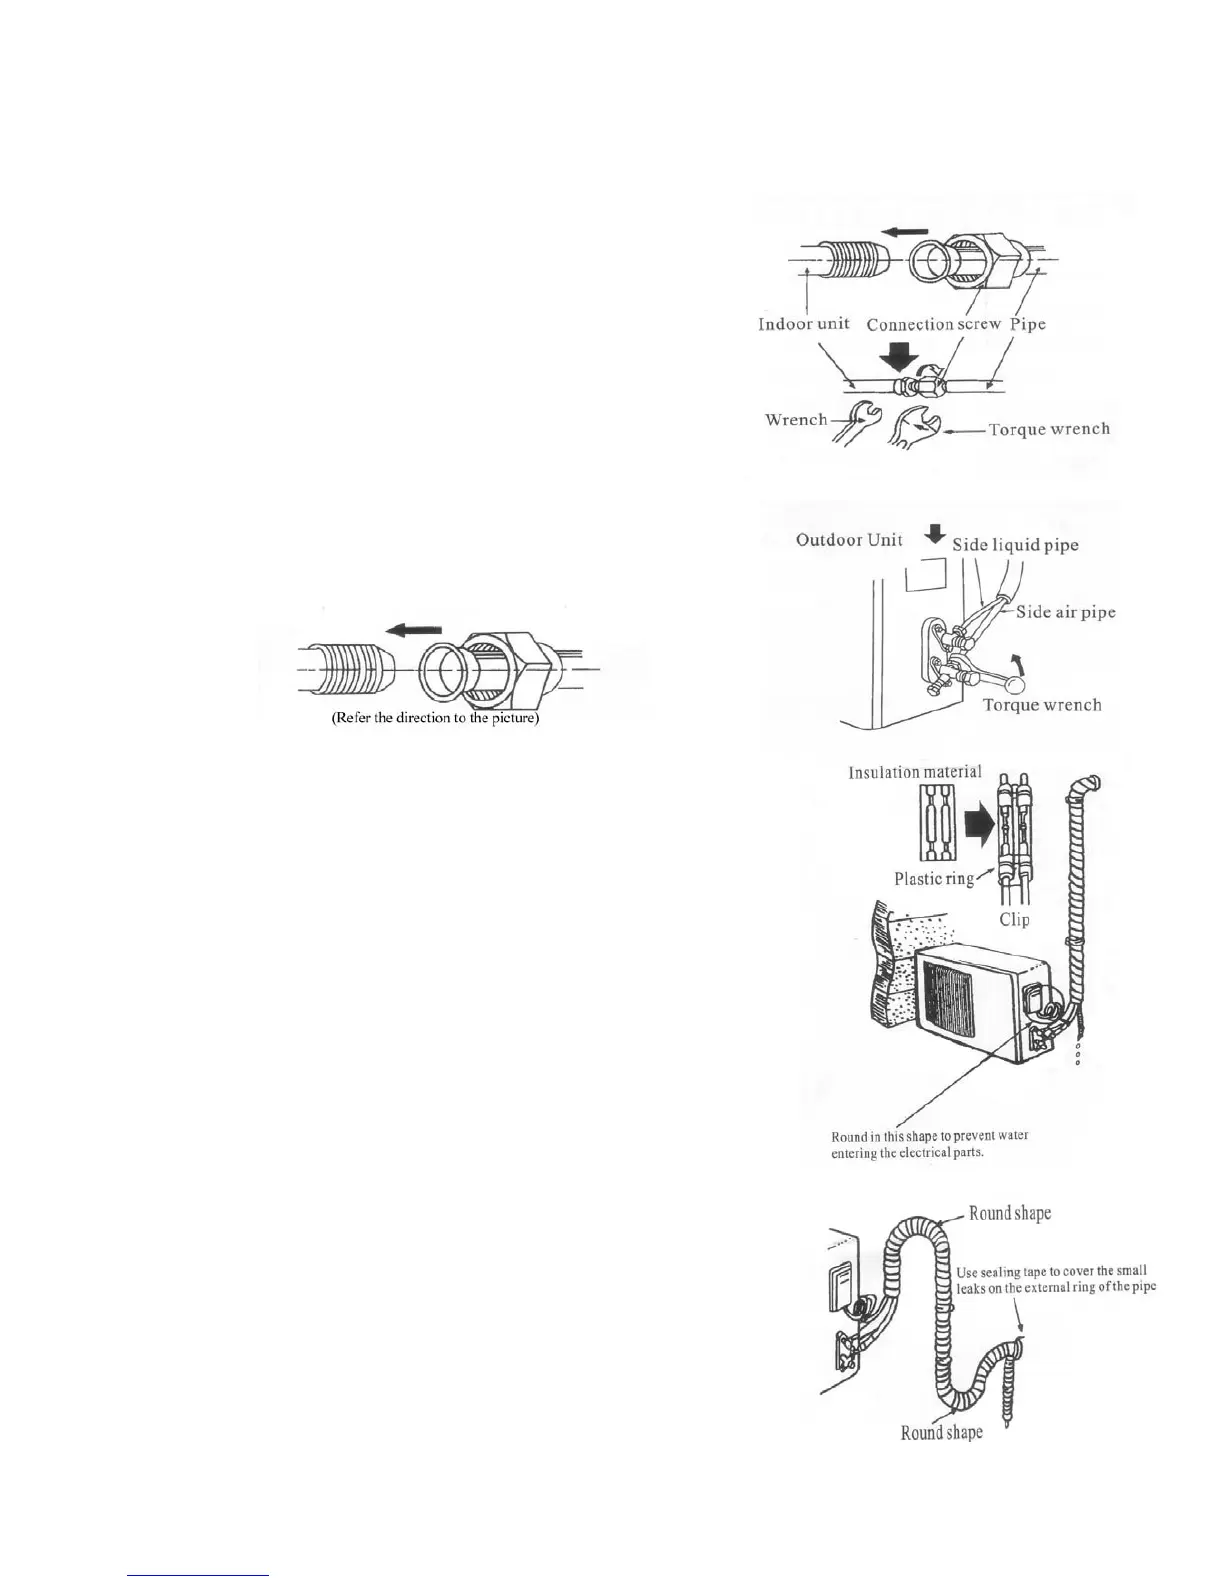
(5)Pipe Connection
① Connect the pipe to the unit: point to the center of
pipe and fasten the connection screw at first by hand
and then by wrench until it is tightly fastened. The
fastening direction is shown in the picture.
② Pointing towards the center of pipe, fasten the screw
with strength.
③ Wrench the screw in the end until you hear the “click”
sound.
(6)The fixing of pipe
① Wrap up all pipe, water discharge and connection wire from
top to below.
② Cover the connection parts with insulation material and fix
them with two plastic rings.
③ Wrap up the pipes with tape alongside the wall and fix them
to the wall with clips. These steps are usually adopted when
outdoor unit is installed below the indoor unit.
④ In case that you want to have additional water discharge
pipe, the end of pipe should be within certain distance from the
floor (to prevent water from draining back into the pipe). Fix it
onto the wall so it won’t be swayed by wind.
⑤ Wrap the pipes and connection wire well from below to top.
⑥ Wrap up the pipes that are rounded up in the way shown in
the picture so it can prevent water from entering the room.
⑦ Use clips or other fixture to fasten the pipes to the walls.
18
 Loading...