S6L-24C and S6L-16C 21
S6L-24C/16C Only
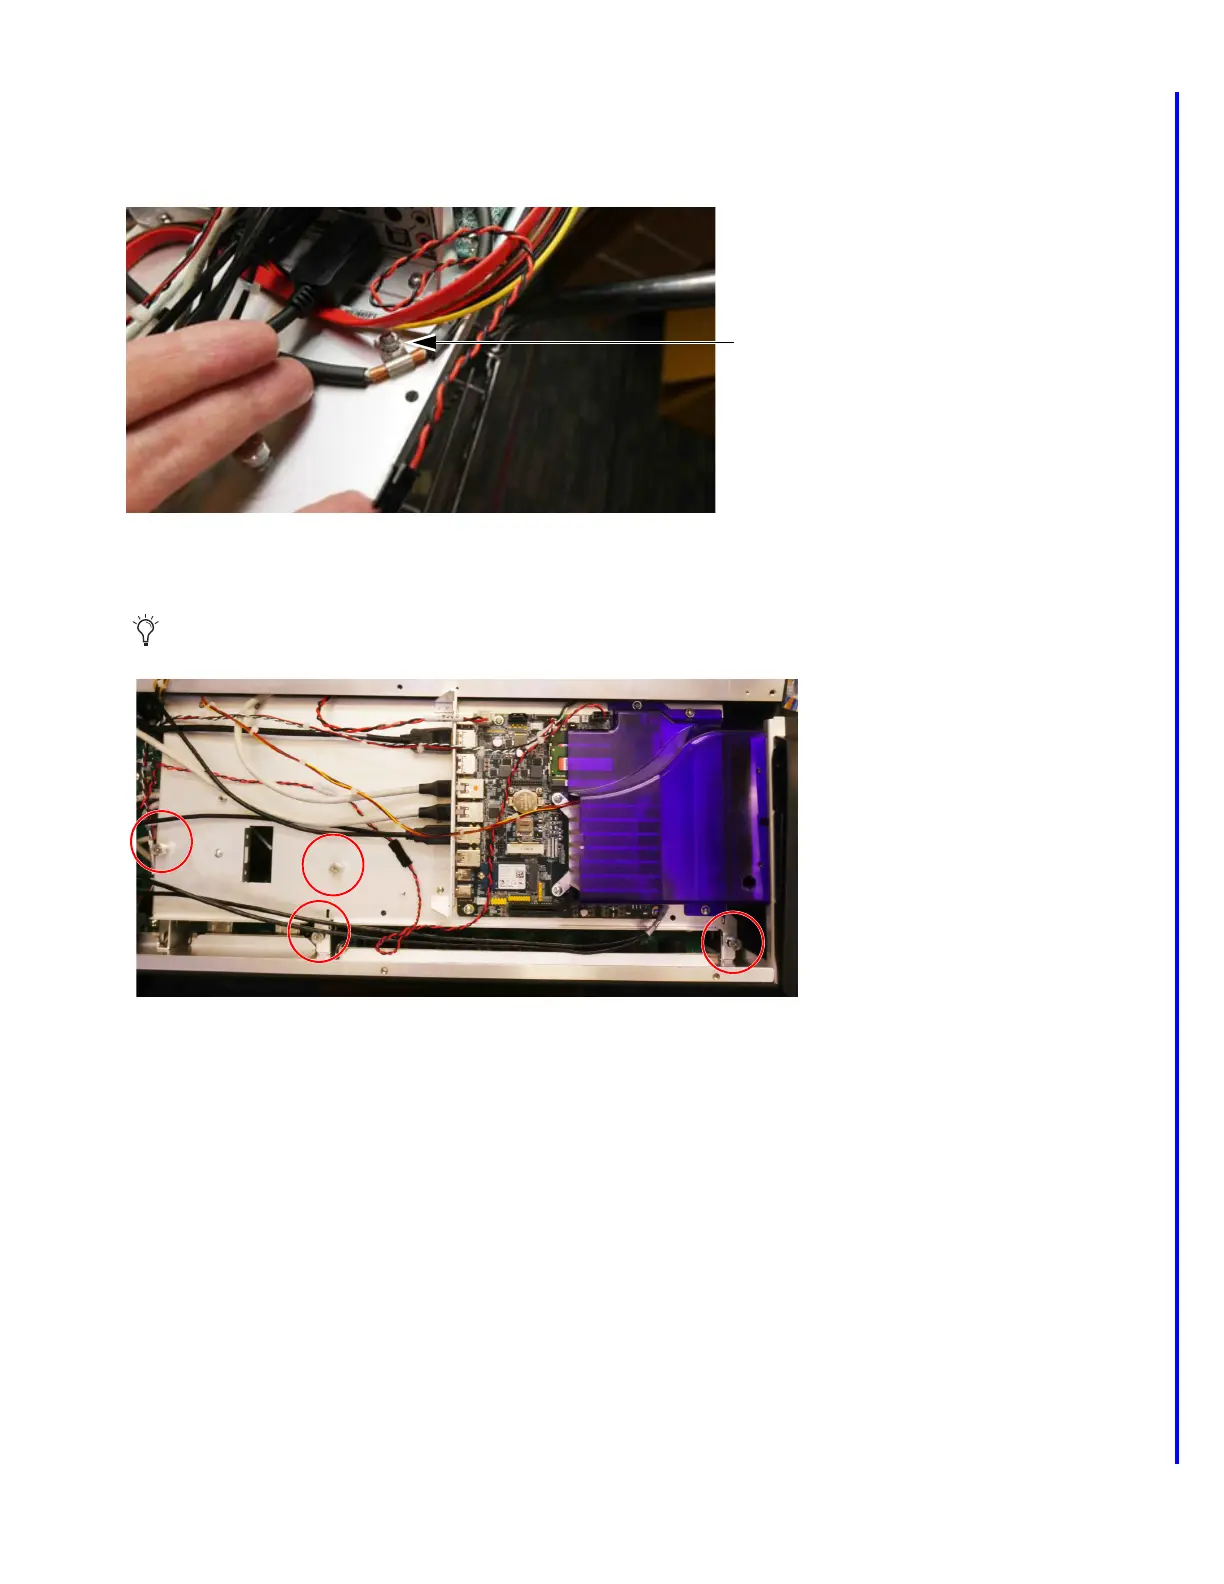
3 On S6L-24C the LVDS cable must be freed from the tray before the Tray can be removed. Do the following:
• Using a 9/32 nut driver, remove the nut securing the LVDS cable to the tray then remove the cable clamp from its bolt. Note
how the cable clamp contacts the copper segment of the cable (you will clamp the new cable similarly). This clamp is not used
on S6L-16C.
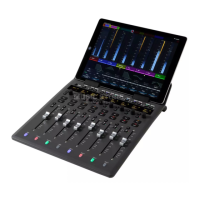
4 Locate the captive screws securing the SBC Tray to the chassis (these are in addition to the captive screw under the shroud that
you loosened earlier). S6L-24D, 32D, and 48D have four captive screws to loosen, shown below:
• S6L-16C has two captive screws to loosen (at the far left and far right in the image, above).
Figure 29. Bolt for LVDS cable
Though the image shown below is of an older series control surface, the location of the captive screws will be the same.
Figure 30. Fasteners securing the SBC Tray to the chassis on S6L-24C