S6L-24C and S6L-16C 16
S6L-24C/16C Only
S6L-24C and S6L-16C
This section provides instructions for replacing the SBC Motherboard in S6L-24C and 16C control surfaces.
Make sure to do all the following items before beginning the procedure.
1 Make sure you have assembled all Required Tools and Items.
2 Put on your anti-static wrist band and configure according to its instructions.
3 Shut down your system, and disconnect any cables connected to your S6L control surface.
4 Make sure your work area is clear of any debris.
1. Prepare the S6L Control Surface
Prepare the S6L control surface by removing the lower and upper back covers.
The steps required to remove the back cover vary depending on the model of S6L control surface.
To remove the covers from S6L-24C or 16C:
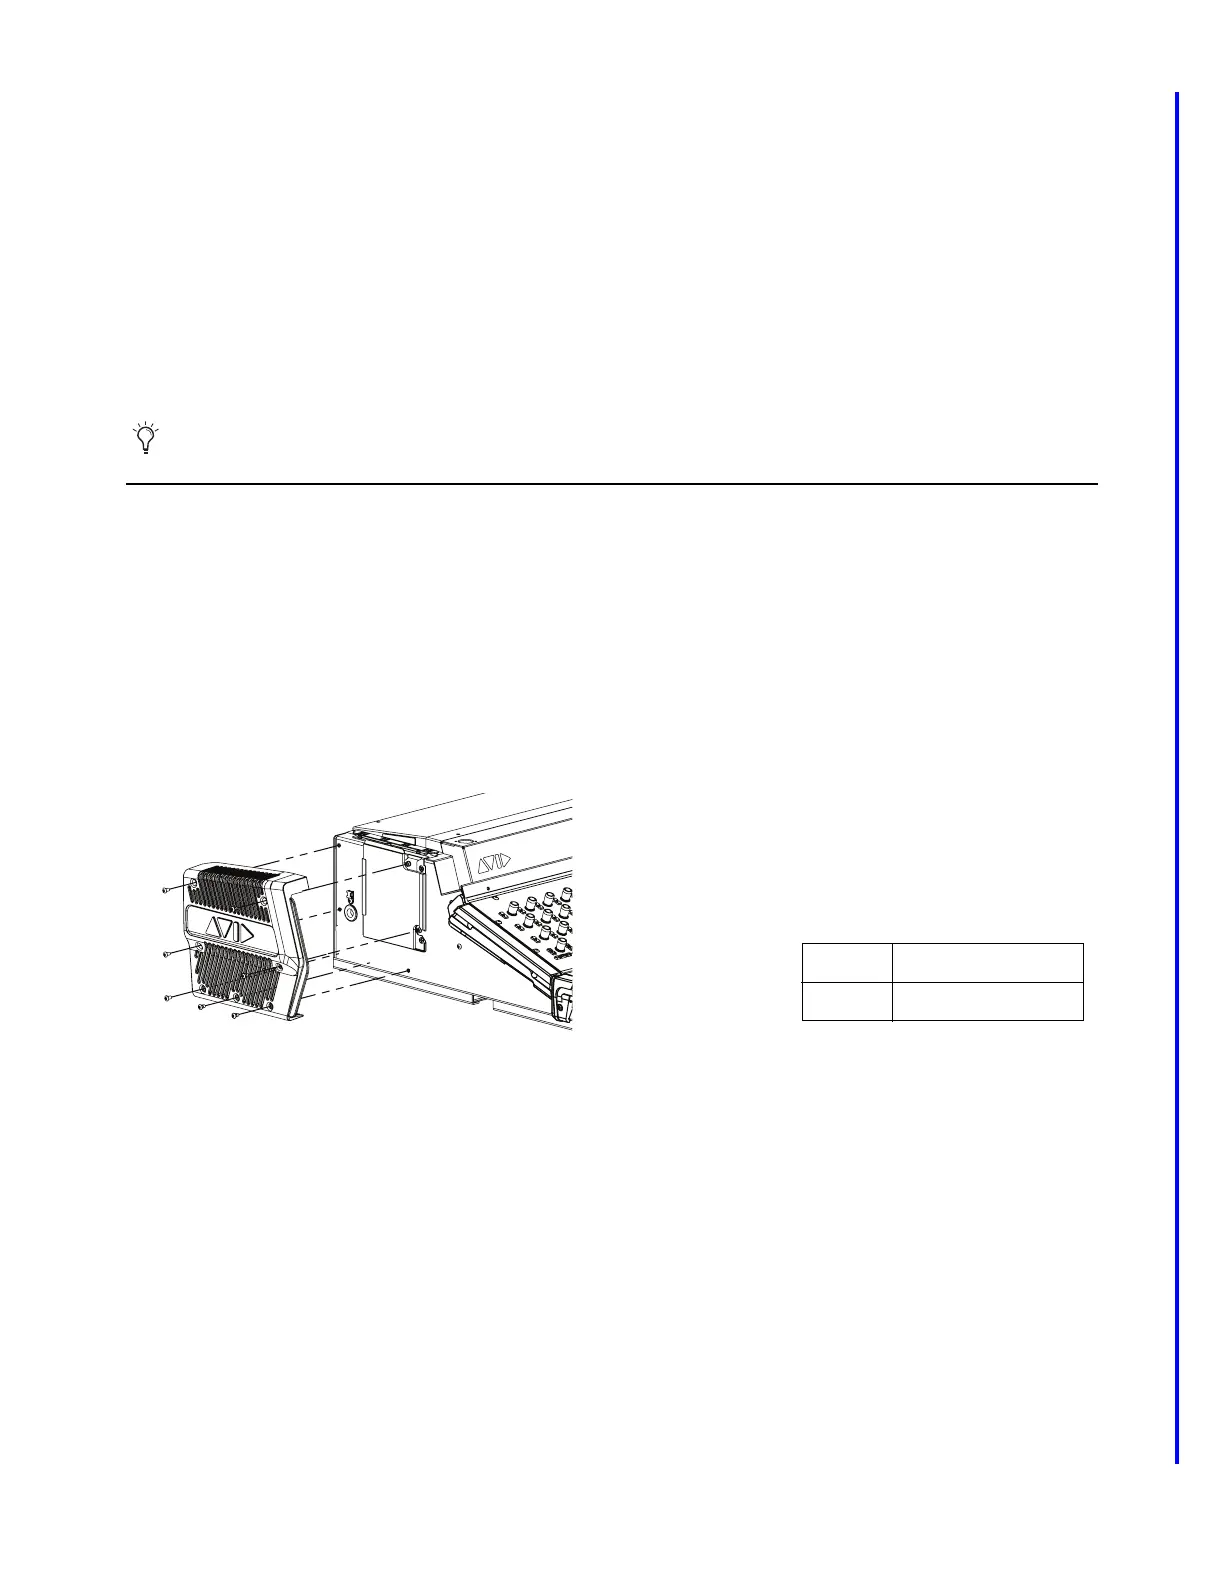
1 Using a 2.5 mm Hex driver, loosen or remove both the right and left End Caps by loosening the 7 fasteners securing the caps to
the chassis.
At minimum, one End Cap needs to be loosened enough to let you remove the top cover later in these instructions. If you remove
either (or both) of the End Caps completely, carefully disconnect the LED power cable before moving the cap away from the
chassis.
Throughout this procedure, keep the removed screws organized to simplify re-assembly.
Figure 22. End Cap fasteners
Fasteners:
Tool:
M4x8mm BHCS
2.5mm Hex driver