S6L-24D, S6L-32D, and S6L-48D 6
2. Remove the SBC Tray
The SBC Tray must be removed from the chassis before replacing the SBC or any of the I/O boards.
To remove the SBC Tray:
1 Use a #2 Phillips screwdriver to loosen the captive screw below the hole along the right edge of the shroud.
2 Using a #2 Phillips screwdriver, remove the two fasteners securing the top edge of the purple shroud to the top of the chassis.
Set the fasteners aside to use later when you reinstall the shroud.
3 Locate the captive screws securing the SBC Tray to the chassis (these are in addition to the captive screw under the shroud that
you loosened earlier). S6L-24D, 32D, and 48D have four captive screws to loosen, shown below:
Figure 5. Shroud access hole for captive screw below
Figure 6. Fasteners to remove from the top of the shroud
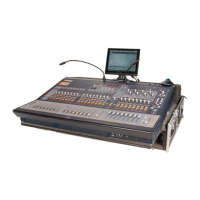
Though the image shown below is of an older series control surface, the location of the captive screws will be the same.
Figure 7. Fasteners securing the SBC Tray to the chassis on S6L-24D, 32D, and 48D
S6L-24D/32D/48D