S6L-24D, S6L-32D, and S6L-48D 15
Pair the New SBC with AVB
To pair the new SBC with AVB:
1 Enter Support Mode by holding down Control + Shift on the USB keyboard while typing SUPPORT.
2 When the Support shortcuts are now enabled message appears on the MTS, tap OK.
3 On the external screen, navigate to Options > Devices.
4 Enable Config mode: double-tap SHOW in the bottom right corner so it displays CONFIG mode.
5 While holding down the Control key on the USB keyboard, right-click (or touch and hold) on the S6L Control Surface icon and
choose
Pair Console to AVB Card from the pop-up menu.
6 If any devices, modules, or components do not seem to be functioning, power down all components and then check connections
to the new SBC.
7 When you have confirmed a successful installation, proceed to 6. Complete the Installation.
6. Complete the Installation
After confirming a successful installation of the new SBC, re-install the upper and lower back covers to complete the installation.
For details and illustrations, refer to the earlier instructions for disassembly.
To reassemble the S6L-24D, 32D, or 48D control surface:
1 Making sure to orient it correctly, re-install the upper back cover on the control surface and secure it with the fasteners you re-
moved earlier (refer to
Figure 4).
2 Making sure to orient the back cover correctly, slide the cover back into position on the control surface.
3 Reinstall the fasteners to secure the lower back cover to the S6L chassis.
Your S6L control surface is now ready for use.
Reminder: Make sure systems are not connected for IO Sharing while pairing with AVB.
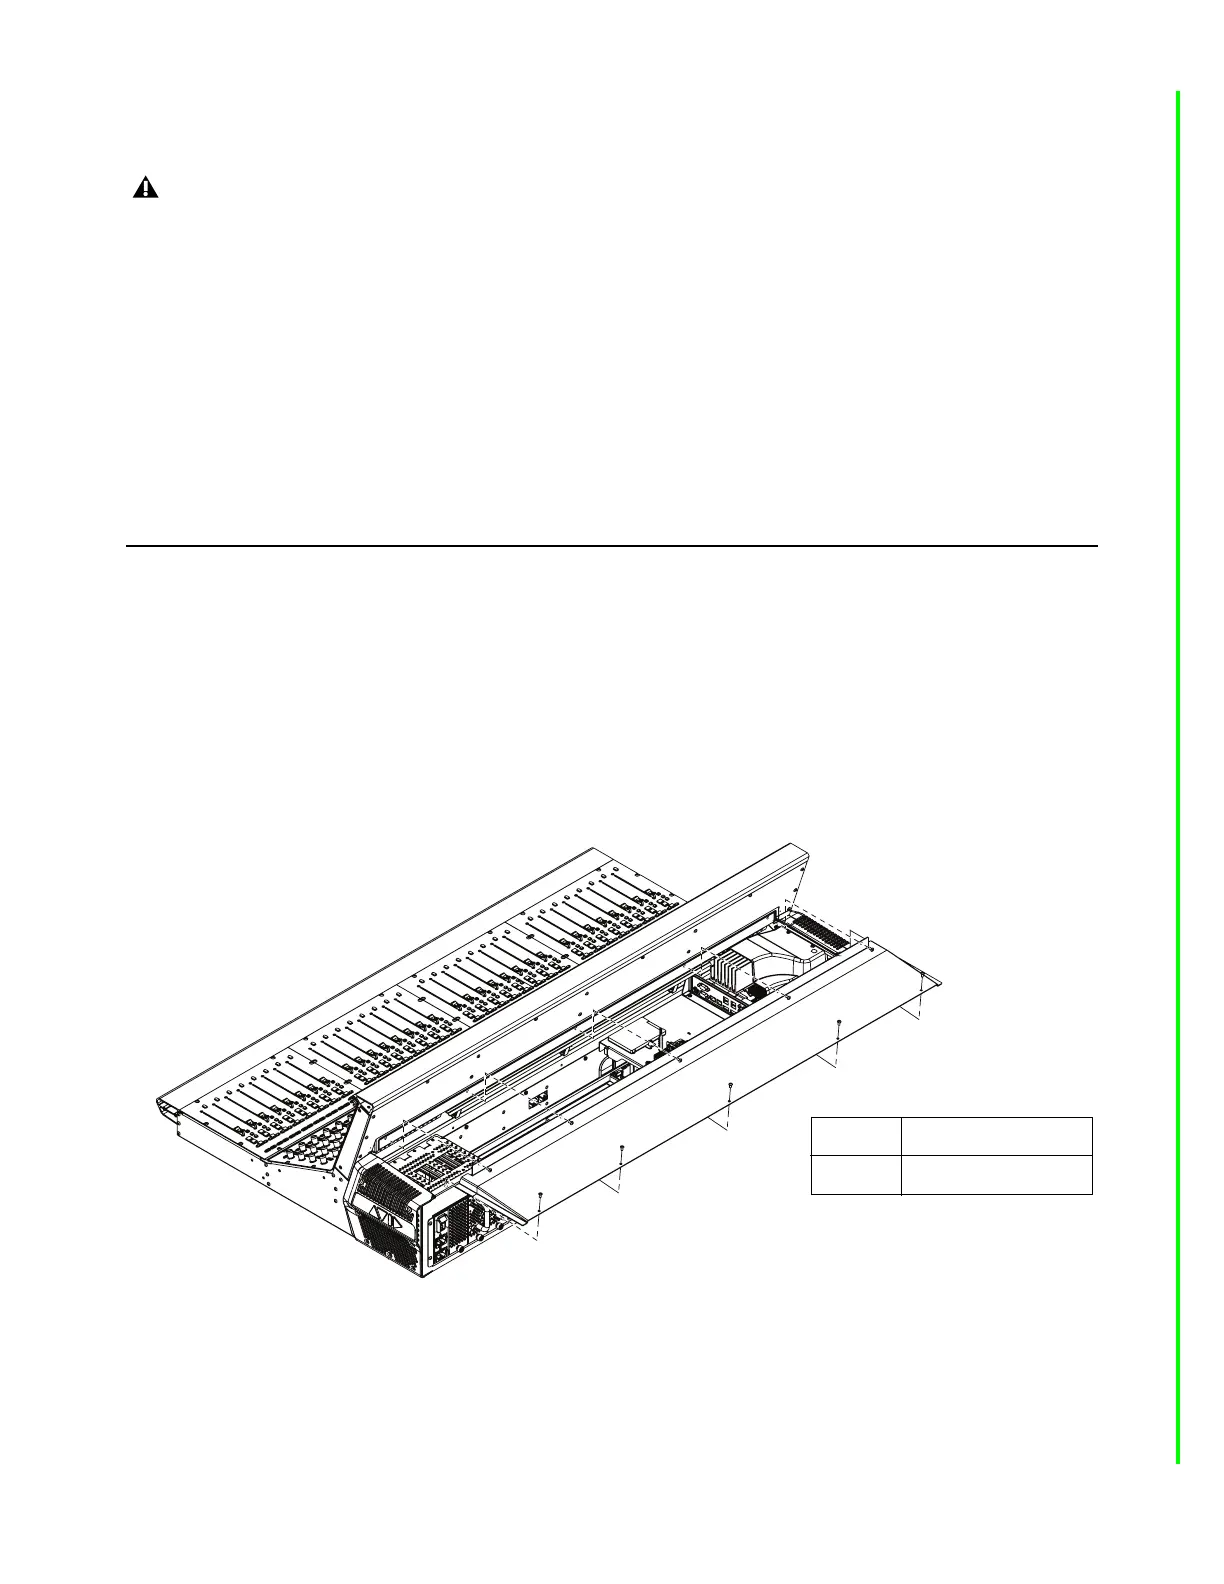
Figure 21. Replacing the S6L back cover (S6L-32D shown)
Fasteners:
Tool:
M4x8mm BHCS
2.5mm Hex driver
S6L-24D/32D/48D