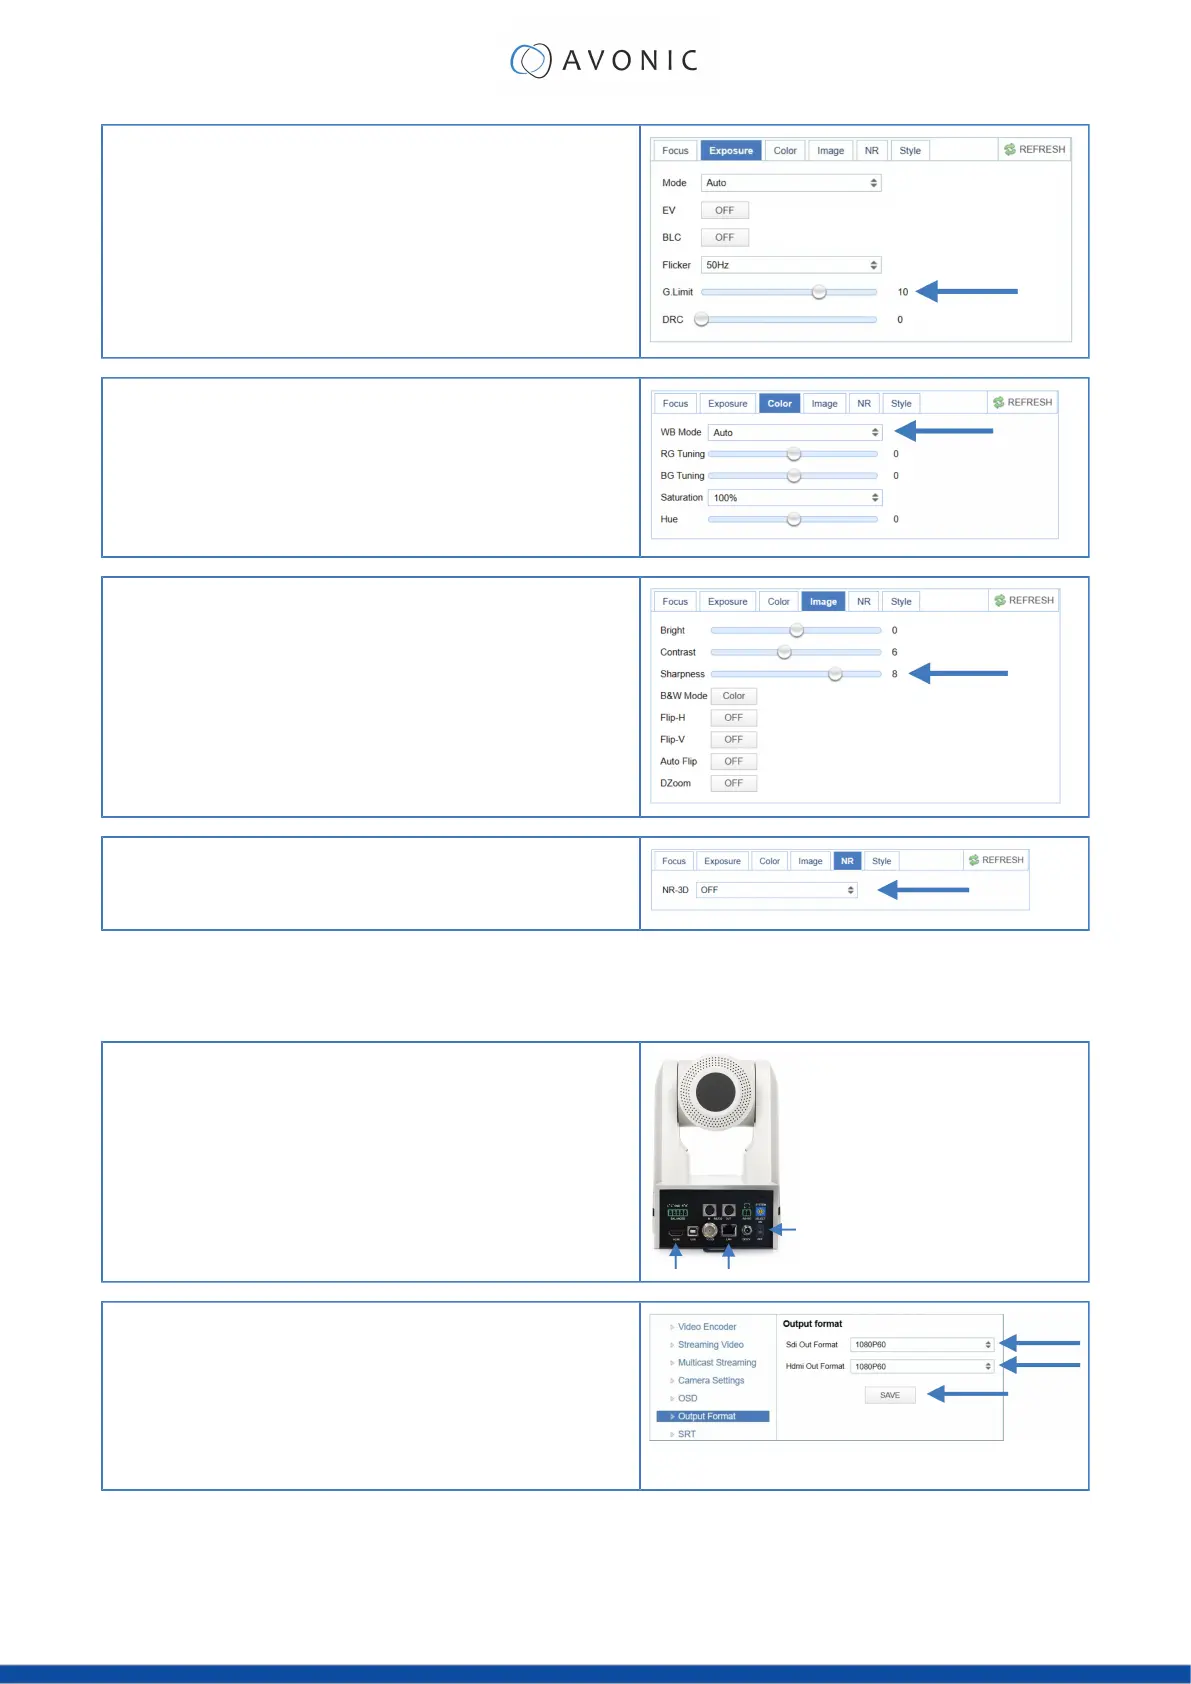
4. Exposure
Navigate to Exposure tab and set the Gain Limit (G.Limit). The higher the
Gain Limit, the lighter the picture will be.
5. Color
Navigate to the Color tab and set the WB Mode to Auto.
6. Image
Navigate to Image tab and set the sharpness. The higher the number, the
more sharp the picture will become.
7. Noise Reduction
Navigate to Noise Reduction tab and set the NR to OFF.
Basic camera setup using (semi)manual settings
Do you have fixed light conditions? Or is the filmed person or object not clear towards the background and the
autofocus has difficulties to find the correct focus? Then a (semi)manual setup is useful. Follow instructions below:
1.
Connect cables
•
Connect a CAT6a cable to the ethernet port of the camera and a
(PoE) network switch. If you use a standard switch, connect also the
power cable.
•
Connect a HDMI or SDI cable to the camera and a monitor.
•
Turn the ON/OFF button at the back of the camera to ON. When the
camera starts, the lens turns from back to forth and will finish with the lens
straight forward. This will take a few seconds.
2. Login and change output resolution
•
Use the standard IP address and login to the WebGUI.
•
Navigate to Output Format and change the video out format (over
HDMI or SDI) when your monitor does not support the (standard) 4K
video resolution. Change this to 1080p60 or lower. Click SAVE to save
the new resolution format.
•
You can also use the System Select at the back of the camera to
change the video output format.
27
 Loading...