www.axxessid.com
Installation & User Guide
AX200 Installation & User Guide – July 2007
35
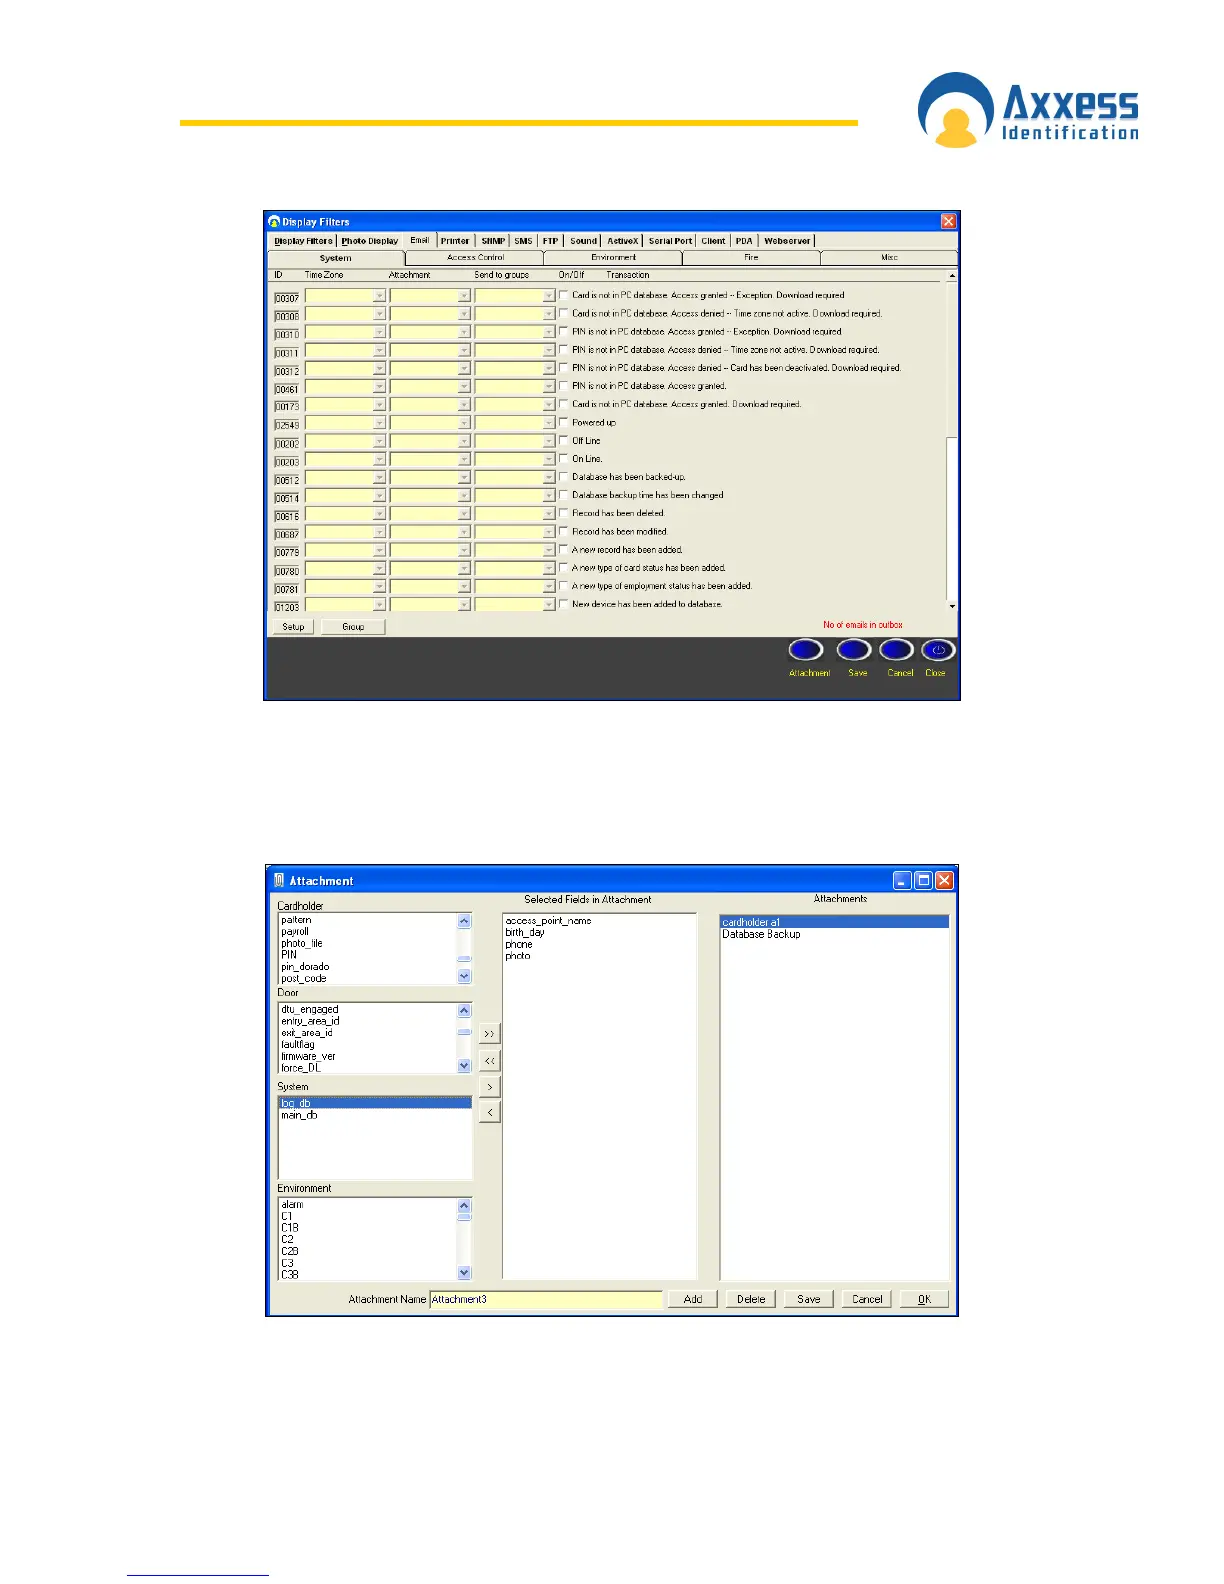
Select the appropriate transaction simply by ticking the check box next to it. From the time zone
column select the time zone during which you would like the email to be sent out. Selecting
“Always Access” would send the email at any time. The attachment menu gives you the ability to
specify what information you would like to be included in the email. To add a new attachment
click on the Attachment button on the bottom of the screen.
To create a new attachment press “Add” and enter an appropriate name. from the four lists on the
left hand side select the information that you would like to appear in the email and move them
over to the middle list by clicking on the > button. Once you’ve completed the selection of your
 Loading...