<12>
FRANÇAIS ESPAÑOL ENGLISH
Assembly
Loop Handle Installation
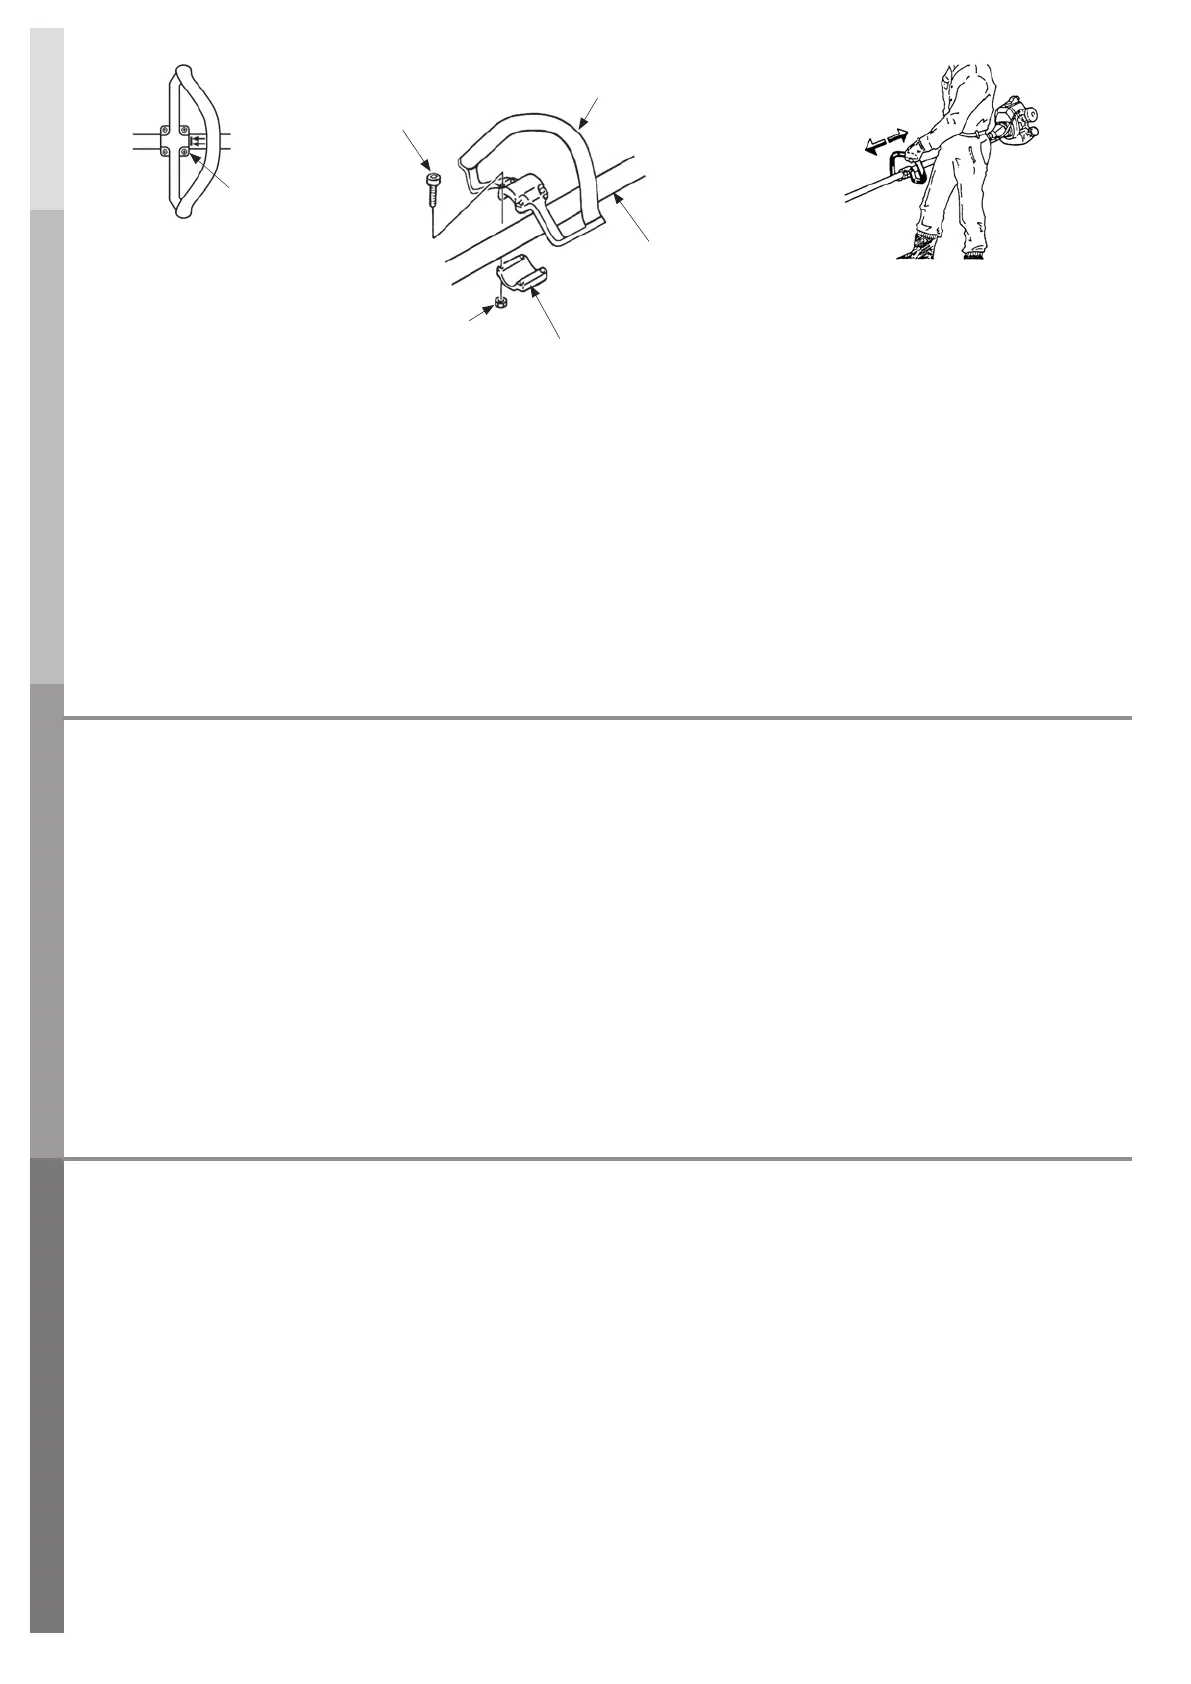
Loop handle must be assembled gearcase side from the arrow
(A). [#12-1]
1. Place the loop handle and the bottom clamp on the shaft
assembly. [#12-2]
2. Install the four screws and nuts. Leave the screws nger-tight.
3.
Reposition the loop handle up or down the shaft assembly to the
most comfortable position, but don’t over to the arrow mark. [#12-3]
4. Tighten the screws and nuts.
Montaje
Instalación del manillar en forma
La empuñadura circular debe montarse en el lateral del cárter
a partir de la echa (A). [#12-1]
1. Coloque el manillar en forma y el agarradera Inferior en el eje.
[#12-2]
2. Instale los cuatro tornillos y nueces. Deje los tornillos a prueba
del dedo.
3. Coloque de nuevo el Manillar en Forma o abajo el conjunto eje a
el la posición más cómoda, pero no te acerques a la marca de la
echa. [#12-3]
4. Apriete los tornillos y nueces.
Montage
Montage de la poignée avant
La poignée doit être assemblée au côté du renvoi d’angle à
partir de la èche (A). [#12-1]
1. Placez l’poignée avant et le collier de serrage inférieur sur le
arbre de transmission. [#12-2]
2. Installez les quatre vis et les écrou. Quittez les vis étanchées au
doigt.
3. Replacez l’poignée avant en haut ou en bas l’arbre de
transmission à le la position la plus confortable, mais ne passez
pas à la èche. [#12-3]
4. Serrez les vis et les écrou.
[#12-1]
Loop Handle
Manillar en Forma
Poignée avant
Screw (4)
Tornillo (4)
Vis (4)
(A)
Nut (4)
Tuerca (4)
Ecrou (4)
Bottom Clamp
Agarradera Inferior
Collier de serrageinférieur
Shaft Assembly
Conjunto eje
Arbre de transmission
[#12-2] [#12-3]