Accessories:
Check to make sure the following accessories
are provided:
(15) Turntable (16) Turntable support (17)
Coupling
Place the turntable support in the centre of the
oven oor so that it can freely rotate around
the coupling. Then place the turntable support
so that it locates rmly into the coupling.
To avoid turntable damage, ensure dishes and
containers are lifted clear of the turntable rim
when removing them from the oven.
The waveguide cover is fragile and
as such care should be taken when
cleaning inside the oven to ensure that
it is not damaged.
Always operate the oven with the turntable
and turntable support tted correctly. This
promotes thorough, even cooking. A badly
tted turntable may rattle, may not rotate
correctly and could cause damage to the oven.
All food and containers of food are always
placed on the turntable for cooking
The turntable rotates clockwise. The rotary
direction may change each time you start
the oven. This does not affect cooking
performance.
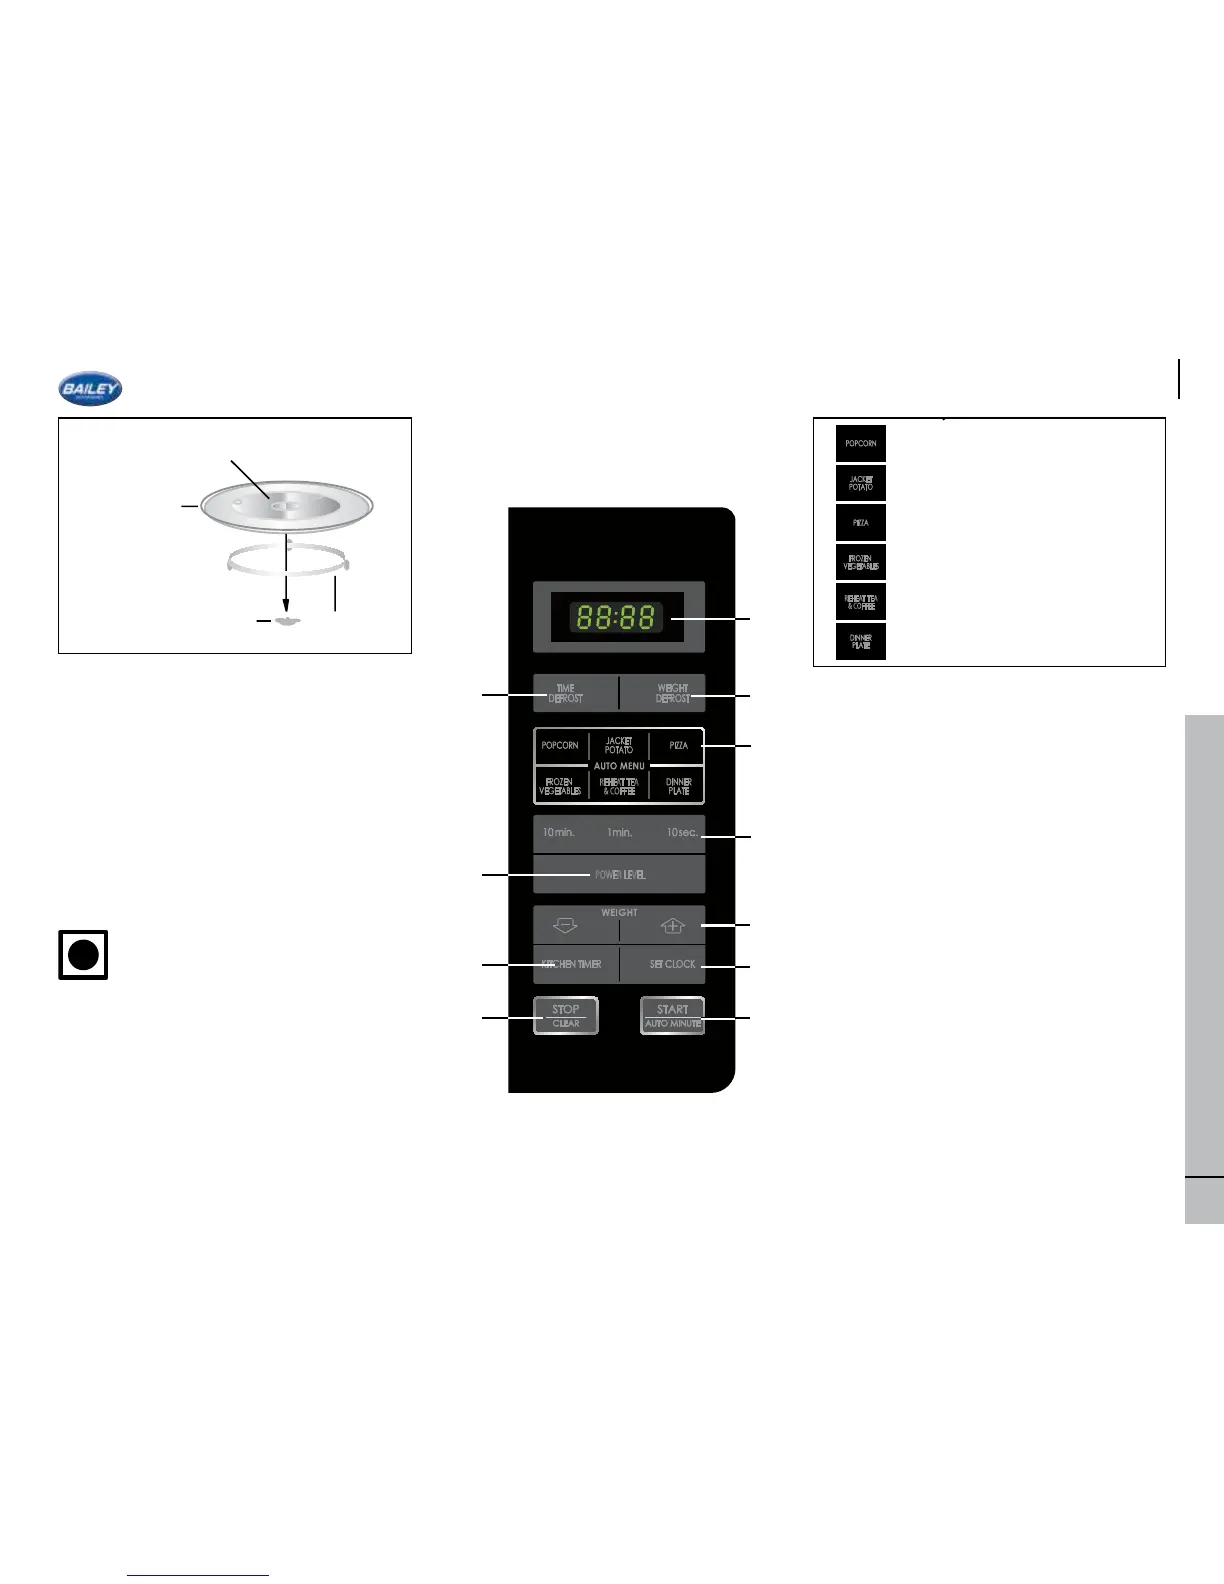
1. DIGITAL DISPLAY
2. WEIGHT DEFROST key
3. TIME DEFROST key
4. AUTO MENU Keys
5. TIME Keys
6. POWER LEVEL Key:
Press to select microwave power level.
7. WEIGHT keys (up and down)
8. KITCHEN TIMER key
Press to use as a minute timer, or to programme
standing time.
9. SET CLOCK key
10. START/ AUTO MINUTE key
11 STOP/CLEAR key
Setting the Clock
Your oven has a 24 hour clock, this will
loose time each time the motorhome is
disconnected from 230v power.
1. Press the SET CLOCK key once and “0:00”
willash
2. Press the time keys and enter the current
time. Enter the hours by pressing the 10min.
key and enter the minutes by pressing 1 min.
and 10 sec. keys.
3.Pressthe SET CLOCK key tonish clock
setting.
ENGLISH
GB-4
OVEN AND ACCESSORIES
OVEN
1. Door
2. Door hinges
3. Oven lamp
4. Waveguide cover (DO NOT REMOVE)
5. Control panel
6. Coupling
7. Door latches
8. Oven cavity
9. Door seals and sealing surfaces
10. Door safety latches
11. Ventilation openings
12. Outer cabinet
13. Power supply cord
14. Door opening button
ACCESSORIES:
Check to make sure the following accessories are
provided:
(15) Turntable (16) Turntable support (17) Coupling
Place the turntable support in the centre of the oven
floor so that it can freely rotate around the coupling.
Then place the turntable on to the turntable support
so that it locates firmly into the coupling.
To avoid turntable damage, ensure dishes and
containers are lifted clear of the turntable rim when
removing them from the oven.
NOTE: When you order accessories, please mention
two items: part name and model name to your
dealer or SHARP authorised service agent.
NOTES:
• The waveguide cover is fragile. Care should be taken when cleaning inside the oven to ensure that it is not
damaged.
• Always operate the oven with the turntable and turntable support fitted correctly. This promotes thorough,
even cooking. A badly fitted turntable may rattle, may not rotate properly and could cause damage to the
oven.
• All food and containers of food are always placed on the turntable for cooking.
• The turntable rotates clockwise or anti-clockwise. The rotary direction may change each time you start the
oven. This does not affect cooking performance.
13
12
11
10 89 6 47
12
3
5
14