Remis Concertina Cab blinds
Remis concertina blinds are tted to the front
windscreen and side windows in the cab of your
motorhome. Bailey has chosen to t these
blinds to ensure that when you are sleeping
in your vehicle you are not disturbed by the
outside light.
Due to the nature and angles that these blinds
inhabit it’s important that they are opened and
closed in the correct manner.
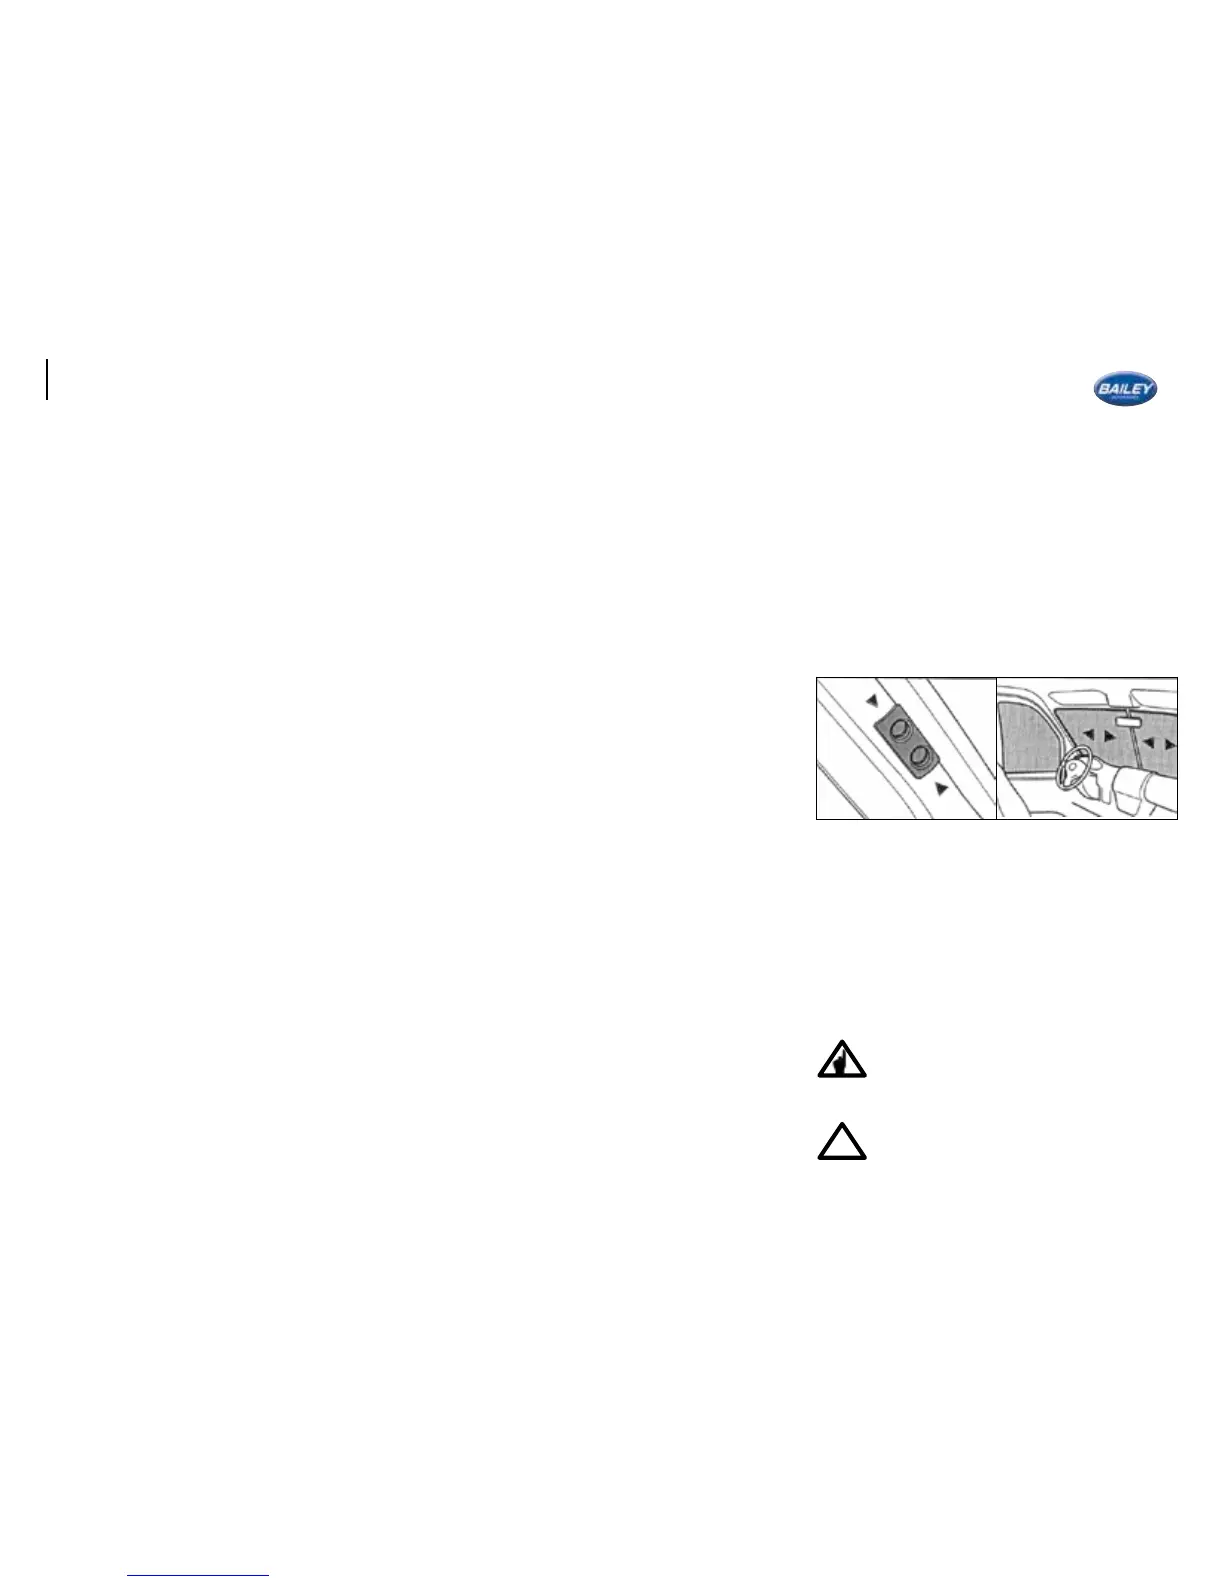
Usage of the front system
To release the front blinds, push both buttons
in the directions of the arrow. Pull handle
from the left and right towards the middle
of the windscreen. The handles will lock
automatically due to the magnetic catch. To
open, pull the handles apart in the direction of
the arrows and pull them back to their resting
position. Lock the handle in place by pushing
it into the frame.
Always ensure that both sides are
locked in place prior to commencing
travel.
Do not swing your forward visors to the
drivers or passenger door as this will
damage the blinds.
Remis Remibase Plus Window Blinds.
Please note the blinds should not be in the
closed position when the vehicle is travelling
or when in storage for extended periods.
The sunscreen is housed at the bottom and the
yscreen at the top of the blind. To open either
hold the cross bar and pull up or down. Both
blinds can be fully extended to totally cover
the window or can meet at any position to
give sun shading/privacy and protection from
insects entering the vehicle.
The blinds are pre set to the correct tension.
If re tensioning is required please follow these
steps:
The blind needs to be taken down from the wall
by unscrewing the 4 corner screws.
Lay the blind face down on a table with the
cross bars of both blinds meeting in the middle.
The black cords re-tension the y screen and
the white cords re-tension the sun screen.
The cords are xed at either side with a screw.
Loosen this screw and gently pull the cord
5mm tighter and repeat on the other side
ensuring the crossbar is level.
Test the tension. This process can be repeated
if necessary.
The blinds over the kitchen sink and in the
bathroom are of a different construction and
can be re-tensioned while xed to the wall. On
the side of the cassettes are two plastic screw
heads. Using a screw driver turn these gently
clockwise until the correct tension is reached.
Test the tension after each turn.
Cleaning:
The actual plastic proles can be cleaned with
a non abrasive cleaner and damp soft cloth.
The blinds should only be dusted lightly with
a soft cloth.
The blinds over the kitchen sink and in the
bathroom have a special sun screen that can
be cleaned with a non abrasive cleaner and
damp cloth. The y screens should only be
dusted with a soft cloth.
84