Manual 2100-705B
Page 20 of 43
Installing Remote Indoor Temperature/Humidity Sensor(s)
One remote indoor temperature/humidity sensor and 35' of 18 gauge 5-conductor shielded cable is included with the
controller. This sensor must be installed for proper operation. Mount the temperature/humidity sensor in a location
least likely to be affected by open doors, rack-mounted fans, radiant heat sources, etc. Locating the sensor between
both return grilles is often the best location, but every installation is unique. Location height should be approximately
60" above the floor. The sensor is best mounted on a 2" x 4" junction box
and it is recommended that the cable be in
conduit
. Use shielded cable to connect to controller.
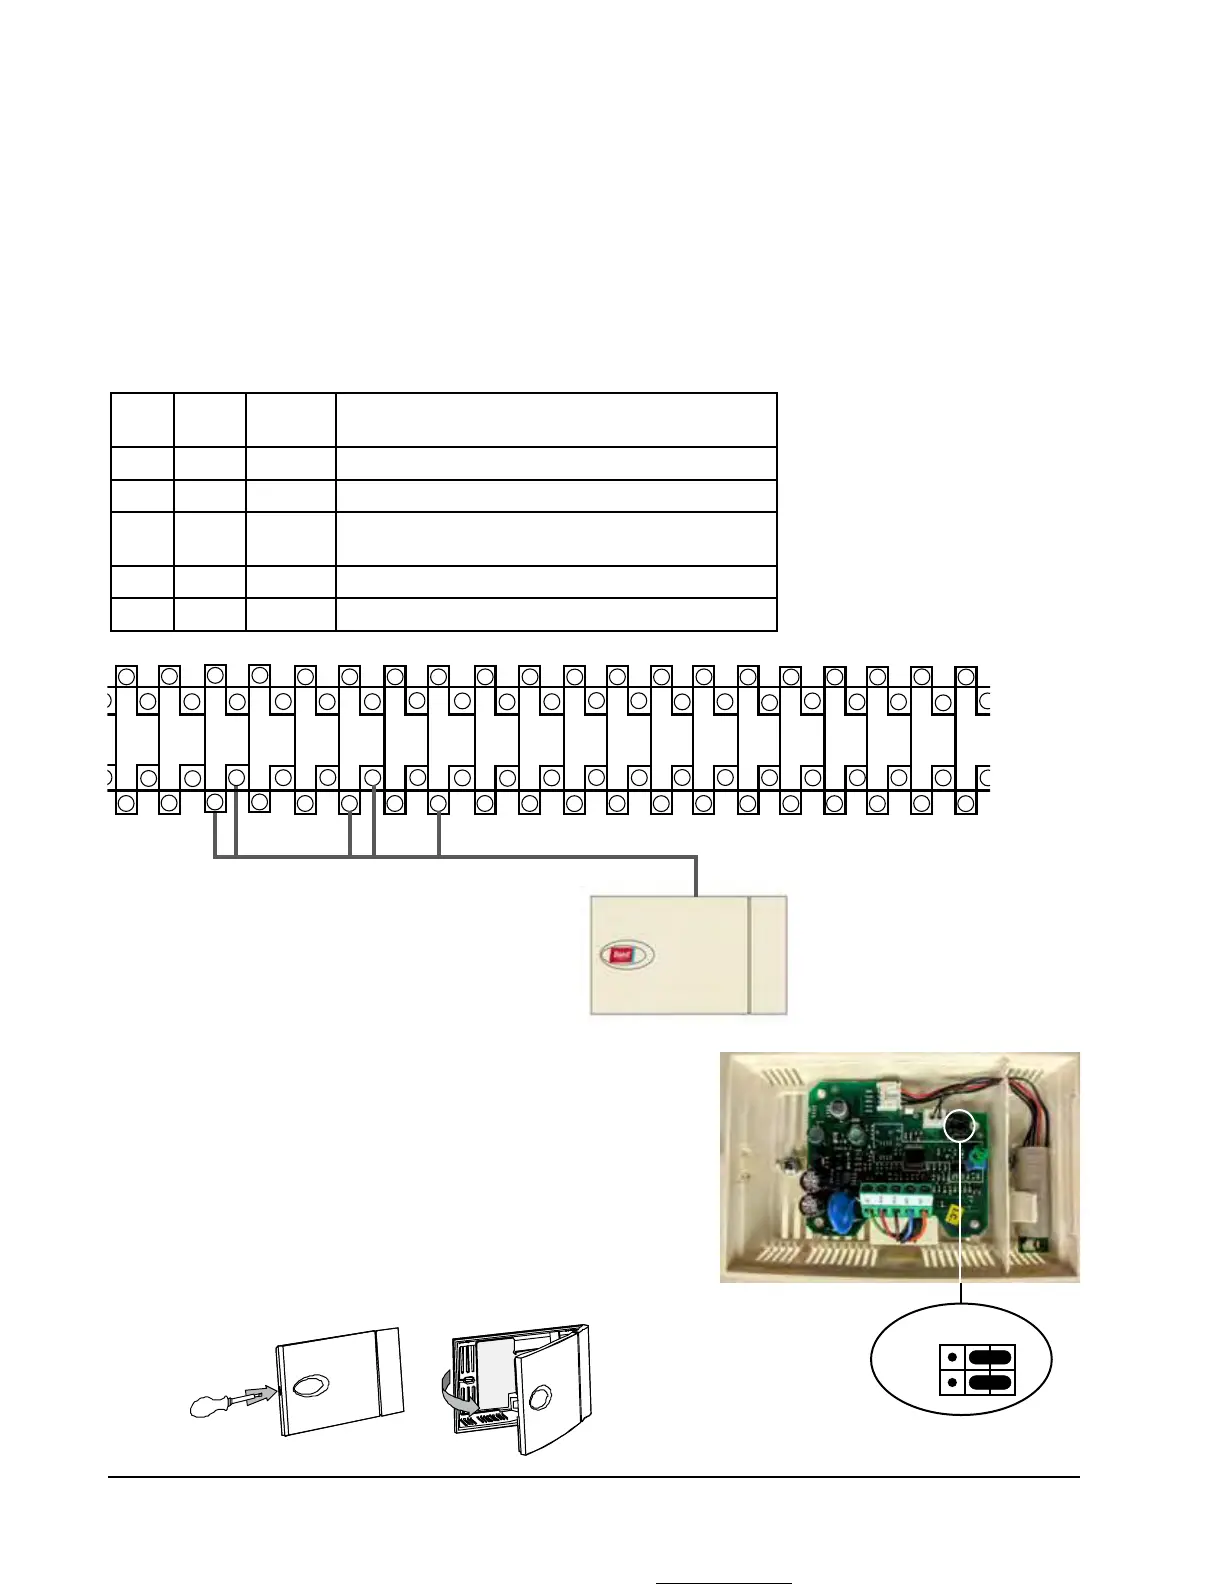
FIGURE 16
Remote Indoor Temperature/Humidity Sensor Installation
1. Connect wires from the 18 gauge shielded cable to terminals #12, #13, #18, #19 and #22.
2. Connect the other end of the shielded cable to the sensor terminals.
Be sure wires are connected to proper terminals as shown in table
above.
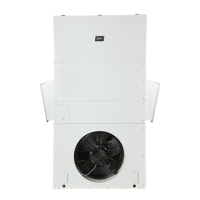
Sensor jumpers need to be positioned for 0-1 V. With sensor oriented
as shown in image to right, move both jumpers to right position (DP1
and DP2 set to OFF). This applies to all indoor temperature/humidity
sensors connected to the LC controller. See illustration mounted
inside of sensor cover for further detail on jumper position.
Earlier versions of this sensor may be mounted in a different
orientation which would affect the positioning of the sensor jumpers.
See page 42 for additional information on sensor orientation.
TB#
Wire
Mark
Sensor Description
18 B6 NTC OUT Indoor Remote Sensor (Zone 1)
19 GND NTC OUT Ground
12 B2 OUT H Remote Indoor Humidity Sensor: 0-1 VDC (Zone 1)
13 GND M (GO) Ground
22 +VDC + (G) Power for B2
DP1
DP2
Jumper
9
17
19
21
25
23
27
29
31
35
33
37
11 13
15
39 4341 45
8 10 12
14
16 18
20
22 24
26
28
30 32 34 36
38
40
42 44
46