54
© Baxi Heating UK Ltd 2017
18.0 External Low Voltage Controls
18.6 Connecting the Optional 7 Day Wired Sensor
NOTE: The yellow link wire between terminals 1 & 2 on
terminal block M1 MUST be removed when fitting the
7 Day Wired Sensor.
1. Ensure that the power to the boiler is isolated.
2. Remove the backplate from the unit by pressing down on
the rear tab and easing apart.
3. Locate the sensor and use wiring as described in the
literature supplied with it.
4. Pass the wiring through the slots in the backplate and
connect as shown opposite to 2 & 3 on the sensor backplate
and 1 & 2 open therm connections (not polarised) of boiler
terminal M2.
5. Complete fitting as described in the sensor literature, turn
the power back on and set the controls to the requirements of
the user.
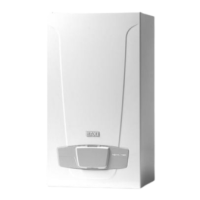
Baxi Optional 7 Day Wired Sensor