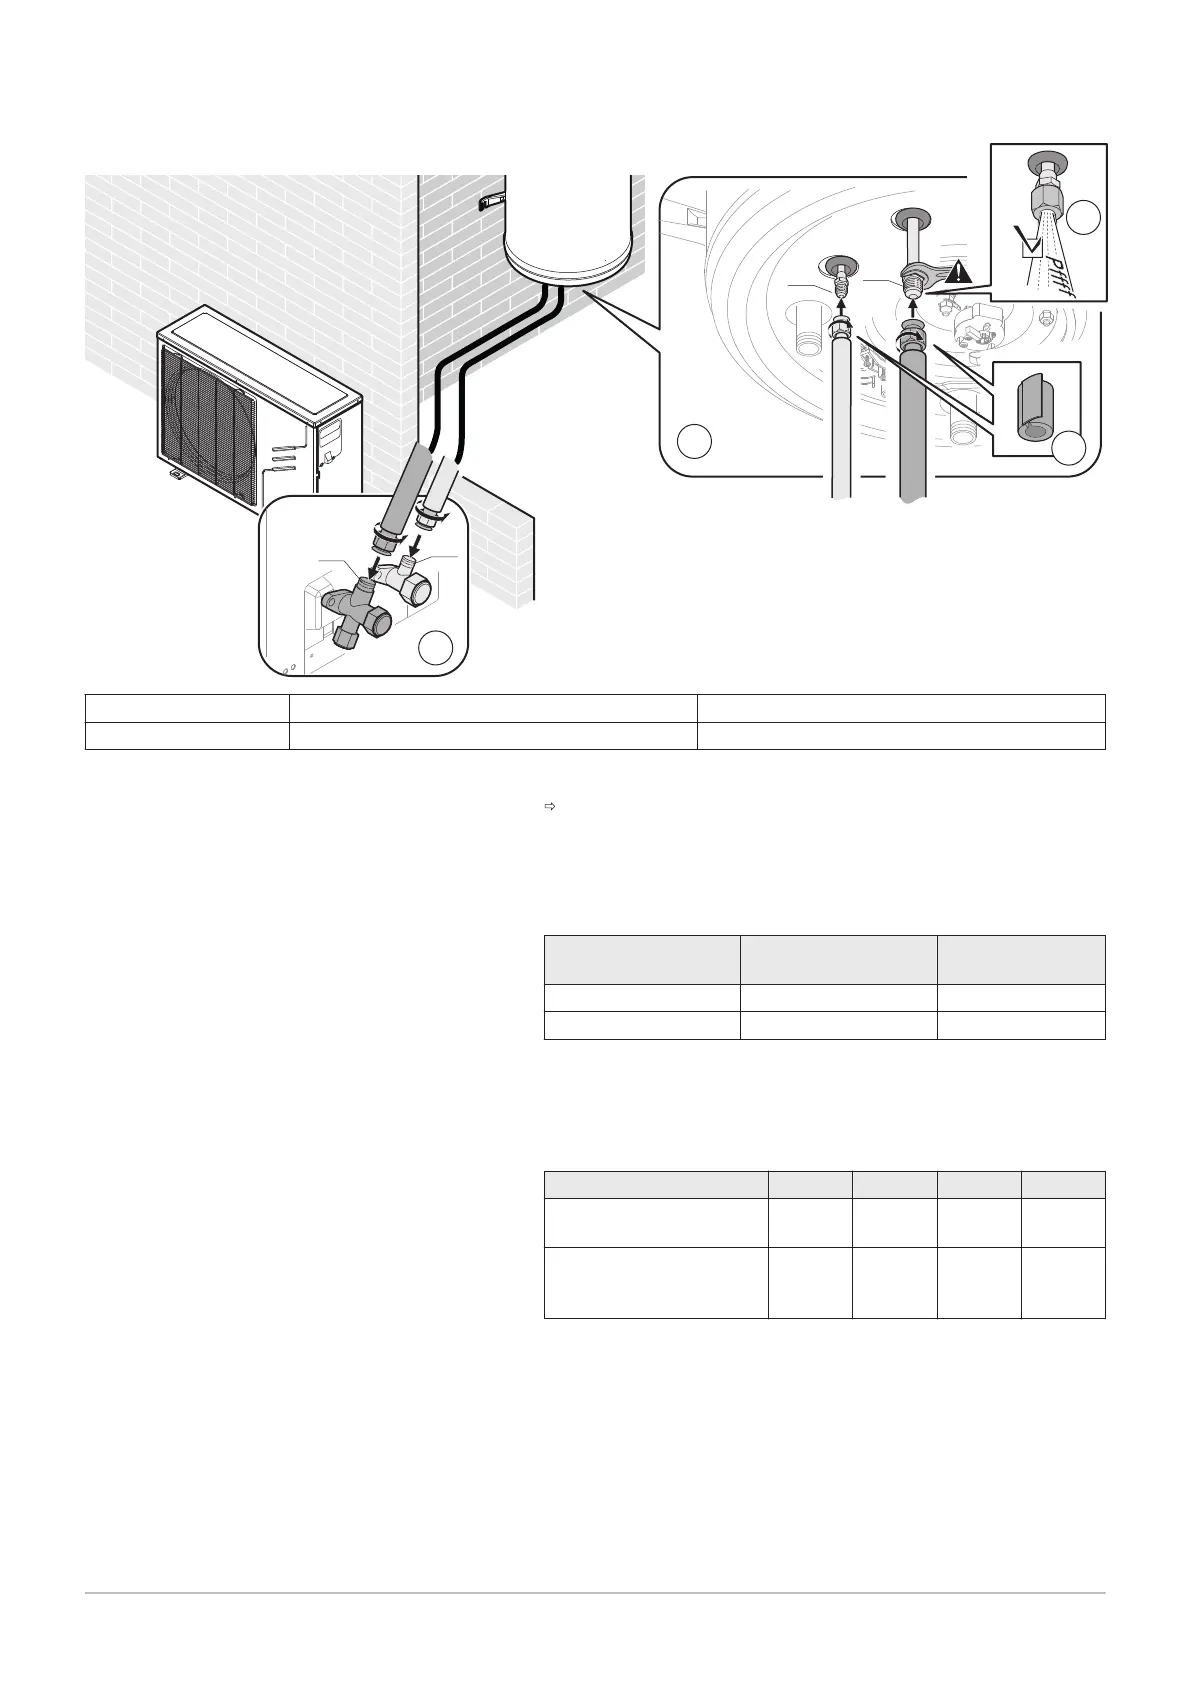
Fig.41
3/8" fitting supplied on the outdoor unit supplied in the documentation bag
1/4" fitting supplied on the outdoor unit supplied on the domestic hot water tank
1. Partially unscrew the 3/8” adaptor on the domestic hot water tank.
If no release noise can be heard, return the product to the after-
sales service.
2. Connect the refrigerant connections to the domestic hot water tank
and the outdoor unit by applying refrigerant oil to the beaded parts to
facilitate tightening and improve the seal, while keeping to the
following tightening torques:
External diameter of
the pipe (mm/inch)
External diameter of
the cone fitting (mm)
Torque load (N.m)
6.35 - 1/4 17 14 - 18
9.52 - 3/8 22 34 - 42
3. Carry out a seal test of the refrigerant circuit, putting it under a
pressure of up to 25 bar, in 5 bar increments.
4. Place the refrigerant installation under vacuum using a vacuum gauge
and a vacuum pump.
5. Check the pressure according to the recommendations table below:
Outside temperature in °C ≥ 20 10 0 - 10
Pressure to reach in Pa
(bar)
1000
(0.01)
600
(0.006)
250
(0.0025)
200
(0.002)
Evacuation time after
reaching the pressure in
hour(s)
1 1 2 3
6. Open the valves with a hexagonal key by turning anti-clockwise until it
stops.
7. Fit the insulation on the refrigerant connections on the domestic hot
water tank side.
The refrigerant connection insulation pieces are provided in the
documentation bag.
7 Installation
7740327 - v03 - 03122019 39