B. Attach a manometer to the 1/8" NPT outlet
pressure tap and one to the 1/8" NPT inlet
pressure tap on the gas valve and turn the
gas supply and gas valve on.
C. Remove the pressure regulator adjustment
cap screw from the main gas valve to
access the adjustment screws.
D. Turn the main gas valve on, turn the oven
on and set the temperature to call for heat.
E. With the burner flame established, insure
the proper line pressure (adjust supply
regulator if necessary) and adjust the outlet
manifold pressure regulator to:
3.5" W.C. (Natural Gas)
10.0"W.C. (Propane Gas)
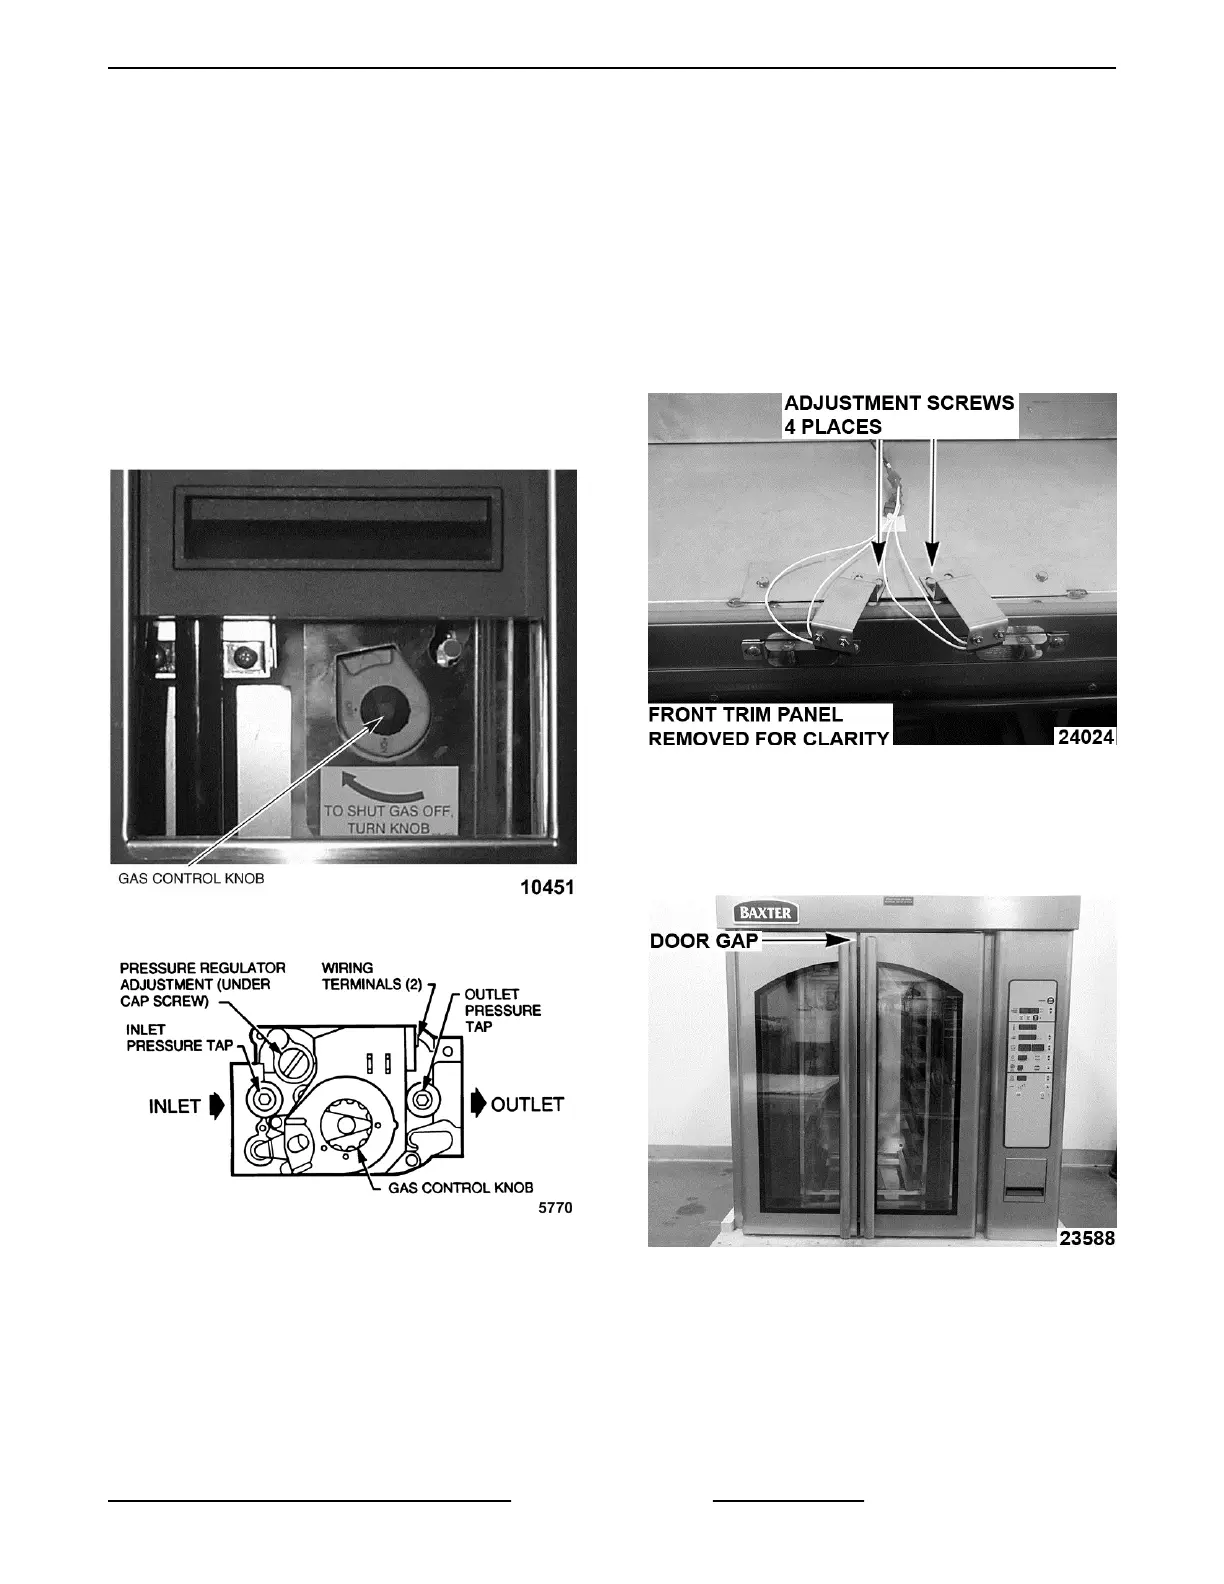
4. Door Switch Adjustment.
If the rack does not rotate and the circulation fan
does not come on, then the door switches may
be out of adjustment. The door switches are
located on top of oven.
A. Turn the power On.
B. Access door switches on top of oven.
C. With the oven doors closed loosen door
switch screws and position door switch
bracket until door switch closes.
D. Secure door switch screws and put oven
into operation.
NOTE: If unable to determine which switch is not
closing, adjust switches inward / outward until
switches are activated when doors are completely
closed and deactivated when doors are opened more
than ½".
Fig. 9
5. Door Adjustment Procedure.
A. Check to ensure that the door gap is a
consistent 3/8" between the doors. Check
from top of doors to bottom of doors.
Fig. 10
NOTE: If door gap needs to be adjusted - adjust hinge
plates to obtain consistent 3/8" gap.
OV310 Series Mini Rack Oven Installation Instructions - INSTALLING OVEN
Page 11 of 16 F25422 Rev. B (0917)
 Loading...