If several tubular drives are to be connected in parallel, you can deactivate the program-
ming mode on one tubular drive by switching the radio switch to the outside position after
turning the power on.
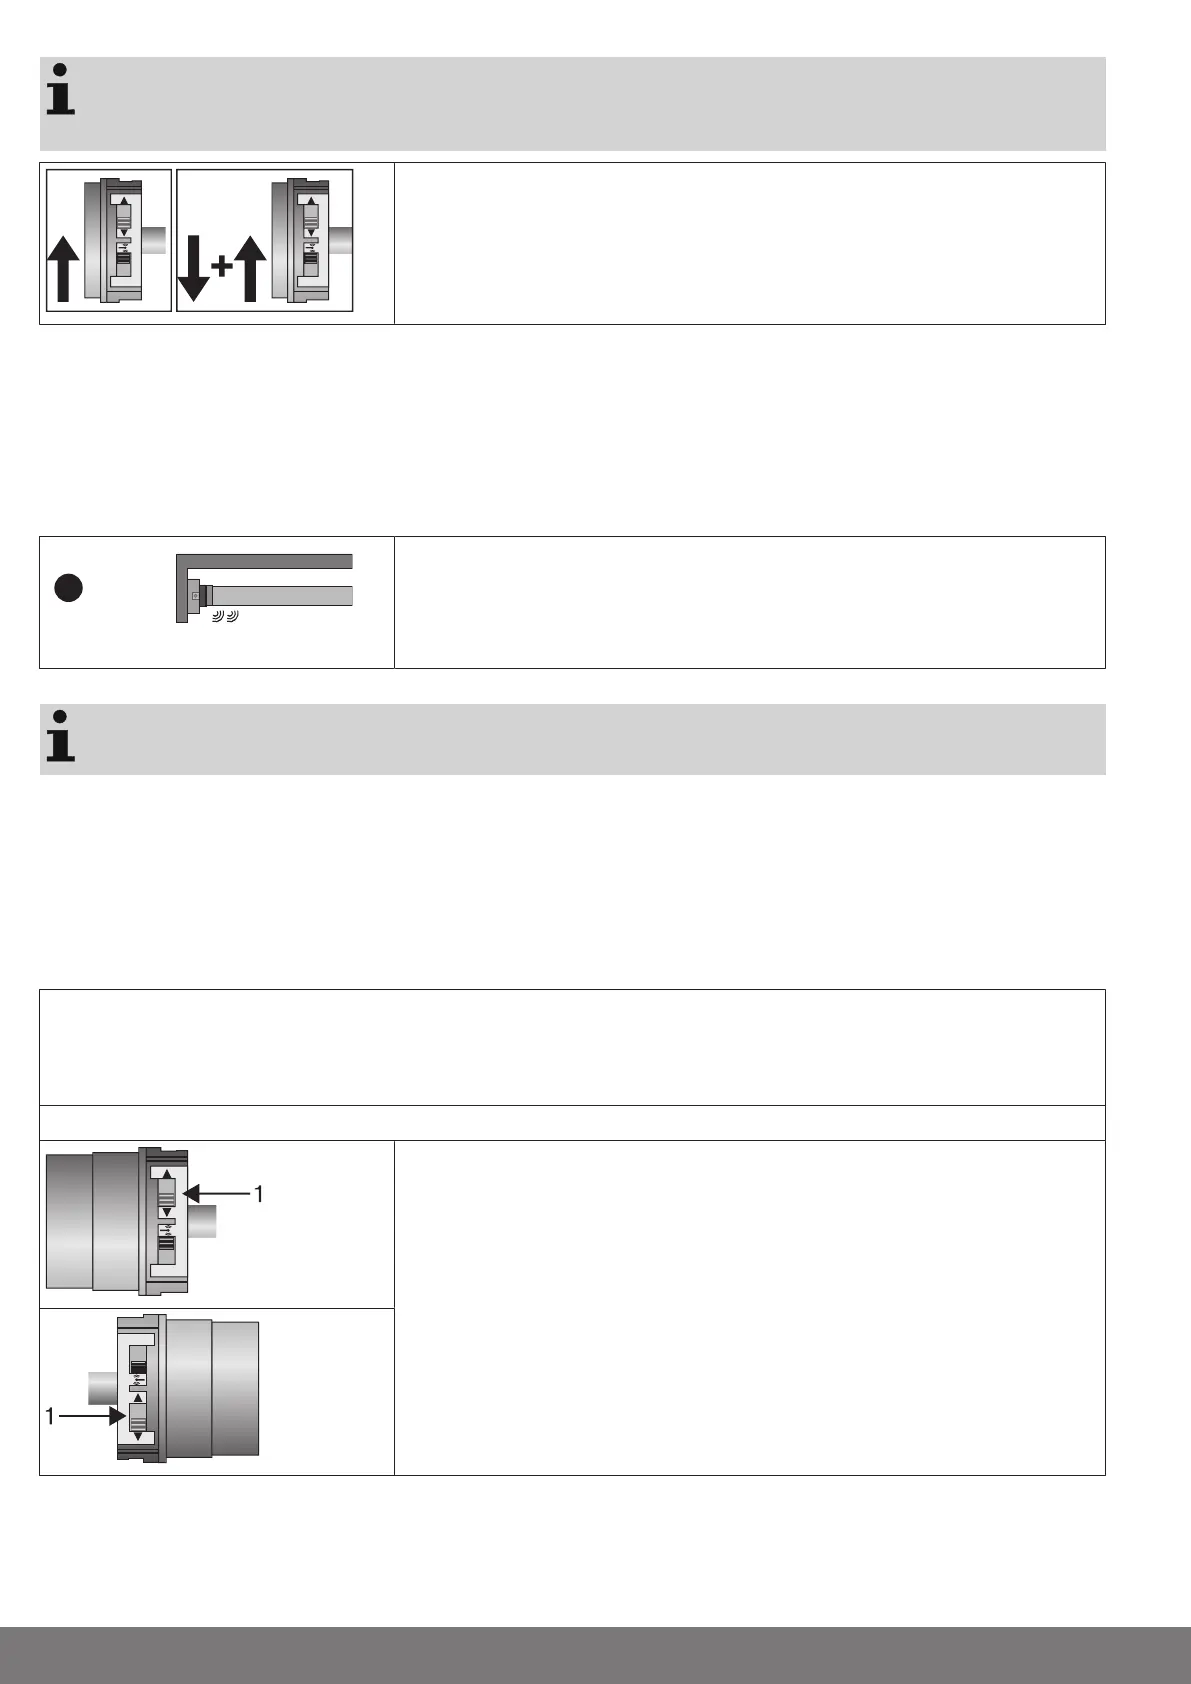
Readying the tubular drive for programming with the radio switch
Switch the radio switch to the inside position. If the radio switch is already in this posi-
tion, switch it to the outside and back to the inside position.
► The tubular drive is ready to program for 3minutes
Intelligent installation management
Limit position status indicator
A brief stopping and restarting indicates that no limit position has been set in that direction of movement.
Completion of installation following automatic setting of limit positions
The drive saves the limit position permanently once the upper limit position is reached 3 times in succession. Installation is then
complete. If the limit position is set above a point, this is stored permanently.
Programming the master transmitter
Press the programming button for 3 seconds when it is ready to programme.
▻ The tubular drive makes a clicking sound to confirm.
► The programming process is now complete.
If a transmitter is already programmed on the receiver, press the programming button for
10 seconds.
Checking that the running direction is correct
There are 2 ways to change the direction of rotation
• Changing direction of rotation via the direction switch
• Changing direction of rotation via the master transmitter
Changing direction of rotation via the direction switch
Press the UP or DOWN button
▻ The shading solution runs in the desired direction
► The running direction is OK.
If the shading solution runs in the wrong direction, the running direction must be switched. Proceed as follows:
Switch the direction switch (1) to the opposite position.
▻ The running direction will now have changed.
► Check the running direction again.
12