14
MIDI FOOT CONTROLLER FCB1010
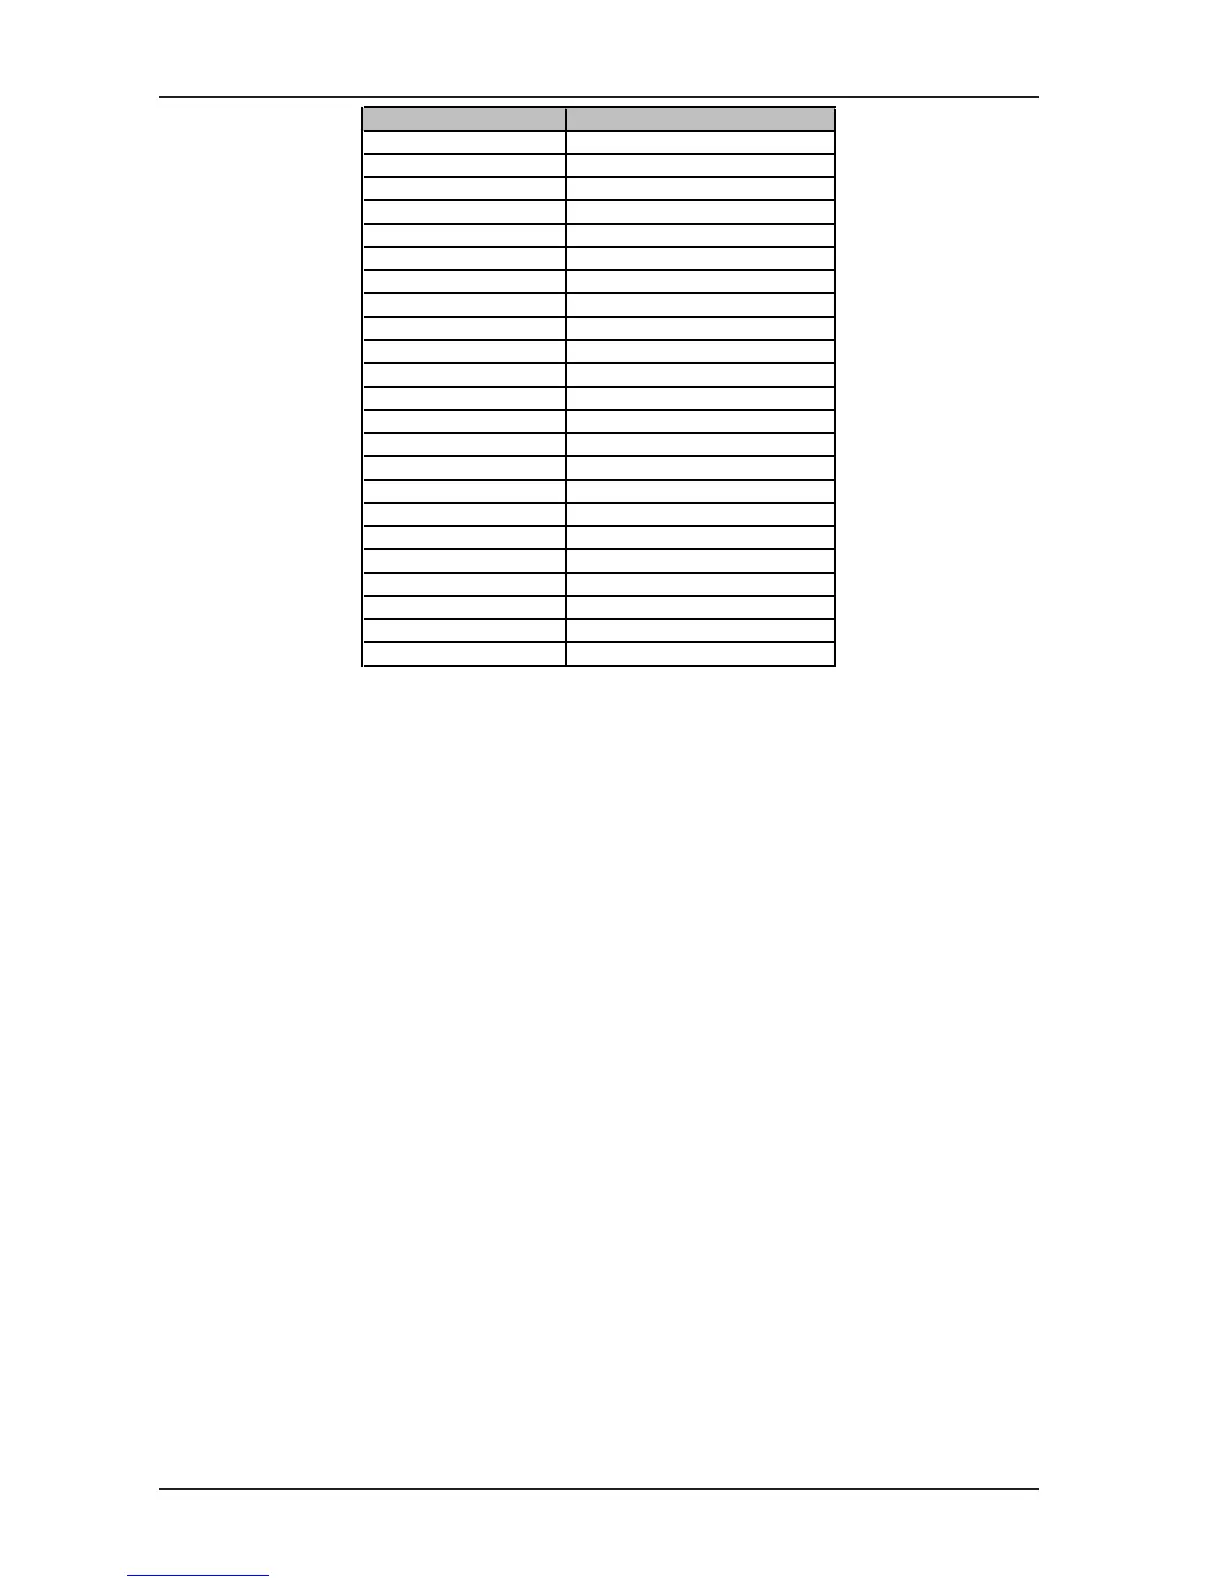
Musical Note MIDI Note Number
C-2 0
C#-2/Db-2 1
D-2 2
D#-2/Eb-2 3
E-2 4
F-2 5
F#-2/Gb-2 6
G-2 7
G#-2/Ab-2 8
A-2 9
A#-2/Bb-2 10
H-2 11
C-1 12
C0 24
C1 36
C2 48
C3 (Clef C) 60 (Yamaha Convention)
C4 72
C5 84
C6 96
C7 108
C8 120
G8 127
Tab. 2.4: Assignment of MIDI NOTE numbers
s Confirm your selection with UP/ENTER. The SELECT LED lights up.
s Quit PRESET programming mode by means of a long press on DOWN, or select another MIDI function for
editing.
The NOTE function will be particularly useful for so-called tap-tempo applications. Many of todays multi-effects
devices allow the user to enter the delay time by means of an on-board TAP button. The device measures the
time between two TAP button presses and uses this interval to adjust the delay time. Often, this function can
be remotely controlled via MIDI. In this case, tapping is the transmission of two subsequent NOTE ON
commands, which is what the NOTE function of your FCB1010 does for you.
+ If you program the NOTE function with a PRESET, a NOTE ON command will be sent each time
you select the PRESET. To tap the tempo, simply press the PRESET switch several times in
the rhythm of the music.
2.4.5 TAP-TEMPO function
In addition to the NOTE function, which is used by many effects devices to tap the song tempo, the FCB1010
offers you another way to reach this goal: the TAP-TEMPO function also allows you to enter the song tempo,
however, transmits a FCB1010-generated controller value to the controlled effects device, in order to adjust the
delay time. Advantage: you can also control devices that cannot process NOTE commands, but only allow for
changing the delay time by means of a MIDI controller.
+ The TAP-TEMPO function does not work with DIRECT SELECT enabled.
The TAP-TEMPO function has no dedicated switch, but is activated as follows:
s Enter PRESET programming mode by means of a long press on DOWN. The green SWITCH 1/SWITCH 2
LED starts flashing. Confirm with UP/ENTER. The SELECT LED lights up.
s Select the NOTE function by briefly pressing foot switch 10/0. Please note that the NOTE function must be
enabled. The foot switch LED starts flashing. Confirm your selection with UP/ENTER. The NUMBER LED
lights up.
2. PROGRAMMING THE FCB1010