10
Setup
Unpack the Unit
1.Removethebandingsfromthebox.
2.Removethetopcartoninfold,themoldedpulptray,
andtheangleboards.
3.Removethesleevefromthebottomcartoninfold.
4.Gentlyrolltheunitforwardandoffthepallet,
avoidinganysuddenshockstothemachine.
Unpack the Accessory Kit
Unpacktheaccessorykitfromthebox,andremovethe
plasticpackaging.Thekitconsistsof
• Calibrationweight(533g).
• Fourbottles—oildrainbottle,oilinjectbottle1,oil
injectbottle2,UVdyeinjectbottle3.
• Plasticpouchcontainingawarrantycard(tobe
completedandmailed),applicableMSDSsheets,and
aservicecenterlisting.
• Oildrainscalecalibrationbracket.
• Dustcover.
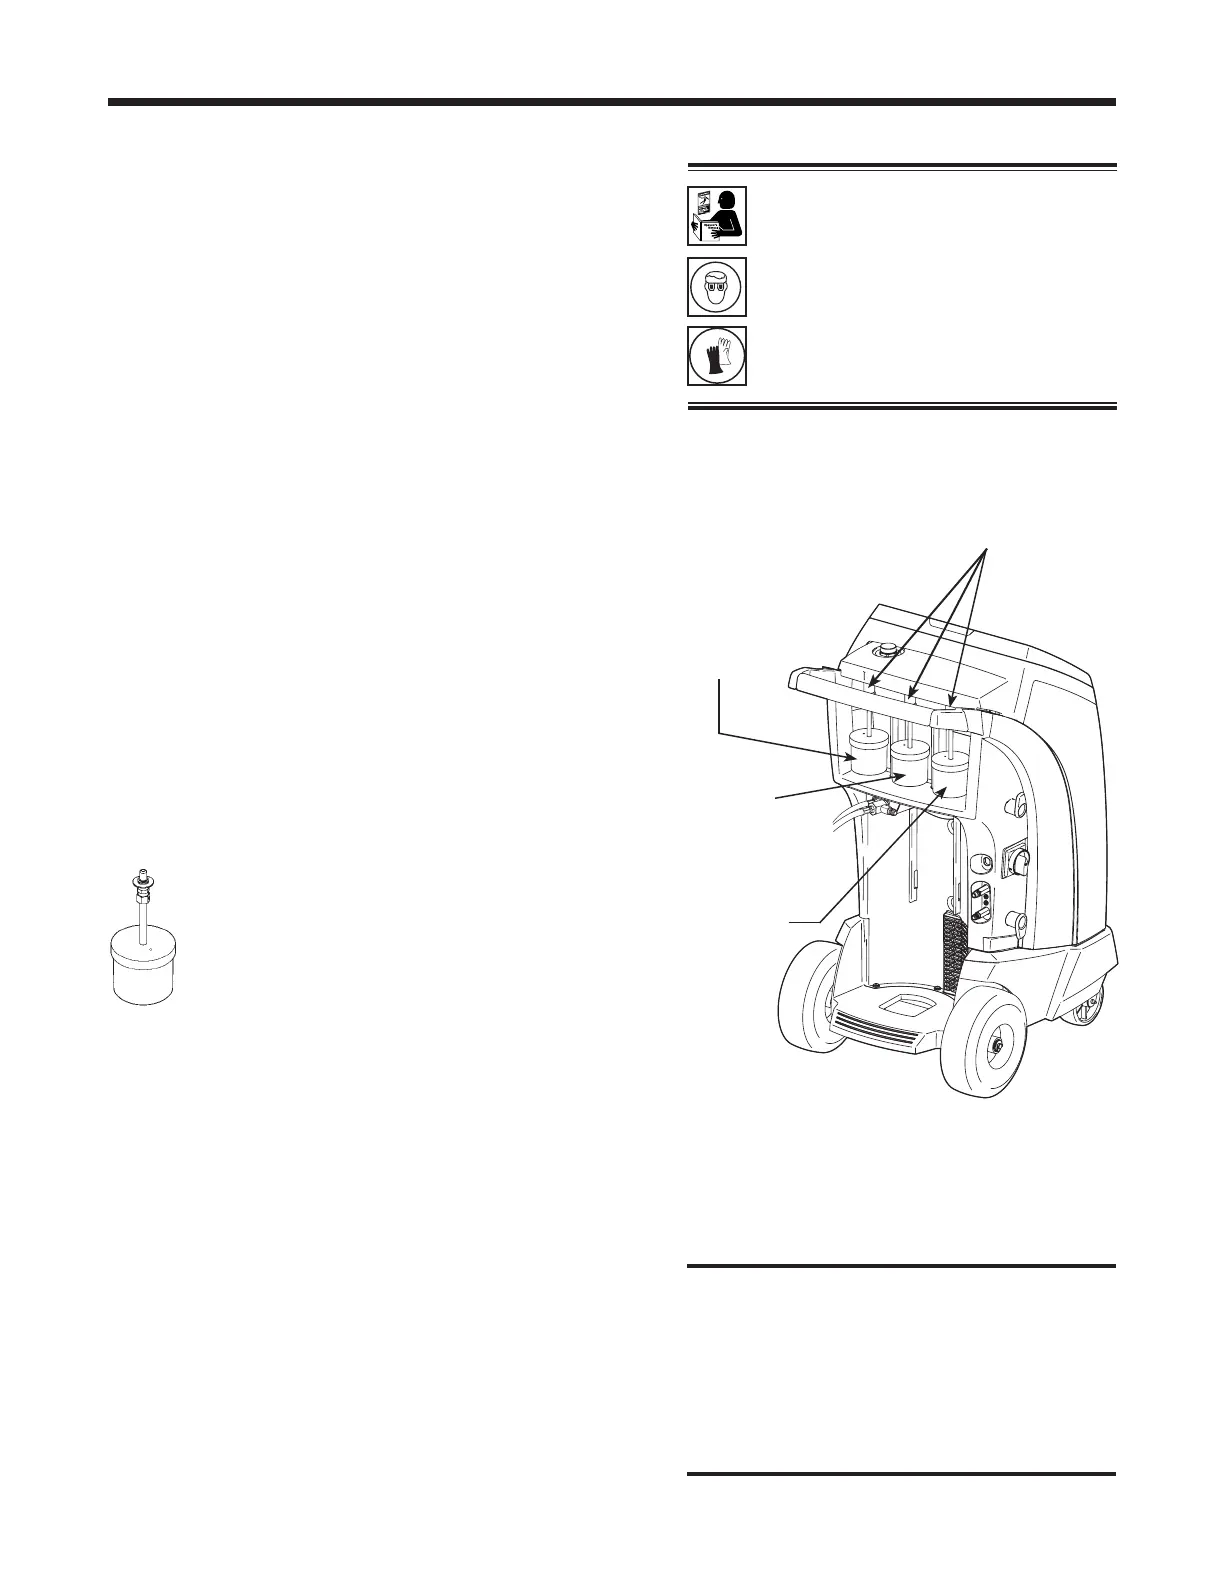
Assemble the UV Dye Inject Bottle and
Two Oil Inject Bottles
Followtheseinstructionstoinstalleachoil
injectbottle,aswellastheUVdyeinject
bottle.RefertoFigure1.
1.Unthreadthecoverfromthereservoirand
removethepiston.
2.FillthereservoironlytotheMAXFILLline.
Overllingthereservoirmaycauseairtobeinjected
intothevehiclesystem.
3.Spreadathinlmofoil/dyeonthepistono-ring
(toreducesealdrag),andinsertthepistonintothe
reservoir.Threadthecoverontothereservoir.
4.Slowlypushthepistonintothereservoiruntilyou
seeoil/dyeattheconnector.
5.Inspectthebottletoensuretherearenoairbubbles
betweenthepistonandtheliquid—thepistonshould
beindirectcontactwiththeliquid.
6.Holdtheassemblybytheplasticbottle,andinsert
theconnectorintothemagneticcoupleronthe
machine.
CAUTION: To avoid chemical
incompatibilities with the internal
components of the machine, use only UV
dyes and oils approved by the vehicle
manufacturer. Problems resulting from
the use of non-approved UV dyes and
oils will cancel the warranty.
WARNING: To prevent personal
injury while working with refrigerant,
read and follow the instructions
and warnings in this manual, and
wear protective equipment such as
goggles and gloves.
Figure 1
Oil Inject
Bottle 2
(greencolor
oncover)
Oil Inject
Bottle 1
(whitecover)
UV Dye
Inject Bottle
(yellowcolor
oncover)
Magnetic Couplers


 To Next Page