19
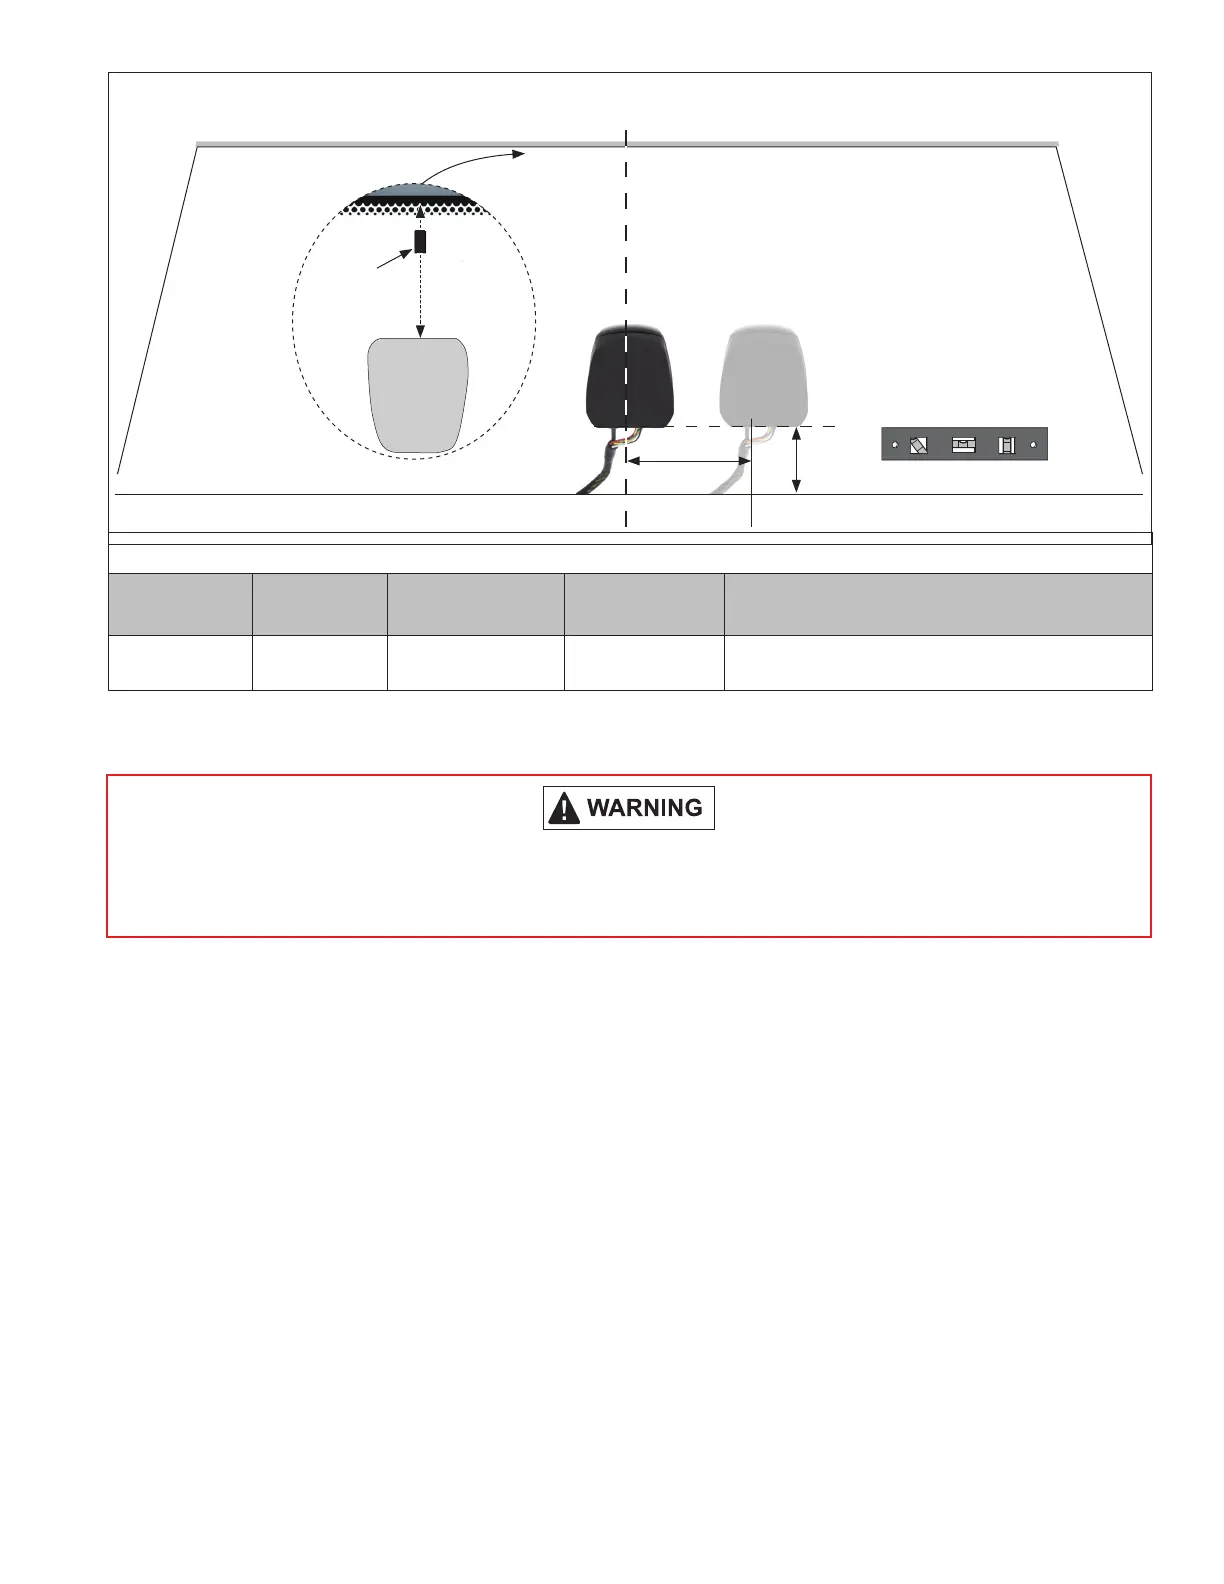
Figure 11 – Bracket Installation Coordinates (continued)
Whenever re-installing or replacing a camera – for example, after a windshield is replaced – the recommended
position for the vehicle must be used. Failure to install the camera in the correct position can result in system
Diagnostic Trouble Codes being set, and system performance degradation.
The ambient temperature must be in the range of 50-100º F
(10-38º C). Thoroughly clean the area of the windshield
where the camera will be installed with a lint-free cloth and
a 50-50 water/isopropyl alcohol solution. Make certain that
there is no grease or contamination present and that the
windshield is completely dry before installing the bracket.
Use removable tape or a non-permanent marker to indicate
where the top of the bracket will be installed. Remove the
protective lm from the tape covering the adhesive on the
bracket and, using a small “torpedo” level to be sure that
it is level, install the bracket on the glass, holding rmly [a
minimum of 62 lb. (28.1 kg.) pressure] in place for ten (10)
seconds. Wait at least twenty minutes before installing the
camera, at which point a 50% bond strength is created. The
full bond between the bracket and windshield is achieved
after 72 hours.
Bottom Mounting Instruction
Vehicle OEM*
Vehicle
Model
Distance “A” Distance “B”
Comments
± ⅛ in. (3 mm) ± ⅛ in. (3 mm)
Prevost
®
H3-45 3.15 in. (80.0 mm) 5.12 in. (130 mm)
Distance C is from the inner seal surface to the bottom
of the camera bracket.
*
Note: All measurements are along the surface of the windscreen
Note: Use only
Bendix-approved
windshield
adhesive when
remounting a
camera bracket
(included with
the bracket kit)
Bottom and Center of Windshield - Viewed from Inside.
C
Center line of
the windshield
A small “Torpedo” Level
is Used to Make Sure the
Bottom of the Bracket is
Level
D
NOTE: Some
Placements
are Oset
Center
Line Mark
A
Torpedo level Angular
tolerance of +/-1º