21
3.2 BRACKET REMOVAL
The camera must be removed prior to this procedure. The
preferred method for removing a bracket ideally requires
two technicians. Using a heat-gun, one of the technicians
gradually applies heat to the outside of the windshield at
the location of the adhesive, while the other gently applies
a prying force to the bracket while being careful not to
damage the windshield.
As soon as the ideal temperature is reached, the bracket
will release. Allow the windshield to completely cool down
before cleaning the glass and installing a replacement
bracket.
When replacing brackets, use only replacements with the
same part number or a direct superceding replacement
number supplied by Bendix or the OEM. If you have questions,
contact the Bendix Tech Team at 1-800-AIR-BRAKE
(1-800-247-2725), option 2.
NOTE: Some OEMs may offer the windshield with
the bracket pre‑installed. Contact the dealer for more
information.
3.3 DASH SWITCHES AND LAMPS
Each OEM has their own method for displaying the system
status to the driver, and typically there will be a switch on
the dash board to allow the driver to temporarily disable the
system. Refer to the OEM Operator’s Manual for system
indicator lamp(s) used for the Bendix
™
AutoVue
®
FLC-20
™
camera, and whether there is a bulb-check illumination at
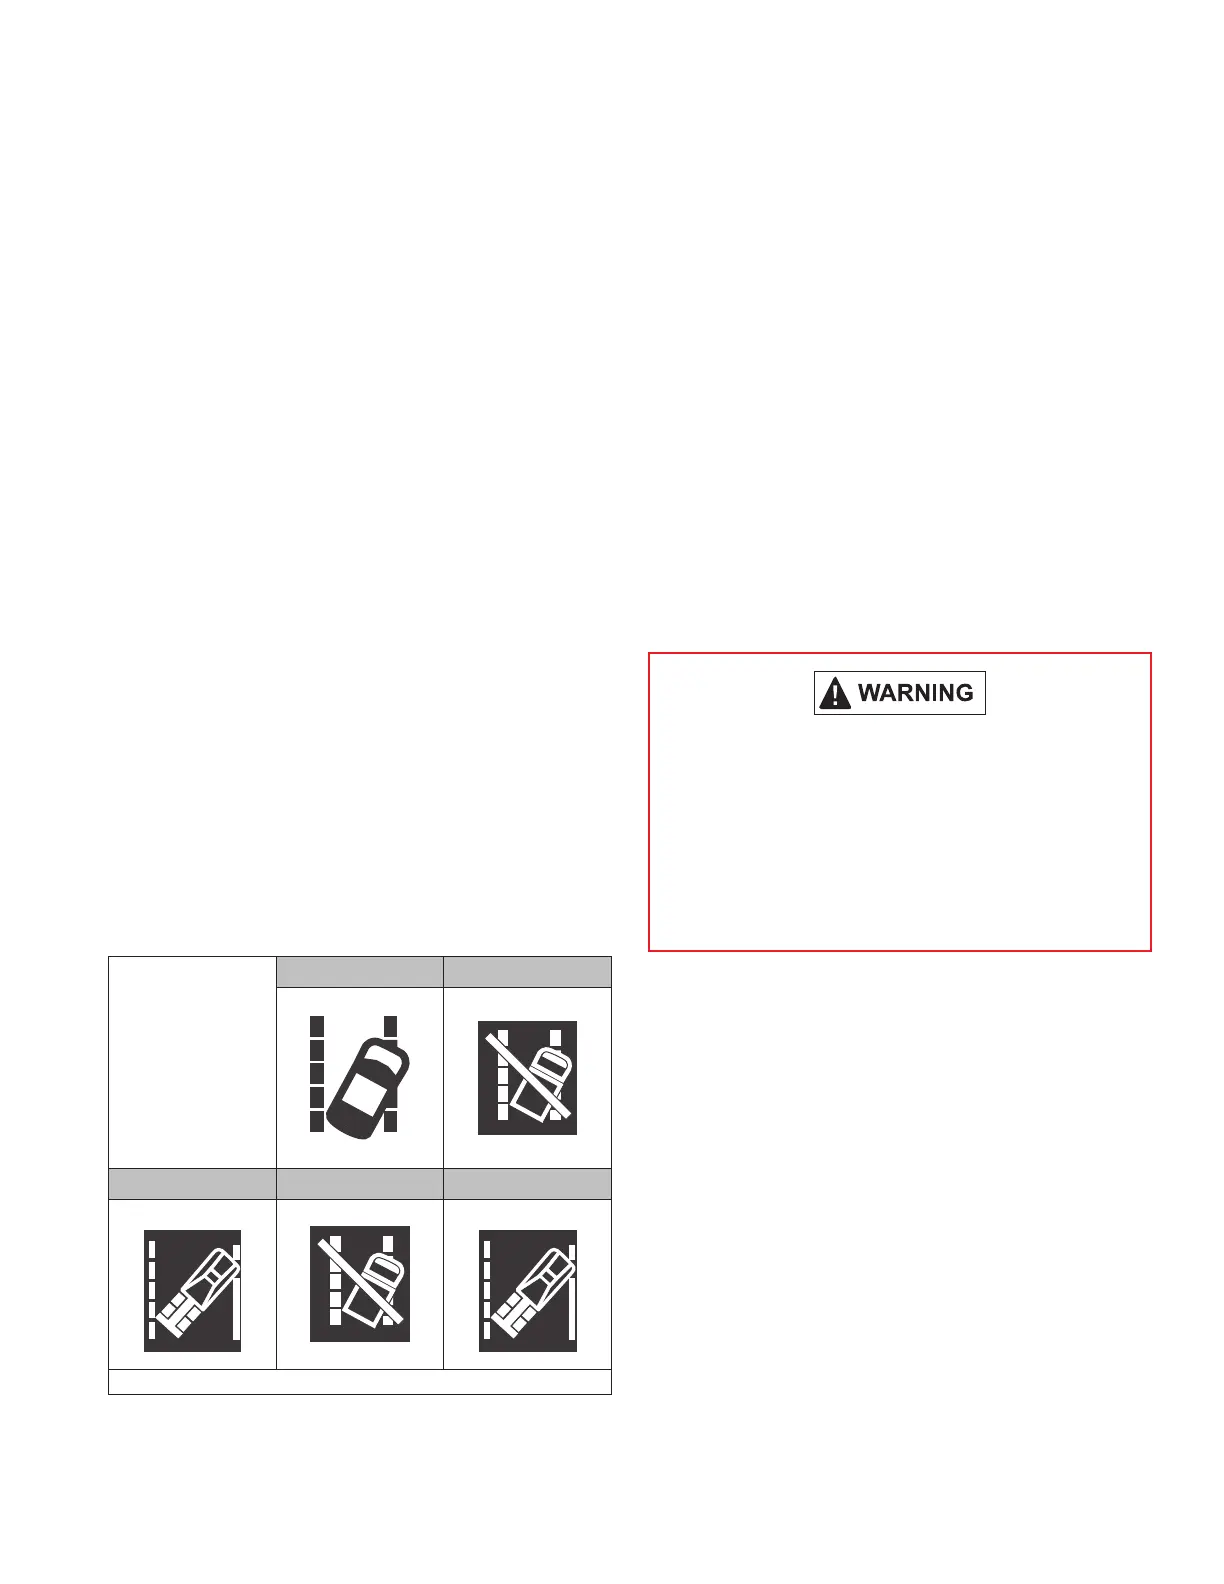
vehicle power-up. See Figure 14 for some examples of
OEM icons used at the time this document was published.
Dash/Switch
Icon.
(The design will
vary by vehicle
OEM. In some
cases, the switch
and lamps may be
separate.)
International
®
Kenworth
®
Mack
®
Peterbilt
Volvo
* All trademarks shown here are the property of their respective owners and are used for reference only.
Figure 14 – Dash Switch Icons
Additionally, the system self-monitors and will set a
Diagnostic Trouble Code (DTC) that will typically alert
the driver using a similar icon on the dash display or by a
status lamp. See Section 2.0 “Troubleshooting” (page 4),
for more information.
3.4 MAINTENANCE
In normal use, the Bendix AutoVue FLC-20 camera needs
only a clean, properly maintained windshield to ensure
a clear view of the road ahead. Protect the camera lens
whenever the inside of the windshield is cleaned. You may
check that the camera’s view is clear by taking a test image
(See Appendix A).
3.5 CAMERA INTERCHANGEABILITY
When replacing cameras only, use replacements with the
same part number (or a direct superceding replacement
number supplied by Bendix). After replacing the camera,
run the engine for two (2) minutes and verify no faults
are present. Once conrmed no faults are shown with
the engine running, drive the vehicle for 5 – 20 miles
(8 – 32 km) or until a speed sign is displayed by the system.
Cameras of dierent vehicle models and model
years must not be interchanged. The use of an
incorrect camera can lead to Diagnostic Trouble
Codes (DTCs) being set, and performance
degradation – including unnecessary system
interventions and the potential for situations
where interventions do not occur when they would
normally.
Cameras are designed specically for a particular vehicle
and model. DTCs caused by relocating cameras to an
incorrect vehicle may result in the vehicle system using
the camera to be partially or fully unavailable.
If you have questions, contact the Bendix Tech Team at
1-800-AIR-BRAKE (1-800-247-2725), option 2.
Bendix AutoVue FLC-20 cameras are powered by
the Mobileye
®
System-on-Chip EyeQ
®
processor with
state-of-the-art-vision algorithms.
3.6 IMPORTANT NOTE ON
TELEMATICS WIRING
Where a vehicle does not have an On Board Computer/
Telematics (OBC/T) system – in order to prevent interference
to the SafetyDirect by Bendix CVS Web Portal Processor
– disconnect from the OBC/T harness (any wiring harness
provisionally installed in the vehicle for potential use for
Telematics) from the main vehicle harness. Re-connect
the harness only when an OBC/T system is installed. (See
Appendix C).