Autostacker™ Parking Lift 62 P/N 5900002 — Rev. D — August 2019
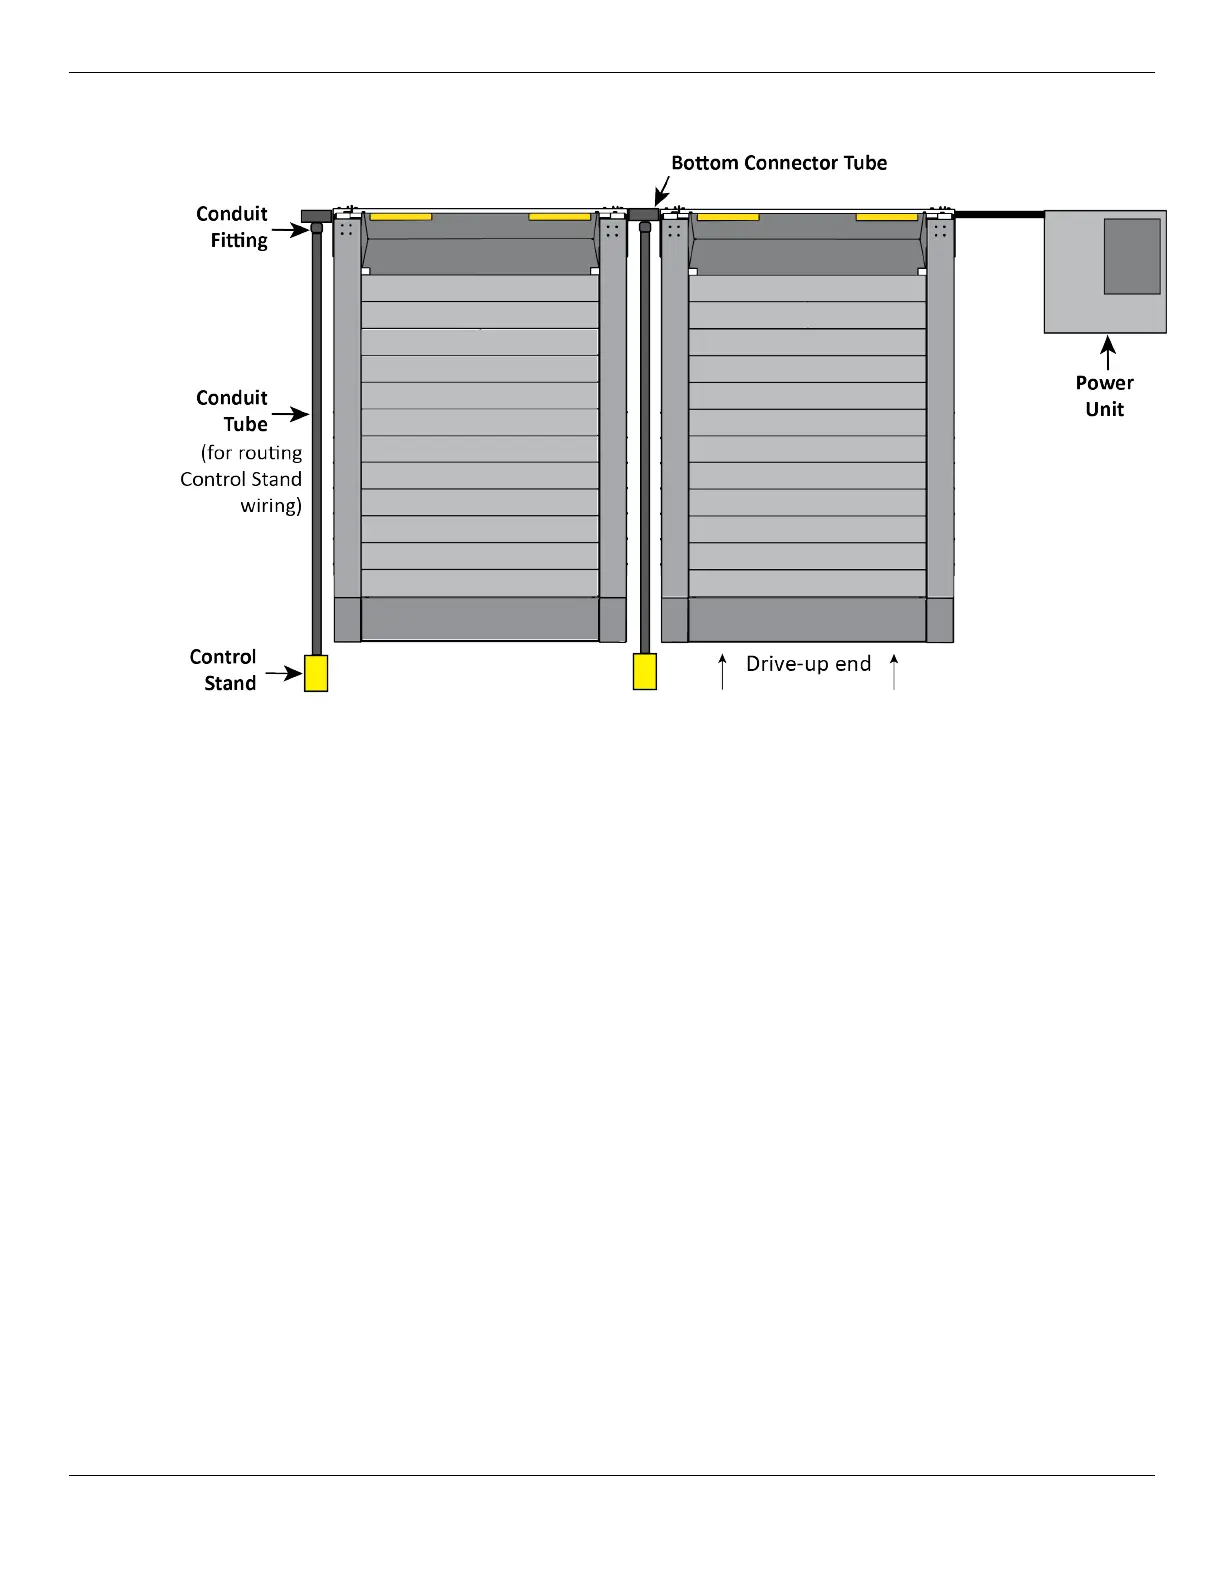
The following drawing shows the Control Stands at the
Rear
of the Lift.
To install the Control Stand at the
Rear
of the Lift:
1. Find the 14-4 Cable and route it through the Bottom Connector Tube to the Conduit Fitting.
2. Use the 16-2 Cable to connect the Solenoids near the bottom of each Hydraulic Cylinder (two per
Lift).
Refer to Wiring Diagrams for wiring information.
3. Route the 16-6 Cable all the way through the Conduit Tube, then attach the wires to the wiring
coming out of the Bottom Connector Tube.
Refer to Wiring Diagrams for wiring information.
4. Remove the Cover of the Control Box to have access to the wiring inside.
5. Find the Control Stand, then route the other end of the 16-6 wire through the opening in the
Control Stand.
6. Connect the 16-6 wire to the Controls inside the Control Box.
Refer to Wiring Diagrams for wiring information.
⚠ DANGER Do not connect the wires to the Power Unit at this point; that task is for an
Electrician. All wiring connections made to the Power Unit
must
be performed
by a licensed, certified Electrician.
7. Attach the Placard to the Control Stand, as described in the previous procedure.
8. Secure the Control Box to the Control Stand using a Screw, Washer, and Nut in each hole.
9. When you are ready to anchor the Control Stand, use the two holes on the Control Stand Base to
mark the locations on the ground.
 Loading...