1111
STEP 3
(Column Preparation)
COMPLETE THE FOLLOWING
PRIOR STANDING UP COLUMNS.
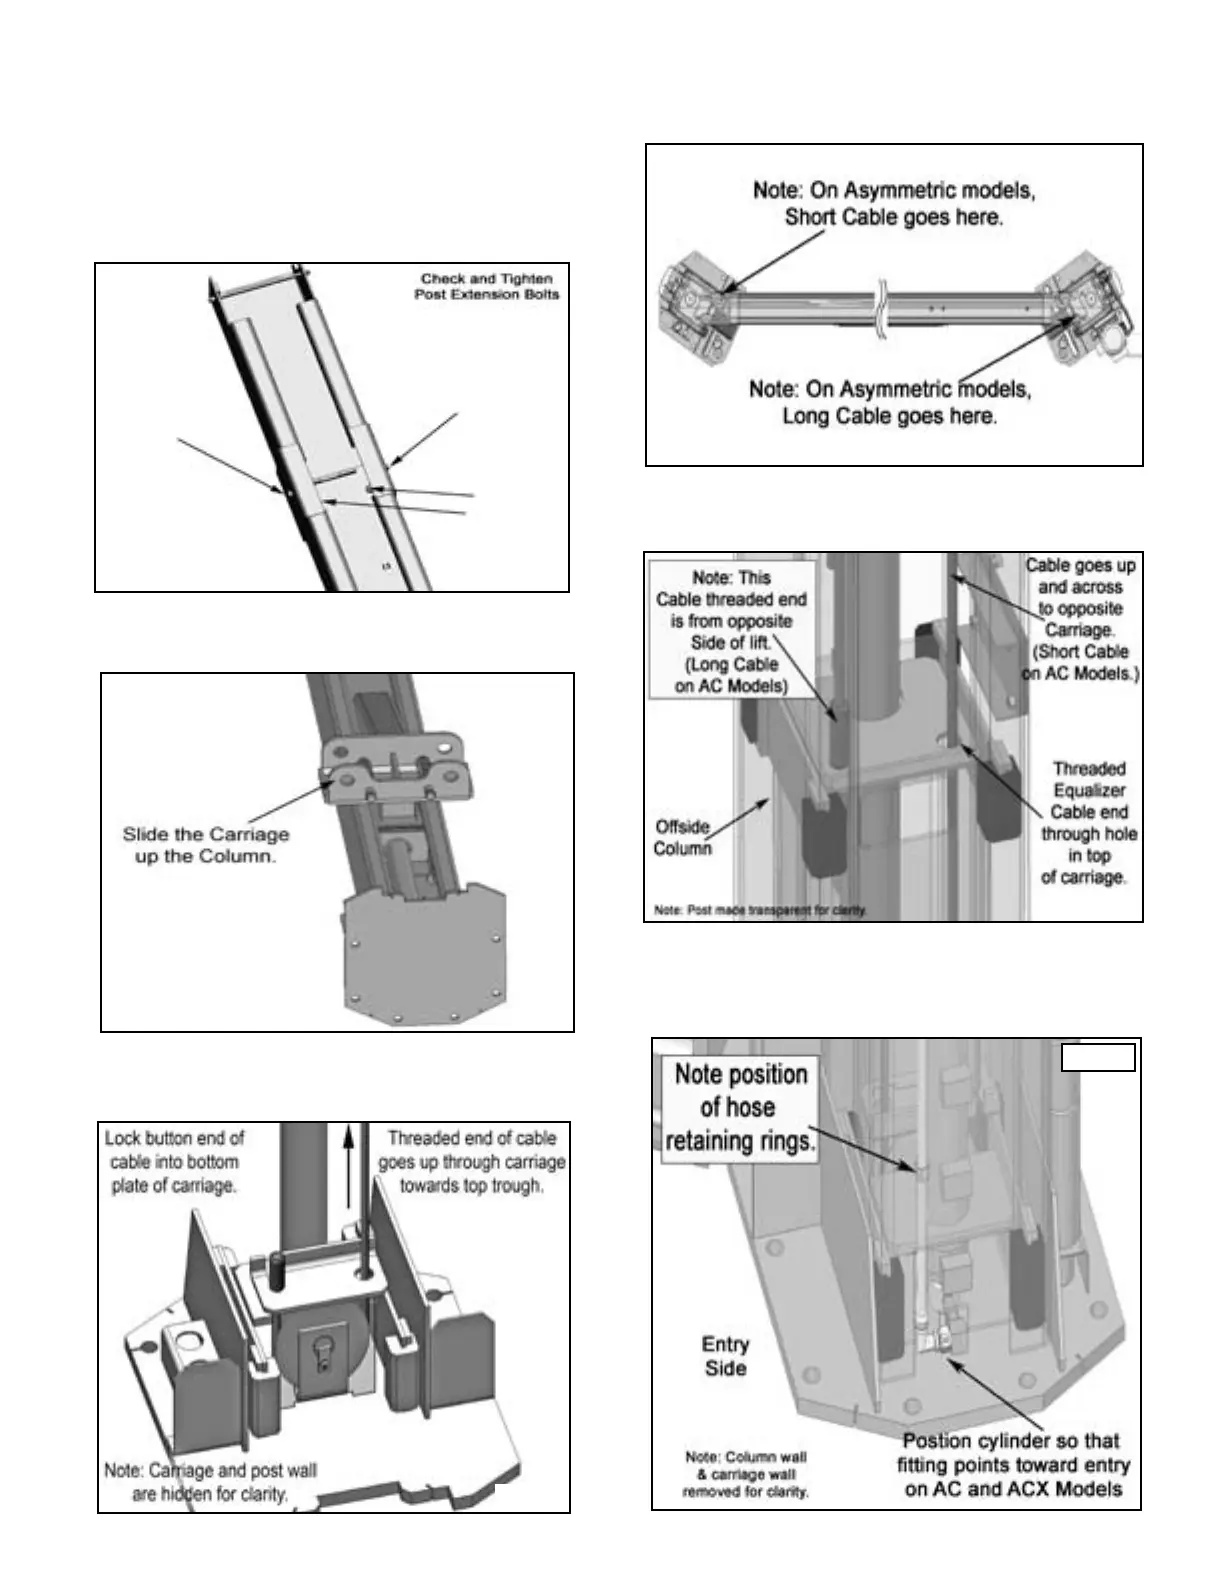
1. Check and tighten the Post Extension Bolts.
(See Fig 3.1)
2. Slide carriage up Column to aid in Pulley removal and
Equalizer Cable routing. (See Fig 3.2)
2. Remove Equalizer Cable Pulley. Route the plug end
of each Equalizer Cable around the bottom Pulley and
lock into Bottom Plate of Carriage. (Fig. 3.3)
(NOTE: Symmetrical models both Cables are same length.
Asymmetric models have two different length Cables.)
(See Fig. 3.4)
3. Feed threaded end of Cable up through carriage. Leave
excess cable resting on top of carriage until further steps are
required. (See Fig 3.5 and 3.7)
4. Install the Cylinder Fittings in Cylinder Ports. Pay
attention when installing the Cylinders in step three to
ensure that each Fitting points towards the entrance side of
lift. (See Fig 3.6)
Fig 3.4
Fig 3.5
Fig 3.3
Fig 3.6
Fig 3.2
Fig 3.1

 Loading...


