42
120001 Rev K 1-19-18
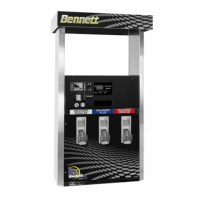
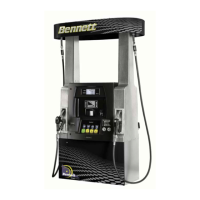
The 210 retail electronics package in the model 3800 unit is a very simple design. There will be one
“control” (CPU) board per hose. The dispenser may be ordered as a one or two hose unit. One hose
units will have one control board, two hose units will have two control boards. The control board is where
the field wires will connect if the optional junction box is not ordered. The installer will only have to run
dispenser power to side 1 product “A” CPU/Control Board. If there is more than one CPU/Control board,
the boards are factory wired for power from board to board. That is, power from board to board is wired
at the factory. Please refer to the Remote Power Wiring Section of this manual. Each control board will
be wired as follows:
Determine the wires needed in each step and add the number of wires from each step together to
determine total number of wires required.
Step 1. Dispenser Power - Every model of 3800 requires these wires:
(1) 12ga. Green ground wire
(1) 14ga Black L1 power wire for electronics power.
(1) 14ga. White for 115V neutral or red for 230V L2, for electronics power.
Step 2. Communications Wiring - For communications, the 210 electronics can communicate using 2
wire current loop or 3 wire RS-485. If the dispenser is to be connected to a control console using the
Current Loop protocol, remote communication wires will be needed. Run 2 separate wires for
each current loop channel. Refer to the Current Loop Communication Wiring Section of this manual
and follow these guidelines:
Current Loop - For each Hose Position (CPU): (1) 18ga. wire for communication positive (+)
(1) 18ga. wire for communications negative (-)
*Note - Follow the recommended color coding found in the wiring diagram.
RS - 485 Protocol - When using RS - 485 communication, 3 communication wires will be needed for
each dispenser. Even if there is more than one CPU/Control Board, only 3 wires are needed for the
entire dispenser. Refer to the RS-485 Communication Wiring Diagram.
To side 1 Product “A” only (CPU): (1) 18ga. wire for RS485 communication positive. (Orange)
(1) 18ga. wire for RS485 communication negative. (Brown)
(1) 18ga. wire for RS485 communication common. (Black)
Step 3. Remote Dispensers (Submerged Pump) - A remote relay control wire will be required for
each plumbed product. If there is only one product, only one control wire is needed. If there are two
products then two control wires are needed. Please refer to the Remote Power Wiring Diagram in the
wiring section of this manual.
For Product “A” : (1) Blue 14ga. wire.
For Product “B” : (1) Brown 14ga. wire
Step 4. For Self-Contained (Suction Pump) - A separate circuit and circuit breaker will be required for
each pumping unit motor. Place the pumping unit motor power circuit breakers on the opposite phase
from the dispenser’s electronic power or on 230VAC. This will keep the dispenser’s electronic power
free from electronic noise. The dispenser may have one motor (single product) or two motors (dual
product). Each motor requires two field wires. Please refer to the Self Contained Power Wiring diagram
located in the wiring section of this manual.
Needed for each Pumping Unit Motor :
(1) Red for L2 Hot & (1) White 14ga. Neutral on 115V circuits
OR
(1) Red for L2 Hot & (1) Black for L1 Hot for 230V circuits.
Note: Runs longer than 50ft. will require larger wires. Size wires to minimize voltage loss or run the
motors on 230V circuits to minimize the current in the wires.
Determining the Number of Wires Needed
(115 or 230 Volt Installations)