English
42
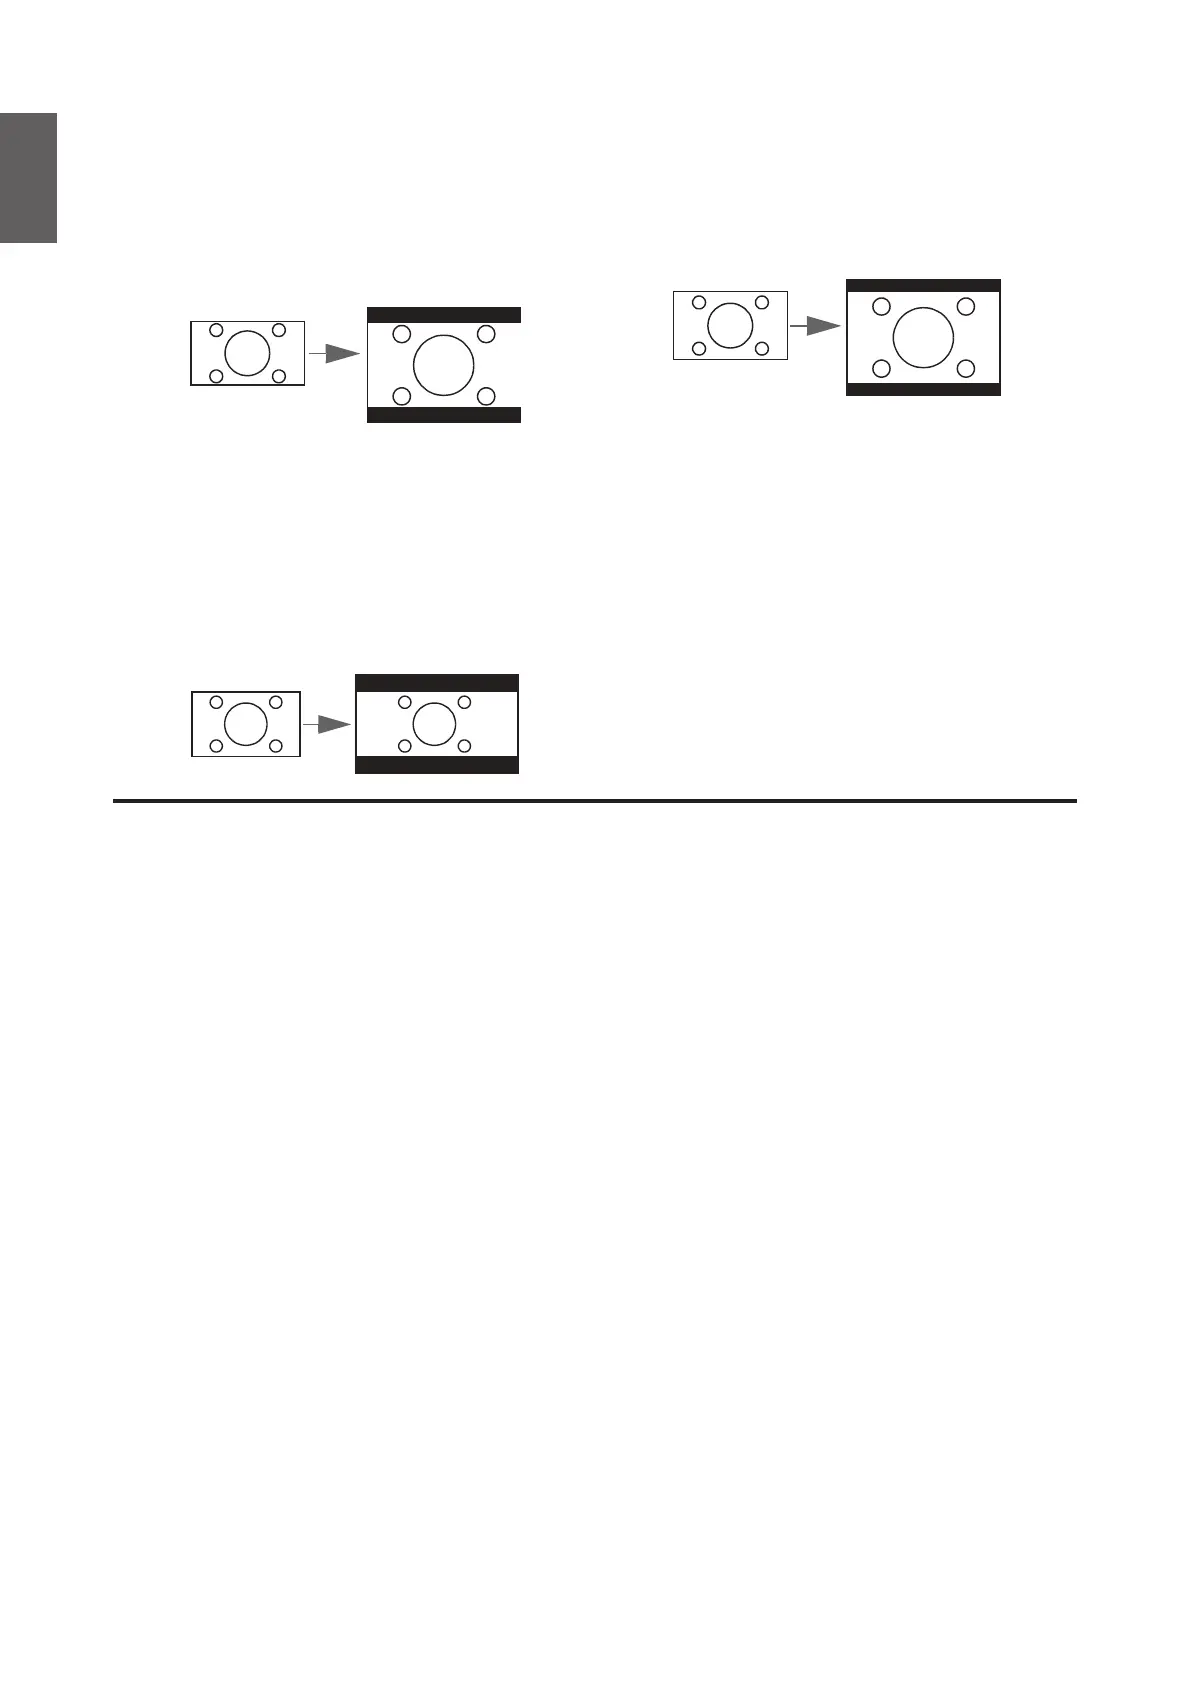
4. 16:9: Scales an image so that it is displayed
in the center of the screen with a 16:9
aspect ratio. This is most suitable for images
which are already in a 16:9 aspect, like high
denition TV, as it displays them without
aspect alteration.
16:9 picture
5. 16:10: Scales an image so that it is displayed
in the center of the screen with a 16:10
aspect ratio. This is most suitable for images
which are already in a 16:10 aspect, as it
displays them without aspect alteration.
16:10 picture
6. 2.35:1: Scales an image so that it is
displayed in the center of the screen with a
2.35:1 aspect ratio. This is most suitable for
widescreen cinemascope formats for movie
theaters or images which already vary from
a 2.35 to 2.40 aspect, as it displays them
without aspect alteration.
2.35:1 picture
• 2D Keystone
Press ENTER and press
▲
/
▼
/
◄
/
►
to adjust horizontal or vertical distortion brought by the
projection angle.
• Corner Fit
Press ENTER to enter the Corner Fit menu. See "Corner Fit menu" on page 43 for more
details.
• Position
Press ENTER and press
▲
/
▼
/
◄
/
►
to adjust the position of the projectored picture.
• Phase
Press
◄
/
►
to adjust Phase for the projectored picture.
• H. Size
Press
◄
/
►
to adjust H. Size for the projectored picture.
• Digital Zoom
Press
◄
/
►
to enlarge the projected image.
• Digital Shrink & Shift
Press ENTER to enter the Digital Shrink & Shift menu. See "Digital Shrink & Shift menu"
on page 43 for more details.
• Blanking
Press ENTER to enter the Blanking menu. See "Blanking menu" on page 44 for more
details.
• Overscan
Press
◄
/
►
to hide edge of the projected image to damage the noise appear.
• 3D
Press ENTER to enter the 3D menu. See "3D menu" on page 44 for more details.