English
49
4. Press
▼
to highlight Hue and press
◄
/
►
to select its range. Increase in the range will
include colors consisted of more proportions of its two adjacent colors.
Please refer to the illustration to the right for how the colors relate to each other.
For example, if you select Red and set its range at 0, only pure red in the projected picture
will be selected. Increasing its range will include red close to yellow and red close to
magenta.
5. Press
▼
to highlight Saturation and adjust its values to your preference by press
◄
/
►
.
Every adjustment made will reect to the image immediately.
For example, if you select Red and set its value at 0, only the saturation of pure red will be
affected.
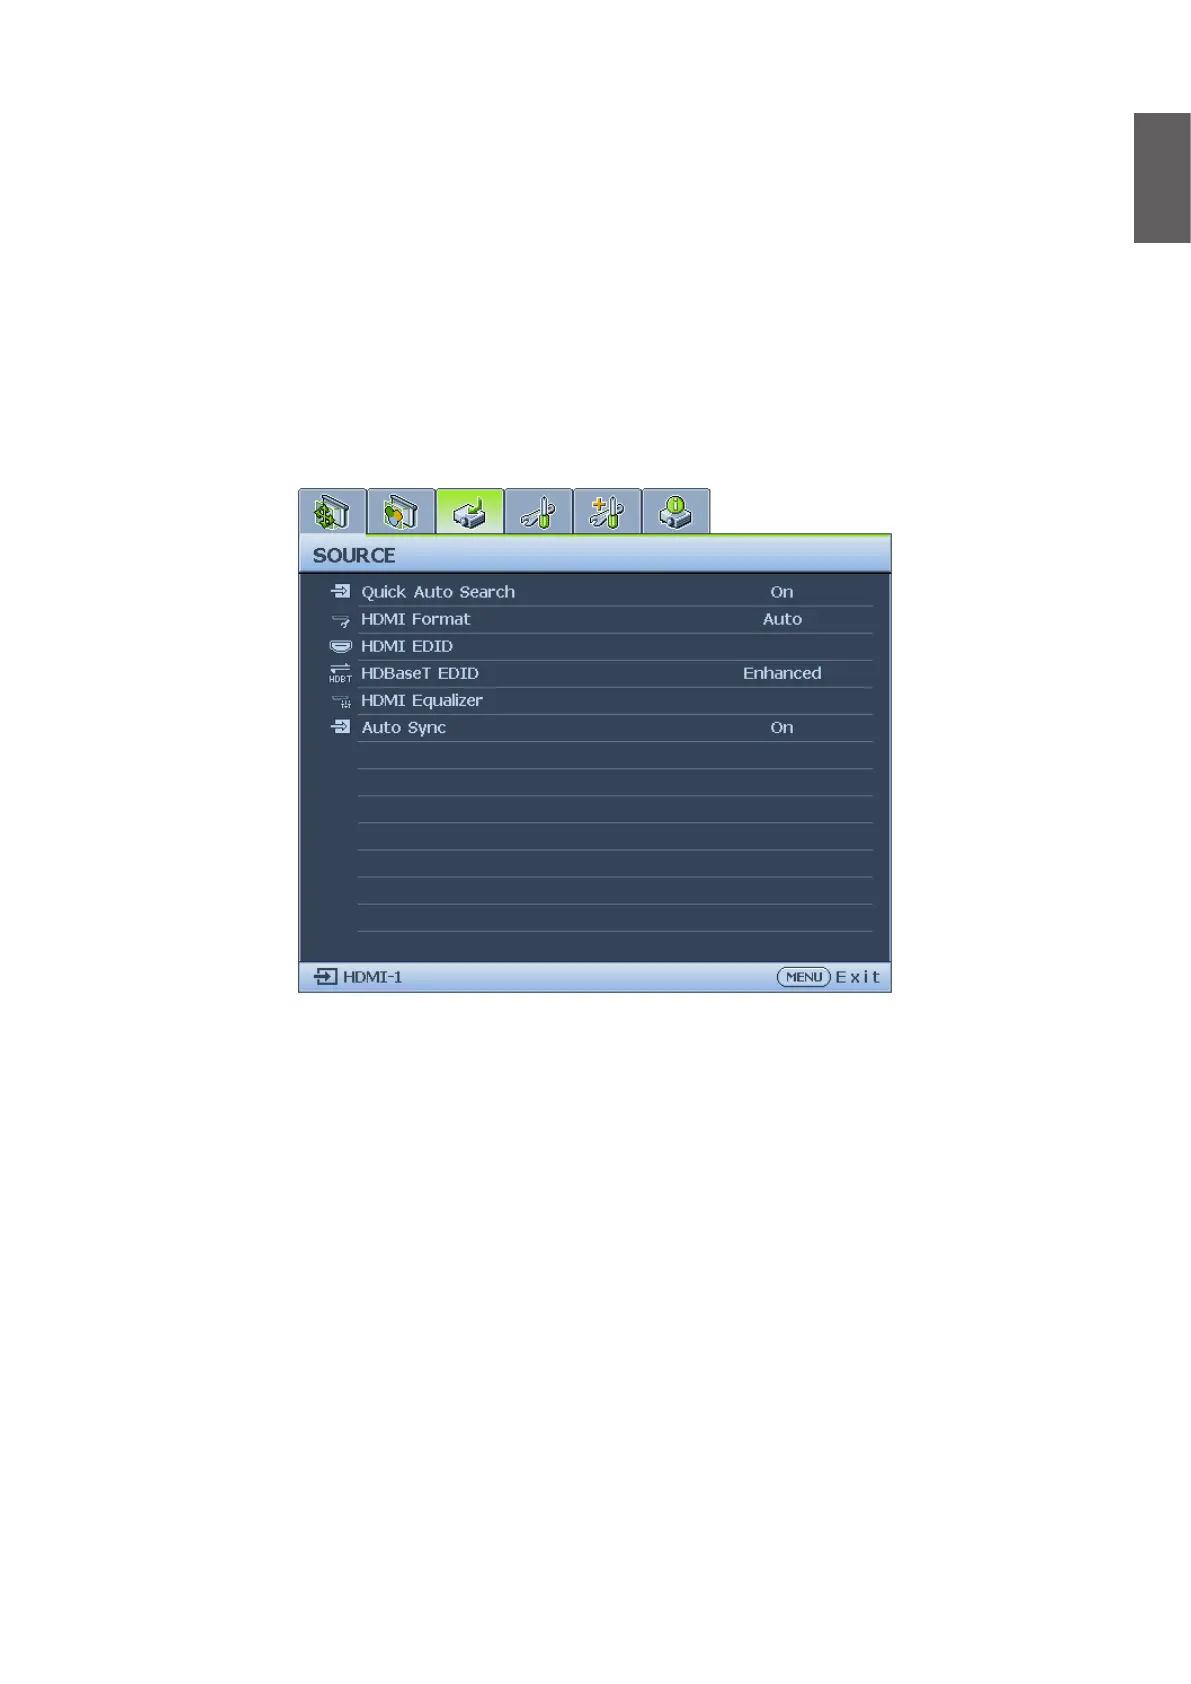
Source menu
• Quick Auto Search
Press
◄
/
►
to enable or disable search the input source automatically.
• HDMI Format
Press
◄
/
►
to selects a suitable color format to to optimize display quality. The options are
Auto, RGB Limited, RGB Full, YUV Limited and YUV Full.
• Auto: Automatically selects a suitable color space and gray level for the incoming HDMI
signal.
• RGB Limited: Utilizes the Limited range RGB 16-235.
• RGB Full: Utilizes the Full range RGB 0-255.
• YUV Limited: Utilizes the Limited range YUV 16-235.
• YUV Full: Utilizes the Full range YUV 0-255.
• HDMI EDID
Press ENTER to enter the HDMI EDID menu. Press
▲
/
▼
and press ENTER to select the
HDMI. Press
◄
/
►
to set to the default value.
• Enhance: Enhanced mode can switch to HDMI 2.0 EDID.
• Standard: Standard mode can switch to HDMI 1.4 EDID.