23
caldaie
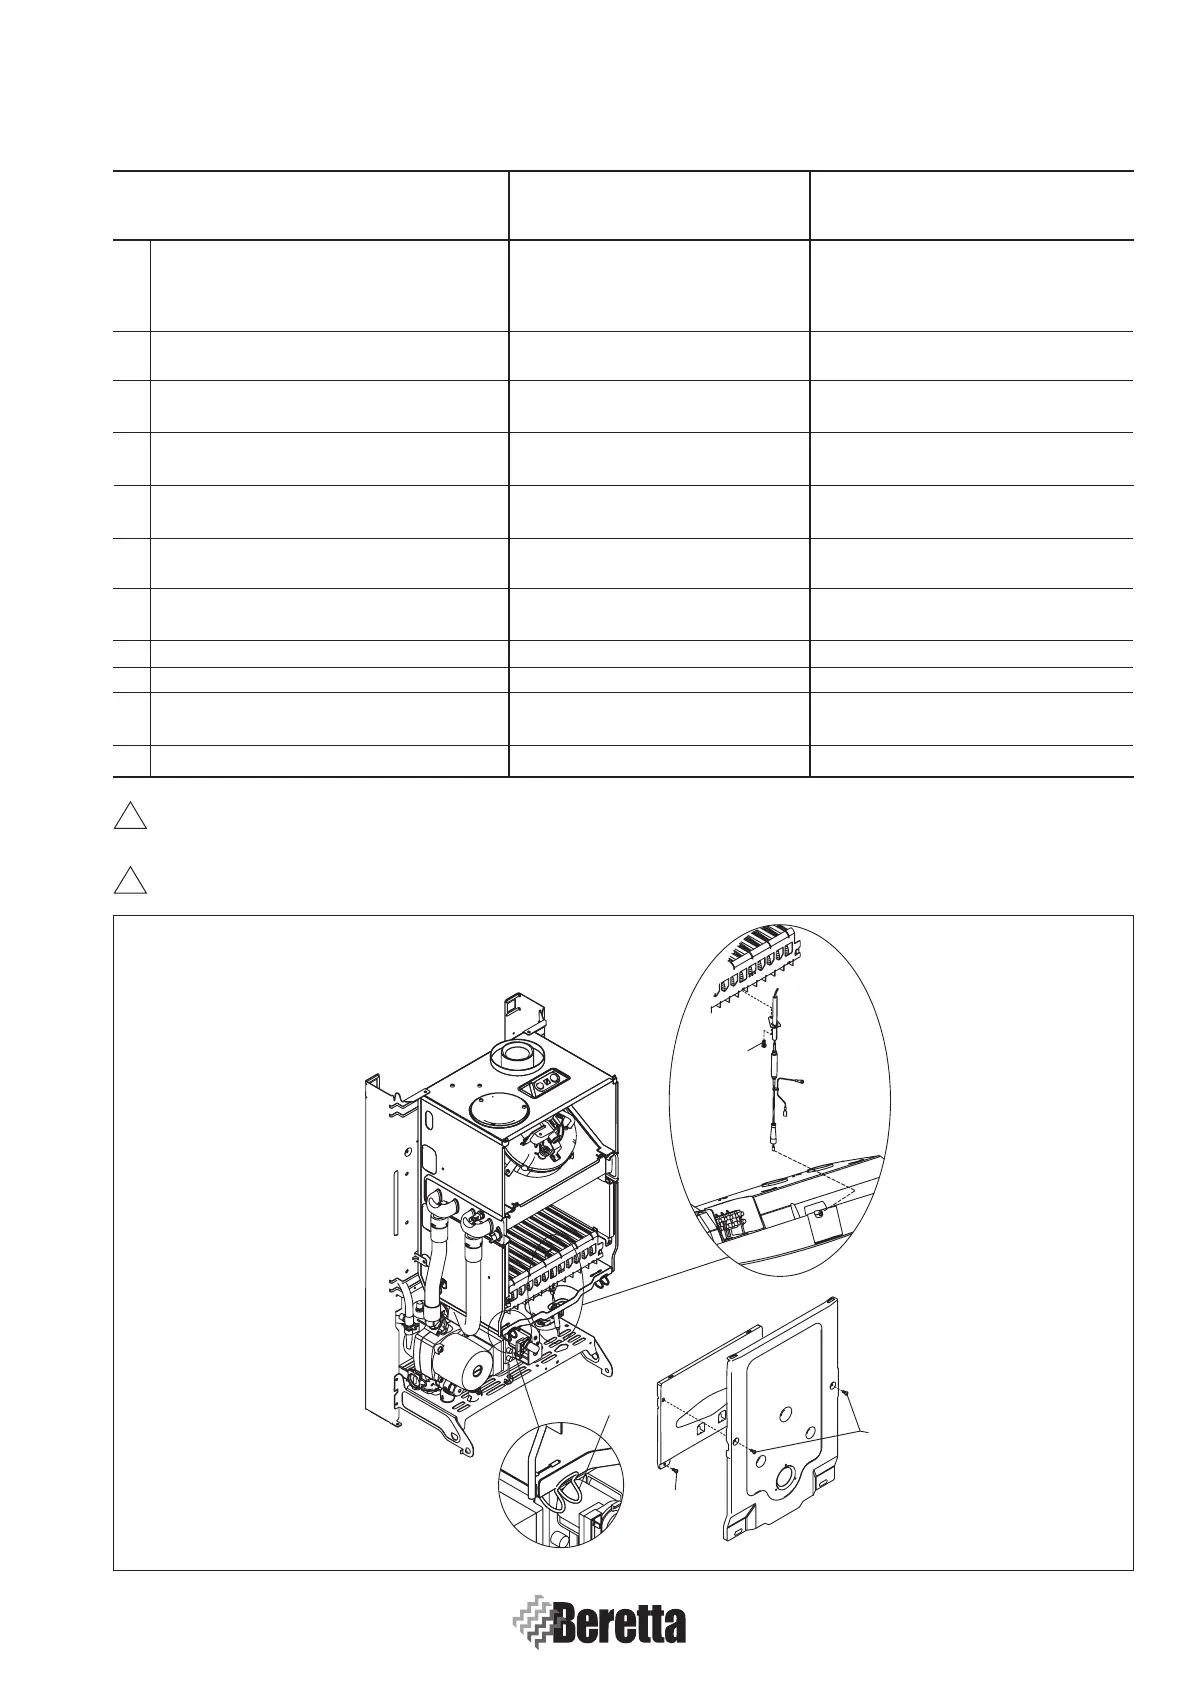
4.4.3 b FLAME IGNITER-CONTROL ELECTRODE DISASSEMBLY (C.S.I. Version)
OPERATION SEQUENCE ITEM INVOLVED TOOLS NEEDED FOR
WITH OPERATION THE OPERATION
3 • Disconnect the boiler from the electricity
supply
• Turn off the gas tap
3.1 Remove the case.
See procedure pag. 25
3.2 Disconnect flame igniter-control electrode
lead from control panel Safety hood + faston Hand made hood – faston with pliers
3.3 Free the electrode cable from the cable
holder on the instrument panel Electrode cable No tools – by hand
3.4 Cut the 2 fastons on the wiring and the
fairlead faston on air box N. 3 faston Scissors or small cutting nippers
3.5 Take off air box cover
removing the screws (1) and the clip (2) N. 2 screws and N. 2 clip Magnetic PH2 screwdriver+cac. piano
3.6 Take off combustion chamber cover
removing the screws (3) N. 2 screws Magnetic PH2 screwdriver
3.7 Disconnect earthing on the electrode Earthing fastons Pliers
3.8 Remove fairlead and leads from air box Fairlead, spark plug lead and earth No tools – by hand
3.9 Unscrew the screws fastening (4) plug
support-burner N. 1 screw Magnetic PH1 screwdriver
3.10 Remove electrode from its housing Flame igniter-control electrode No tools – by hand
!!
Work the other way round from the above for reassembly operations.
!!
MAKE FUNCTIONAL TESTS PAGES 65, 66 and 67.
4
1
2
3
 Loading...