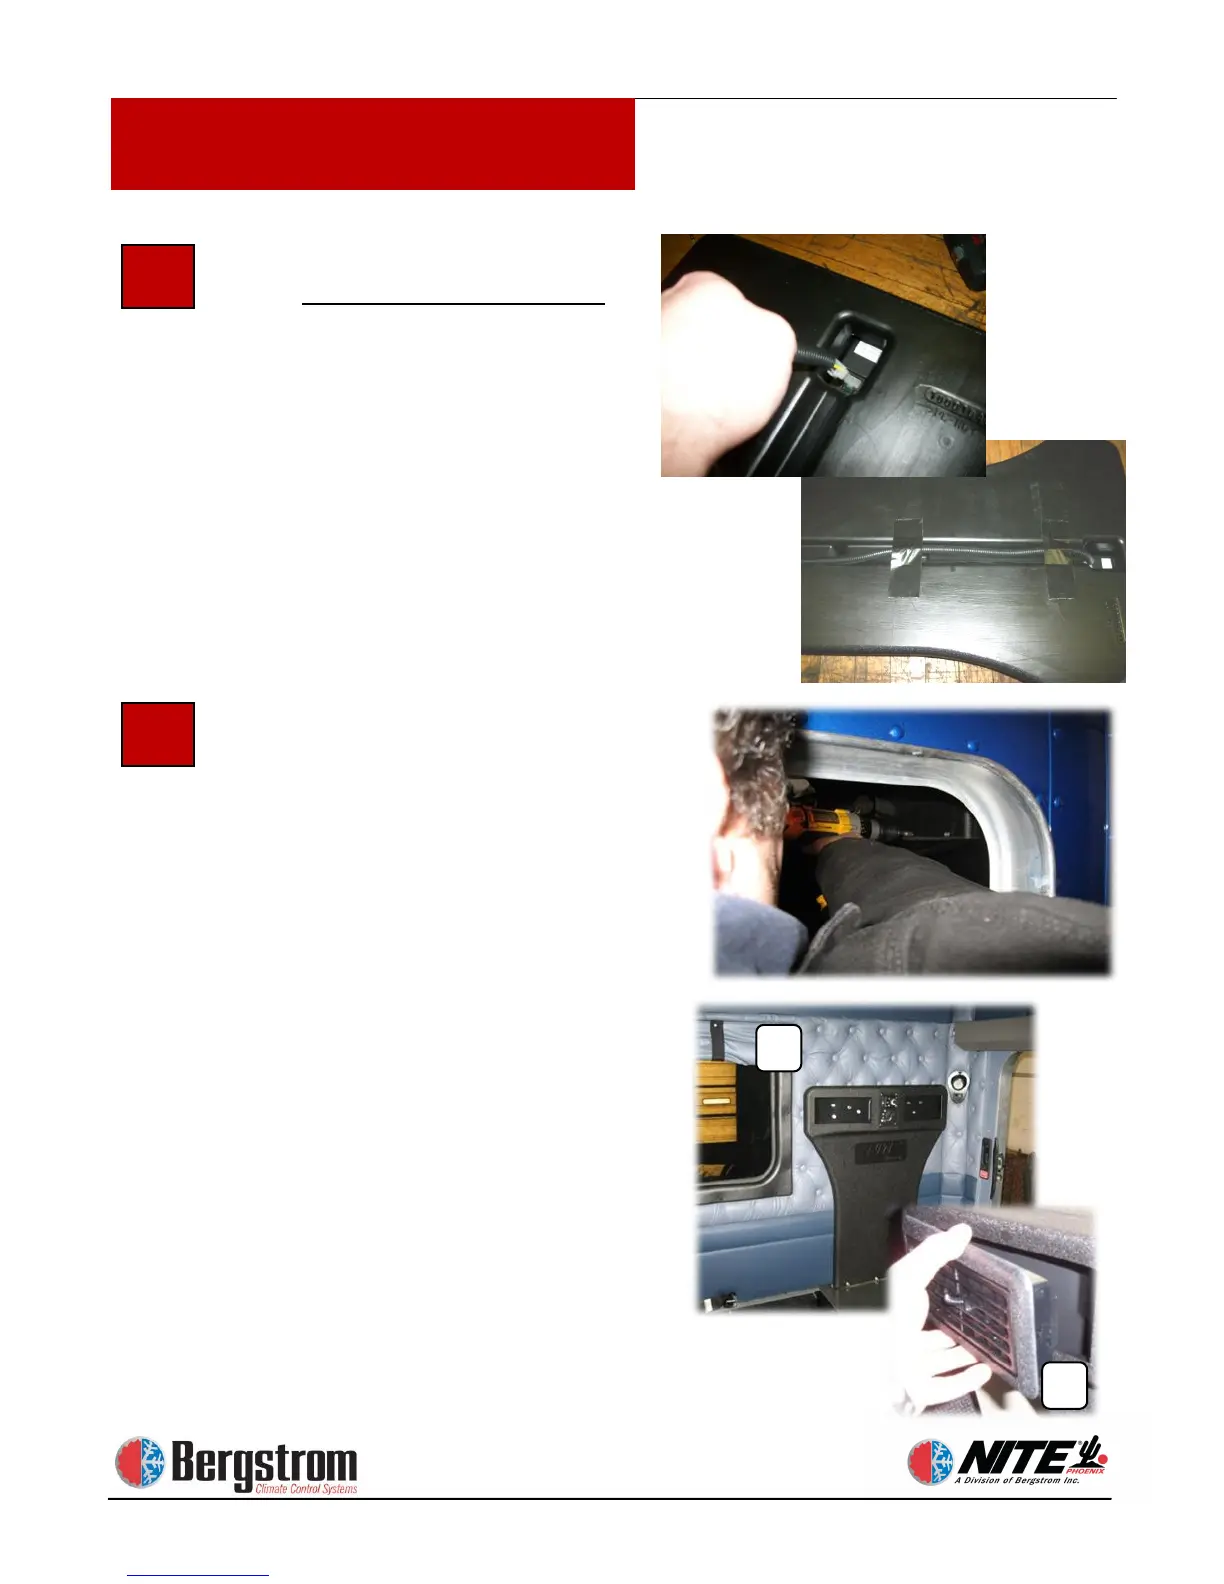
Run Wiring behind NITE Phoenix
Duct. Loom the control harness.
Connect it to the back of the
controller. Place the wiring harness
along the channel on the back of the
duct. Secure wiring in channel with
tape. The duct is now ready to be
attached.
Attach stealth to the NITE Phoenix
Duct. After the controls are installed
slide NITE Phoenix duct and wiring
down through the slot in the decking
enough to fasten the elbow to the duct
using two 1″ X 5/16 self-tapping
screws. Seal around stealth with
silicone sealant. Now raise duct back
up to proper location.
Attach NITE Phoenix Duct to Back
Wall of Sleeper. Press the top of the
duct up against the back wall. Make
sure the duct is square and level
against the back wall. Use 1″ X 5/16
hex head self-tapping screws to attach
top of duct to back wall. Place 3 - 5
screws in each duct opening and install
at different angles (A). Take care not
to over tighten. Snap both louvers into
place (B).