22 23
PRACTICAL SEWINGPRACTICAL SEWING
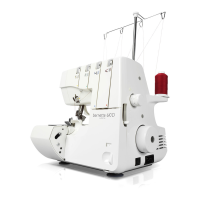
TURNING OUTSIDE CORNERS WITHOUT CUTTING THREADS
1. When you reach the fabric edge, stop stitching with the needle above the
fabric.
2. Raise the presser foot and gently pull on the thread chain just enough to
clear the stitch finger.
3. Turn the fabric, lower the presser foot and begin stitching in the new
direction. Fig. 1.
NOTE:
When overlocking and trimming at the same time, cut the fabric along the new
stitching line for about 3 cm, before turning the fabric. Fig. 2.
TURNING CURVED EDGES
For inside curves, guide fabric gently with trimming line of the fabric under the
right front of the presser foot (or a little to the left), applying pressure at point A
in the direction of the arrow with your left hand, and at the same time applying
a little opposite pressure at point B with your right hand. Fig. 3.
For outside curves place under the presser foot in a similar manner but
applying the pressure in the opposite directions. Fig. 4.
REMOVING STITCHES FROM SEWN FABRIC
To remove stitches already sewn, snip off needle thread(s) at intervals and pull
out looper thread(s).
PRACTICAL SEWING
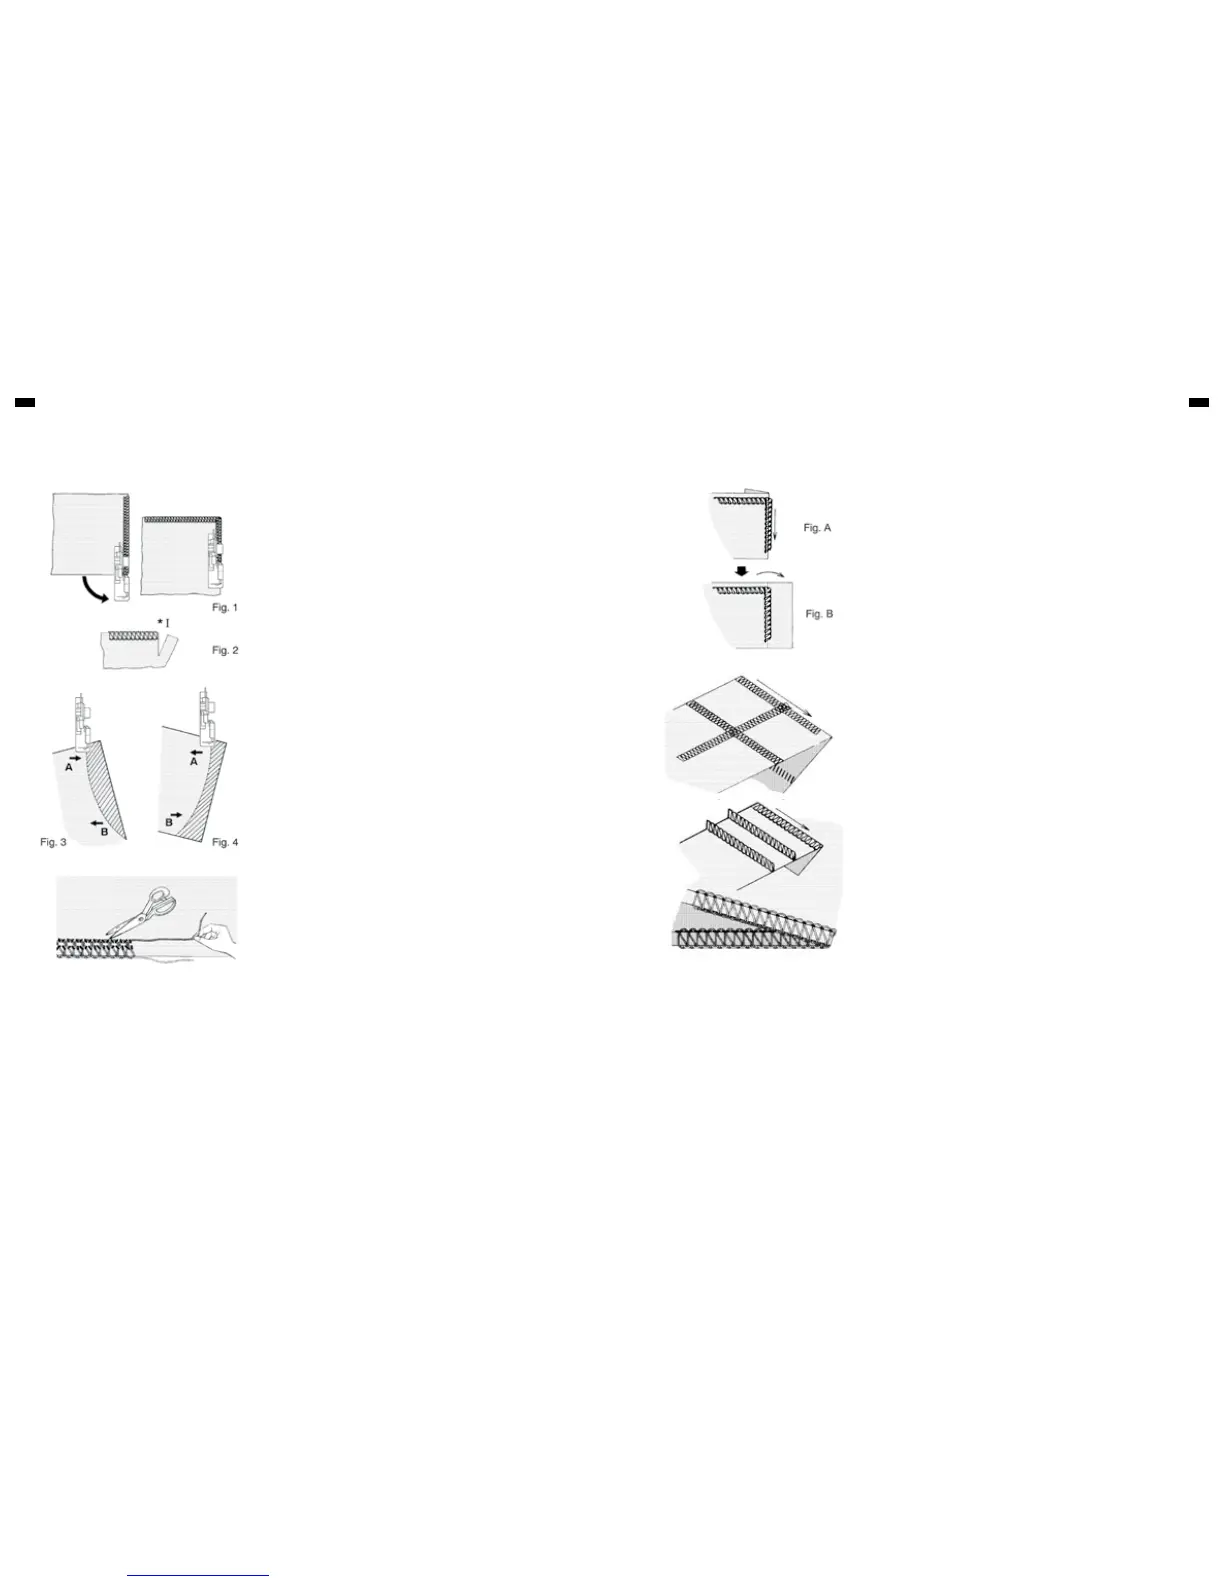
BASIC TECHNIQUES
In addition to normal overlocking which is fully described in this instruction
book, your machine can also be used for a number of decorative applications
such as decorative top-stitching, butted seams, pin-tucking or making lengths
of decorative braid. See below.
Decorative top-stitching – using only two threads or using three threads
(flat seam)
Fold fabric along the line to be top-stitched and sew over the folded edge,
making sure not to cut into the fold. Fig. A.
Unfold the fabric, pull the ends of the threads to the underside and press flat.
The final appearance can be enhanced by using buttonhole twist or embroidery
thread on the lower looper.
Butted seams – using only two threads or using three threads (flat seam)
Place two pieces of fabric wrong sides together and overlock along the edge.
Unfold and press.
By using different coloured fabrics and thread a pleasing ‘patchwork’ effect can
be achieved.
Pin-tucking – using three threads
Fold fabric along a line to be pin-tucked and overlock sew along the folded
edge, making sure not to cut into the folded edge of the fabric. (See page 25).
Pull ends of threads to the underside and press.
Making decorative braid – using three threads
Overlock over a cord or braid, holding it carefully with both hands, making sure
not to cut the edge. (See page 25).
NOTE :
* If you use blind hem foot (See page 28), decorative stitch is made easily.
** Reduce the upper looper tension when you use thick thread.
DECORATIVE EFFECTS
Illustration
I. Cut!