24 25
MAINTENANCEPRACTICAL SEWING
Please refer to page 11 DIFFERENTIAL FEED.
Differential feed is designed to minimize puckering and wavering. It is also very
effective for gathering.
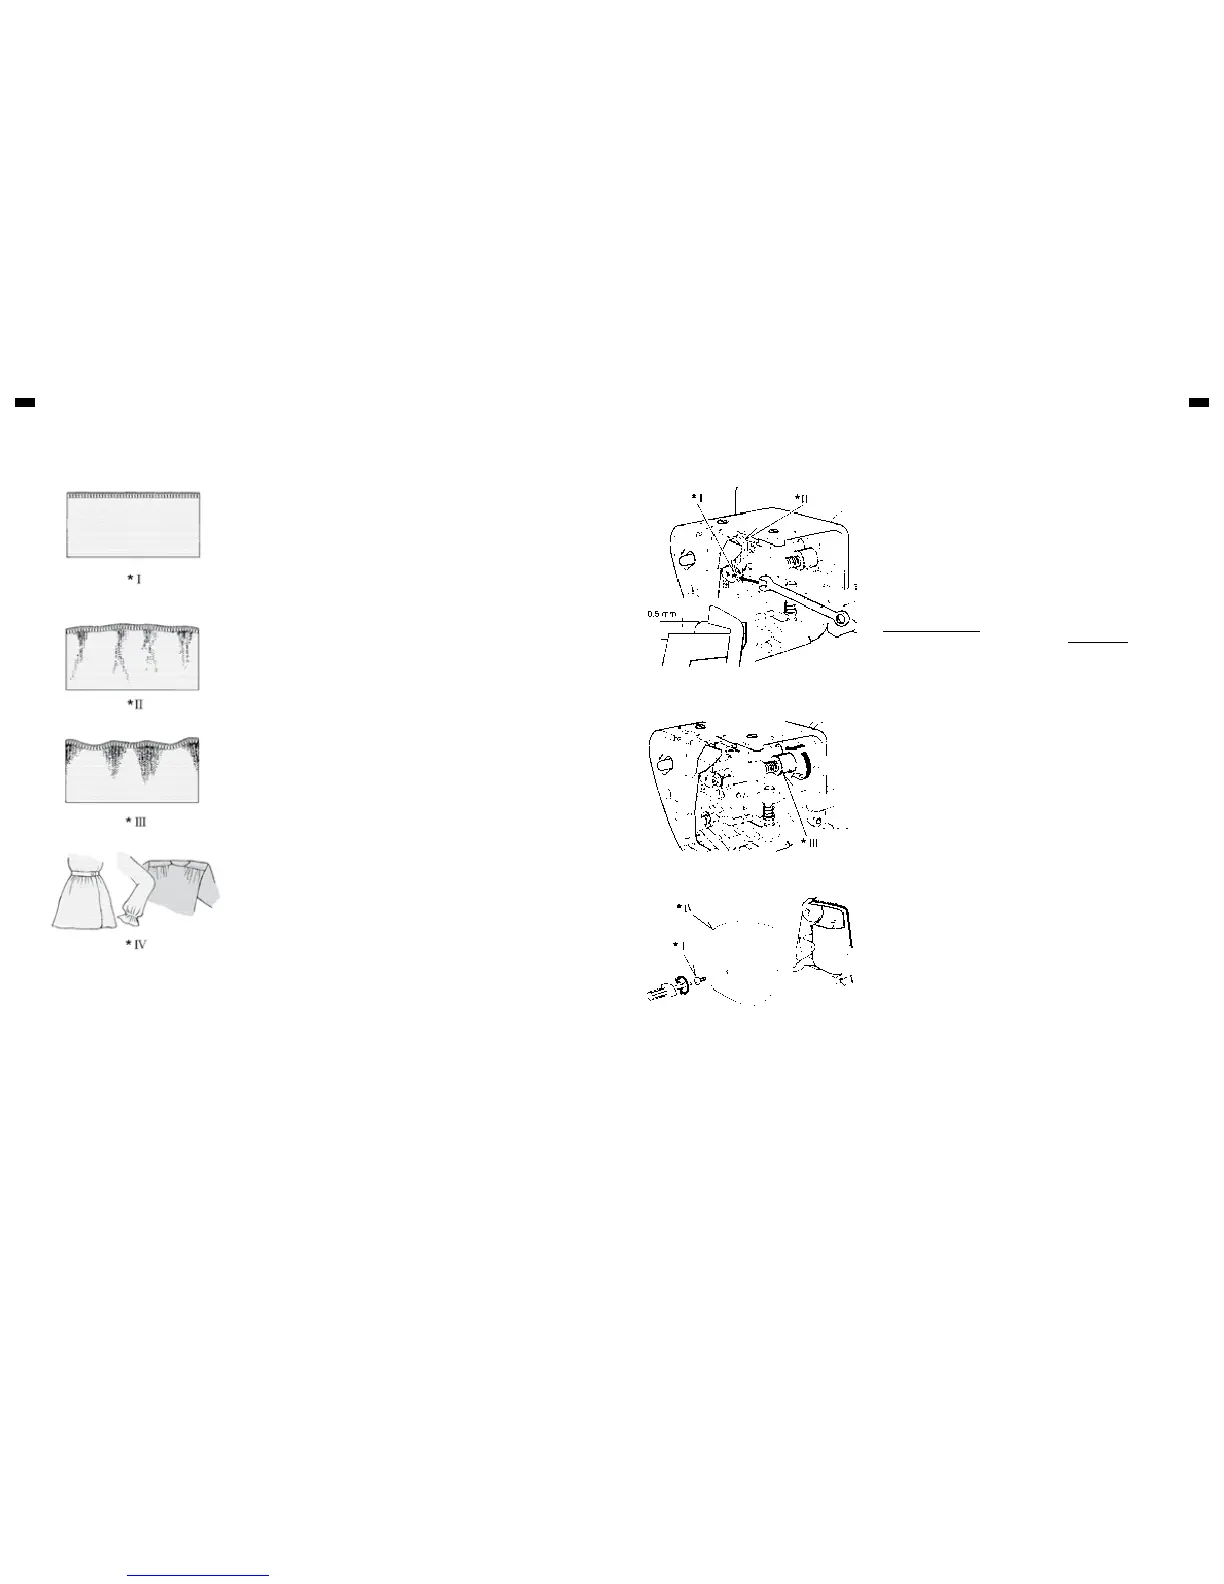
1. Puckering
Puckering tends to occur on woven or sheer fabrics. To obtain pucker-free
seams, set the differential feed control dial at less than 1.
2. Wavering
Wavering tends to occur on knitted or stretchable fabrics. To obtain waver-
free seams, set the differential feed control dial at more than 1.
3. Gathering
Differential feed makes gathering easier on lightweight fabric. Use it on
waistlines, sleeve heads, sleeve bottoms and ruffles, etc.
Set the differential feed control dial between 1.5 and 2 to obtain the best
gathering effect for your use.
NOTE
The exact adjustment depends on the thickness and elasticity of fabric. Even
the stitch length can influence the setting. The longer the stitches, the more the
fabric is contracted.
Always do a test run with a piece of actual fabrics you use and find the best
settings.
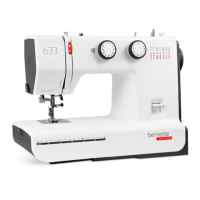
DIFFERENTIAL FEED APPLICATIONS REPLACING MOVING CUTTER
DISENGAGING MOVING CUTTER
REPLACING THE SEWING-LIGHT BULB
MAINTENANCE
Replace a moving cutter if it becomes blunt as follows. A spare cutter will be
found in your accessories.
NOTE:
You should not need to replace fixed cutter, which is made of a special hard
alloy material.
FIRST REMOVE THE POWER PLUG FROM THE SUPPLY SOCKET-
OUTLET.
1. Loosen screw and take out moving cutter.
2. Close the working table. Lower cutter driving arm to its lowest position by
turning the hand wheel towards you by hand. In this position, set
replacement cutter in position and secure it with screw, ENSURING THAT
THE EDGE OF THE MOVING CUTTER IS APPROXIMATELY 0.5 MM
BELOW THE SURFACE OF THE FIXED CUTTER.
If you want to sew without cutting, open the working table and disengage the
moving cutter by pushing the cutter release knob to the left and turning it
towards you as illustrated.
Ensure that fabric edge is not wider than overedge width selected or upper
looper and needle can be damaged.
Switch machine off before removing the face cover.
Remove screws and face cover as illustrated. Push thermal screen aside to
access the bulb. Unscrew and remove defective bulb. After replacing the bulb,
push thermal screen back into its basic position. Refit face cover and retighten
screws.
Illustration
I. Screw
II. Moving cutter
III. Cutter release knob
IV. Face cover
Illustration
I. Pucker or waver-free seams
II. Puckering
III. Wavering
IV. Gathering