4 5
MACHINE OVERVIEW AND INSTALLATIONMACHINE OVERVIEW AND INSTALLATION
17
16
20
21
22
23
24
25
26
18 19
27
28
29
WORKING TABLE OPENED
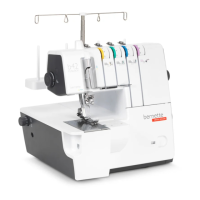
1
2
3
5
4
15
5
6
7
8
9
10
11
12
13
16
14
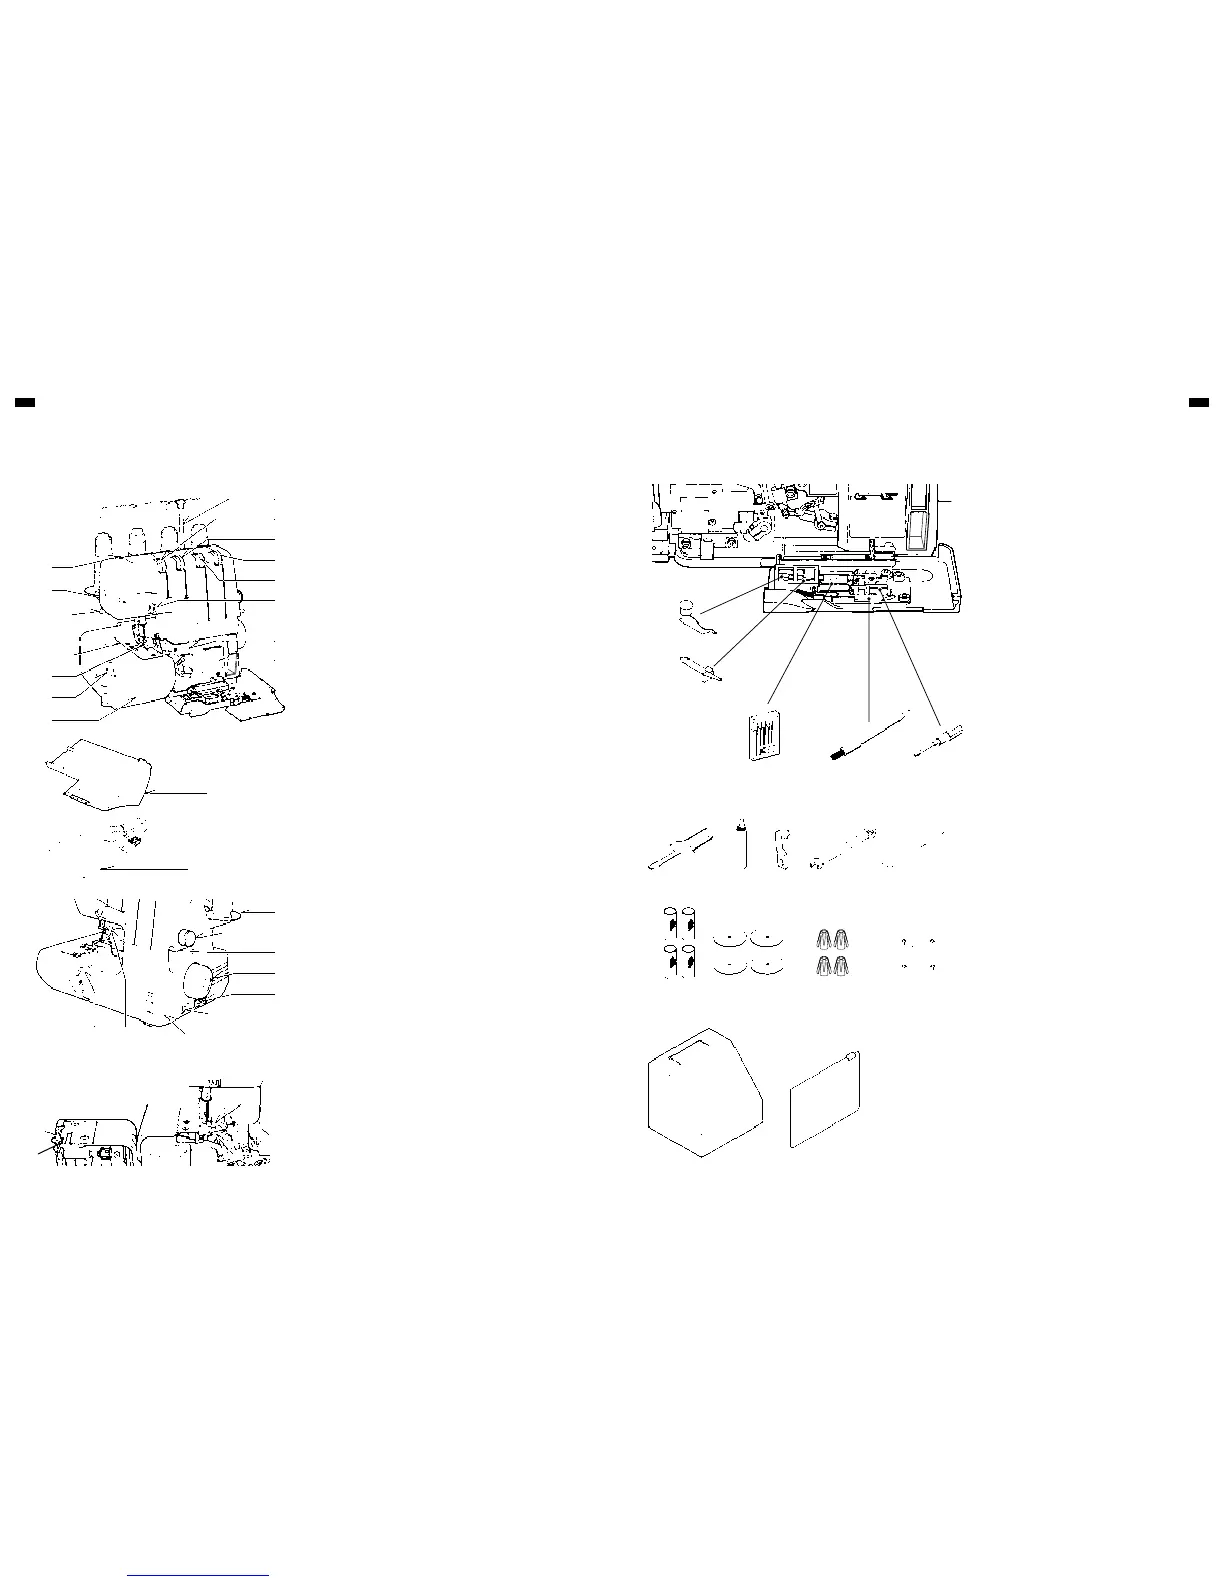
1. Foot pressure regulator
2. Sewing light
3. Presser foot lever
4. Needle plate
5. Presser foot
6. Overedge cutting width dial
7. Working table
8. Thread guide pole
9. Left needle thread tension control
10. Right needle thread tension control
11. Lower looper thread tension control
12. Upper looper thread tension control
13. Needle thread guides
14. Two thread convertor instruction
15. Threading chart
16. Lint tray
17. Foot control
18. Release lever
19. Foot release lever
20. Spool disc
21. Stitch length dial
22. Differential feed control lever
23. Hand wheel
24. Plug connector socket
25. Light and power switch
26. Front cover
27. Moving cutter
28. Upper looper
29. Lower looper
30. Stitch finger (A) (See page 10)
1. Two-thread convertor
2. Stitch finger (B) (See page 10)
3. Needle set
4. Brush
5. Screw driver (small)
6. Screw driver (large)
7. Oiler
8. Moving cutter
9. Spanner
10. Tweezers
11. Thread net
12. Spool disc
13. Spool holder
14. Spool cap
15. Accessory bag
16. Machine cover
2
1
4 5
16
6 7 8 9
11 12 13 14
15
10
3
MACHINE OVERVIEW AND INSTALLATION
DETAILS OF THE MACHINE ACCESSORIES
30
All rights reserved
For technical and product improvement reasons,
the sewing computer's features, parts and
accessory are subject to unannounced changes
and alterations at any time. The accessory included
can differ from country to country.