28 29
OPTIONAL ACCESSORIES OPTIONAL ACCESSORIES
OPTIONAL ACCESSORIES
BLIND HEM FOOT ELASTICATOR
PIPING FOOT
Blind hem feet are obtainable as an optional extra and are available in two
sizes. 0.5 for fine/medium fabrics and 1.0 for medium/heavy fabrics.
Fit the appropriate foot.
Set the stitch length 4 - 5.
Now proceed as follows:
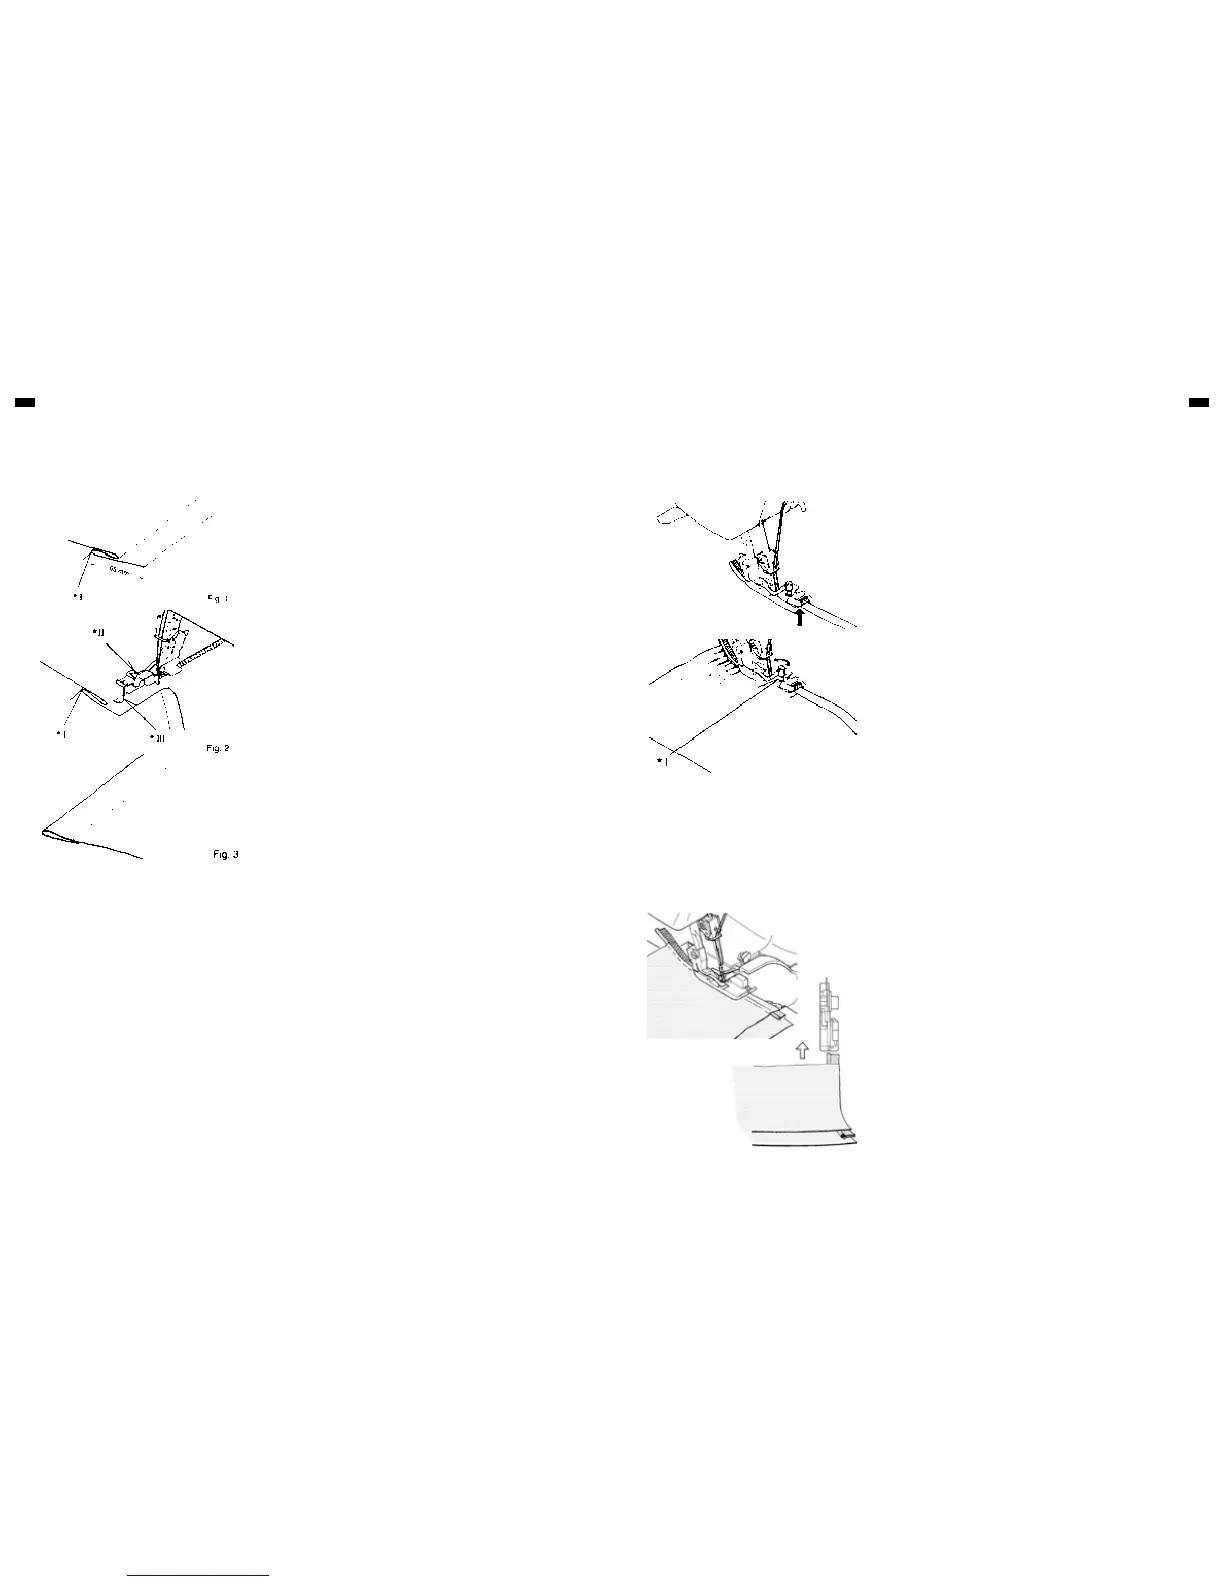
1. Turn up the hem to the required depth and press. Fold the hem back
against the 'right' side of the garment, creating a 'soft' fold on the 'wrong'
side of the fabric – see Fig. 1.
2. Place fabric under the presser foot with the 'wrong' side up. Feed the folded
edge through the guide in the front of the foot and lower the presser foot
lever. Try a stitch (or several stitches) on a spare piece of the actual fabric,
and adjust the guide so that the needle just catches the fold. Adjust the
guide by means of the small screw on the top of the foot – see Fig. 2.
3. When correctly set, sew the hem. The outside edge will be cut away by the
machine – see also Fig. 2. After completion, open out and press again. The
stitches should be almost invisible on the 'right' of the fabric – see Fig. 3.
An elastic foot is available as an optional extra. This foot will guide your elastic
and at the same time apply pressure to the lastic with our specially designed
tension controlled roller, llowing you to control the elasticity while sewing.
1. Replace regular foot with elasticator.
2. Set stitch length at about 4.
3. Slightly raise the roller portion of the foot and insert elastic tape between
the roller and the lower support bar as illustrated, until the edge of elastic
reaches the feed dog teeth.
4. Sew the elastic for about one inch (3 cm) or more to confirm if the tape is
properly sewn.
5. Insert the fabric under the foot and sew together with the elastic.
6. Check the stitches to make sure they are correct and adjust tension
(tighter) if necessary.
7. Adjust the tension control of the roller so that the desired finish can be
obtained.
█
Tighter tension of the roller gives more elasticity of the fabric after it is
sewn.
█
Weaker tension of the roller gives less elasticity of the fabric.
8. When the right side of elastic is not even with right side of fabric, remove
the stitch finger (A) or change it to stitch finger (B). Decrease the number of
overedge cutting width dial. Three threads overlock with right needle or left
needle is recommendable in accordance with the size of elastic.
Prepare a piece of ready-made piping (corded bias fold tape). Place folded
piping between seam edges with fold extending beyond seam line toward
garment. Pin or baste, and stitch the seam.
Braid or ribbon may also be used, either flat or folded braid can be used in
straight seams.
Use for decorating edges of collars, cuffs, pockets, etc.
Illustration
I. Final hem length
II. Screw
III. Guide Illustration
I. Tension control of roller