11
PLEASE NOTE:
There will be particular functions of the reverse sewing
button
14
21 22
when pattern is selected.
Refer to page 26, 36 and 37 for instructions.
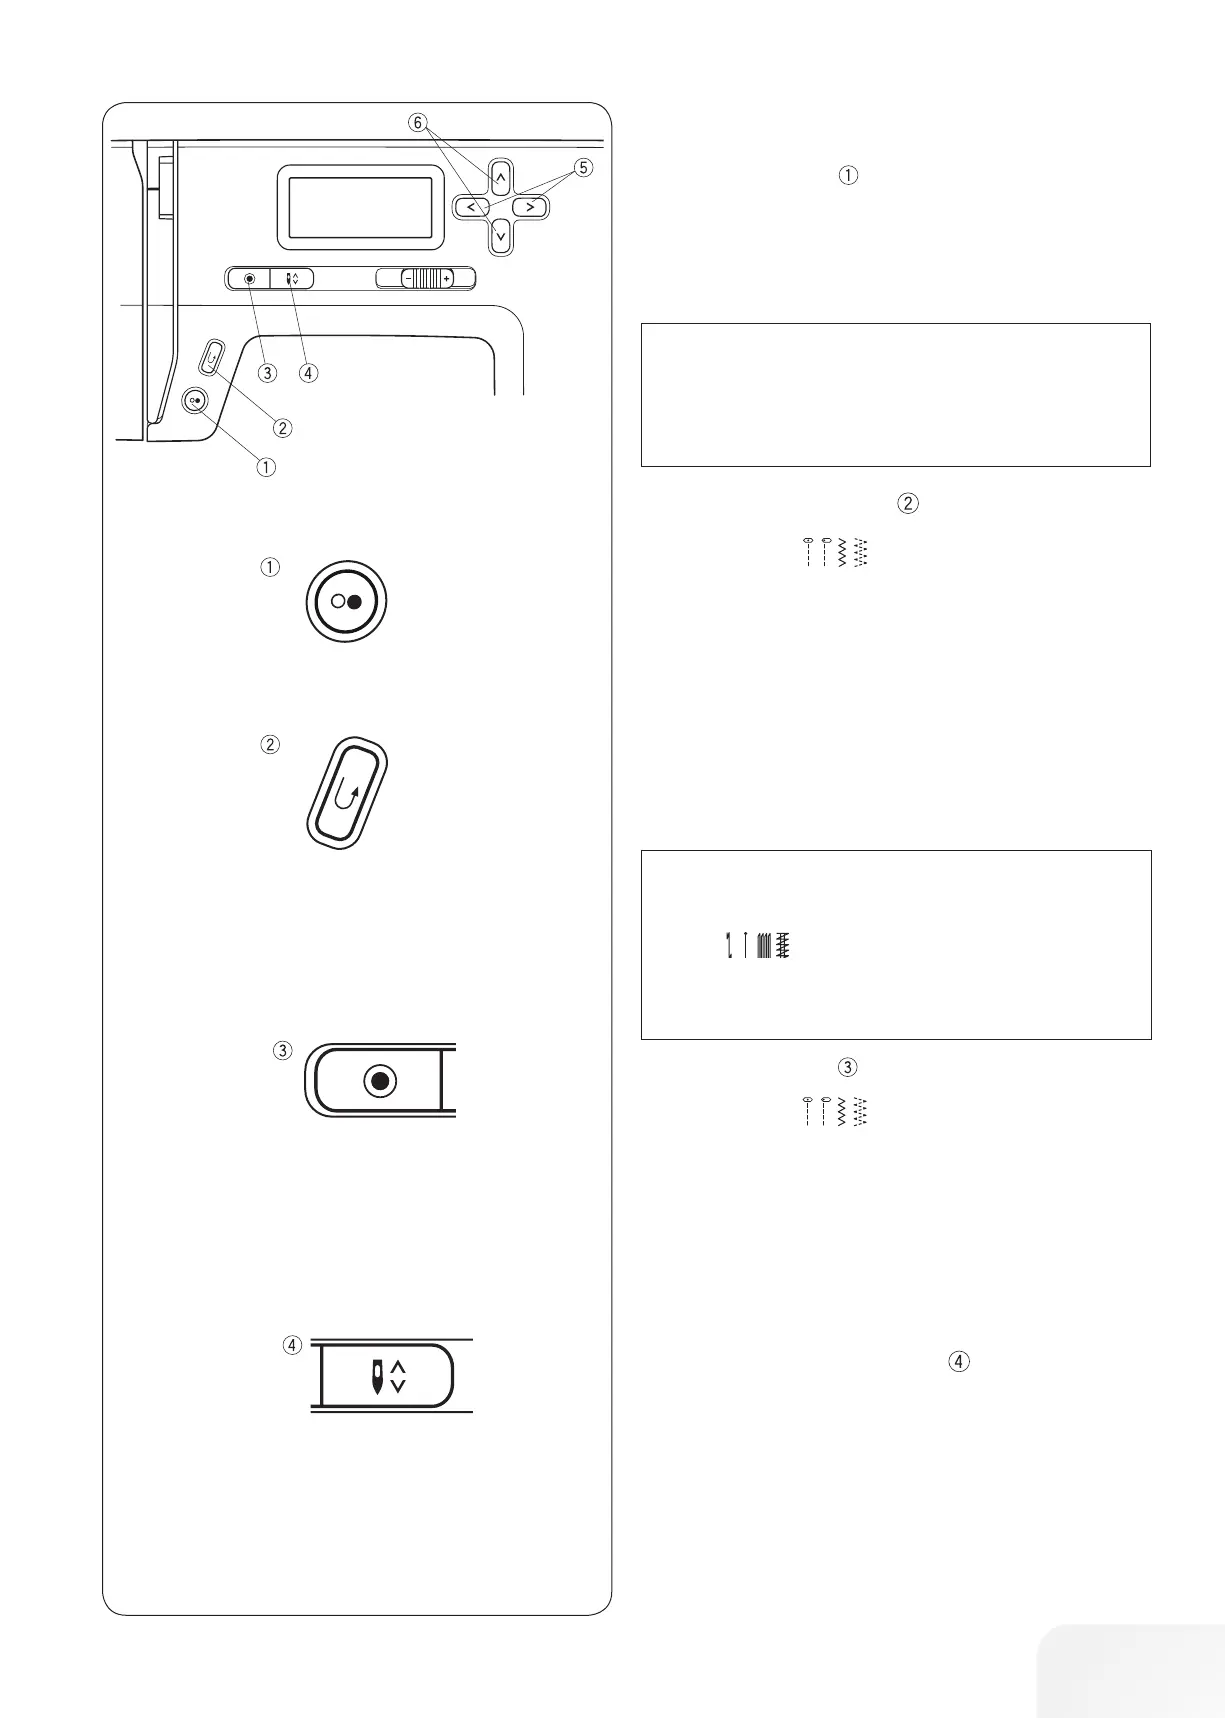
• Reverse sewing button
When stitch pattern
(01, 02, 05, 06) is selected;
The machine will sew in reverse as long as the reverse sewing
button is pressed. Release the button to sew forward.
When the machine is stopped and foot control is disconnected,
the machine will sew in reverse slowly as long as the reverse
sewing button is pressed. Release the button to stop the
machine.
When any other stitches are selected
If you press the reverse sewing button when sewing any other
patterns, the machine will immediately sew locking stitches and
automatically stop.
• Auto-lock button
When stitch pattern
(01, 02, 05, 06) is selected;
Press the auto-lock button to sew a locking stitch immediately.
The machine will automatically stop.
When any other stitches are selected
Press the auto-lock button to sew a locking stitch at the end of
current pattern. The machine will automatically stop.
• Needle stop up/down button
Press the needle stop up/down Button to bring the needle up or
down.
In the case of sewing stop, the needle hold in the desired posi-
tion until the Needle stop up/down button is pressed again.
Machine Operating Buttons
• Start/stop button
Press this button to start or stop the machine.
The machine will sew the left row first. The machine starts run-
ning slowly for the first few stitches, and it then runs at the speed
set by the slide speed control.
PLEASE NOTE:
The machine runs slowly as long as this button is being
pressed.
The start/stop button cannot be used when the foot control
is connected to the machine.