37
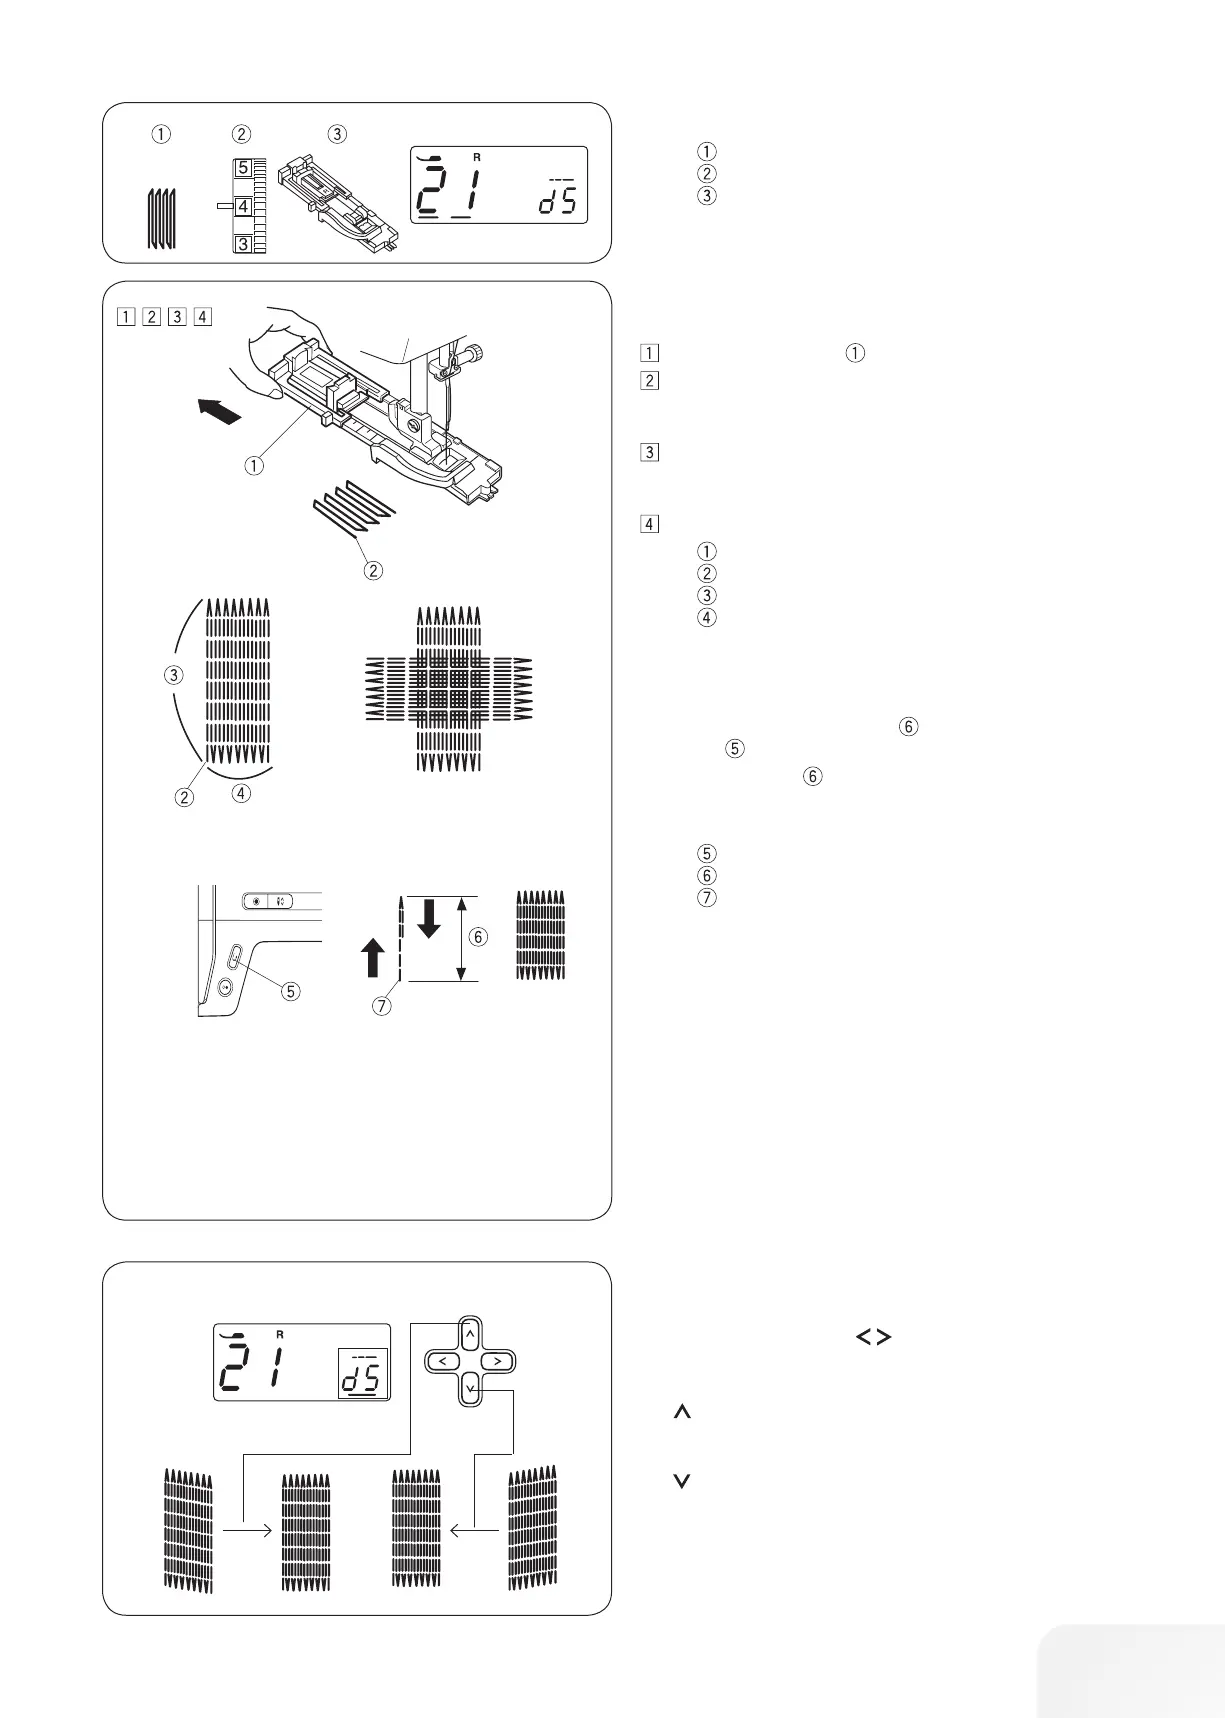
Darning program
Stitch pattern: 21
Thread tension: 3 - 6
Presser foot: Buttonhole foot with slide
• Starting to sew
Pull the button holder to the back.
Place the garment under the foot. Press the needle stop up/
down button twice. Move the fabric to the left to draw both
threads under the foot.
Lower the foot and start the machine. The machine will lock
stitch, sew 16 rows of darning, lock stitch again and stop
automatically.
Turn the fabric and repeat sewing.
Button holder
Starting point
3/4˝ (2 cm)
9/32˝ (0.7 cm)
• Sewing a shorter darning
To sew a darning shorter than 3/4˝ (2 cm), first stop the machine
after sewing the required length , then press the reverse sew-
ing button .
The required length has been determined.
Start the machine again and continue sewing until the machine
stops automatically.
Reverse sewing button
Required length
Starting point
• Sewing a same-sized darning
Simply start the machine to sew another darning at the same
size.
• Darning balance
Correct the evenness of the darning as follows:
Press the cursor buttons to move the cursor under the
value “d5” (default setting).
When the right side of the darn is lower than the left side, press
the button to set the value to “d6” – “d9”, and make the darn
even.
When the left side of the darn is lower than the right side, press
the button to set the value to “d1” – “d4”, and make the darn
even.
0
R
17
F
34
F
1
A
18
R
35
F
2
A
19
R
36
A
3
A
20
R
37
A
4
A
21
R
38
F
5
A
22
F
39
F
6
A
23
F
40
F
7
A
24
F
41
F
8
A
25
F
42
F
9
A
26
F
43
F
10
A
27
F
44
F
11
A
28
F
45
F
12
A
29
F
46
F
13
F
30
F
47
F
14
A
31
F
48
F
15
F
32
A
49
F
16
F
33
F