Better Packages Inc. 12
Shear Blade
(Note: Always unplug machine when performing service to machine)
Procedure
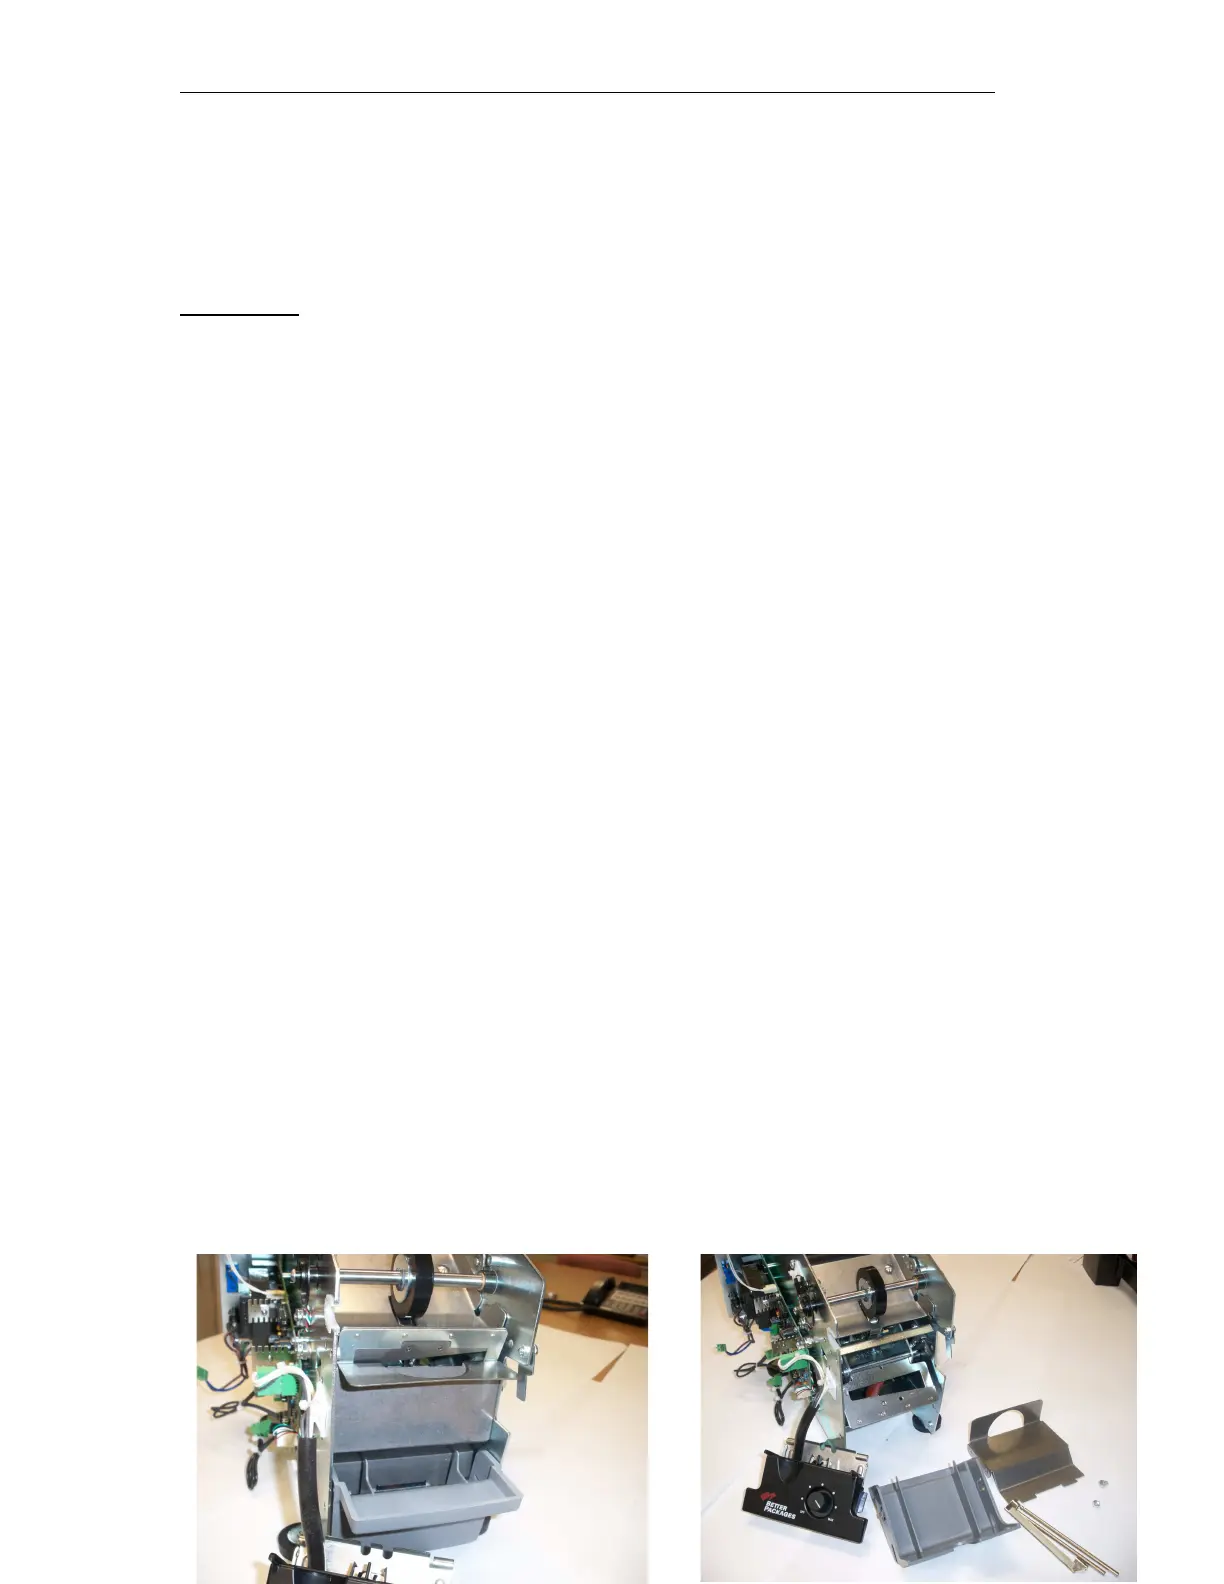
1. Remove the water bottle, tank and brushes
2. Remove the right side cover from the machine by removing the (5) screws
that fasten the cover to the frame
3. Remove the left side cover from the machine by removing the (5) screws
that fasten the cover onto the machine. Gently lift the cover and remove
the membrane switch from the pc board.
4. Remove the (2) screws that hold the baffle plate onto the machine. Take
the baffle plate out.
5. Loosen the screw on the right side frame that locks in the shaft holding the
heater and blade oilier in place.
6. Remove the heater and blade oiler by pulling out the shaft from the right
side.
7. Remove tank shelf by inserting flathead screwdriver in-between tank shelf
and frame.
8. Remove the spring that is fastened to the cutter yoke.
9. Loosen the pin that holds the blade in place by turning it counter clockwise
with a flathead screwdriver. If the pin doesn’t turn loosen the pin with a
pair of vise grip pliers. Once the pin is loose remove it and remove the
blade.
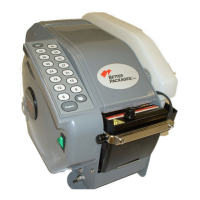
10. Remove the spring from the upper blade by unhooking the springs from
the pins. Remove the blade.
11. Replace the upper blade and hook the springs back onto the pins.
12. Replace the lower blade with the new shaft.
13. Replace spring back onto yoke assembly.
14. Replace tank shelf back onto machine.
15. Replace baffle plate back onto machine and fasten with (2) screws.
16. Replace heater assembly and blade oiler and lock pins back on right side
frame.
17. Replace membrane switch back into pc board.
18. Replace left side cover with (5) screws.
19. Replace right side cover with (5) screws
20. Replace tank, water bottle and plug in machine